
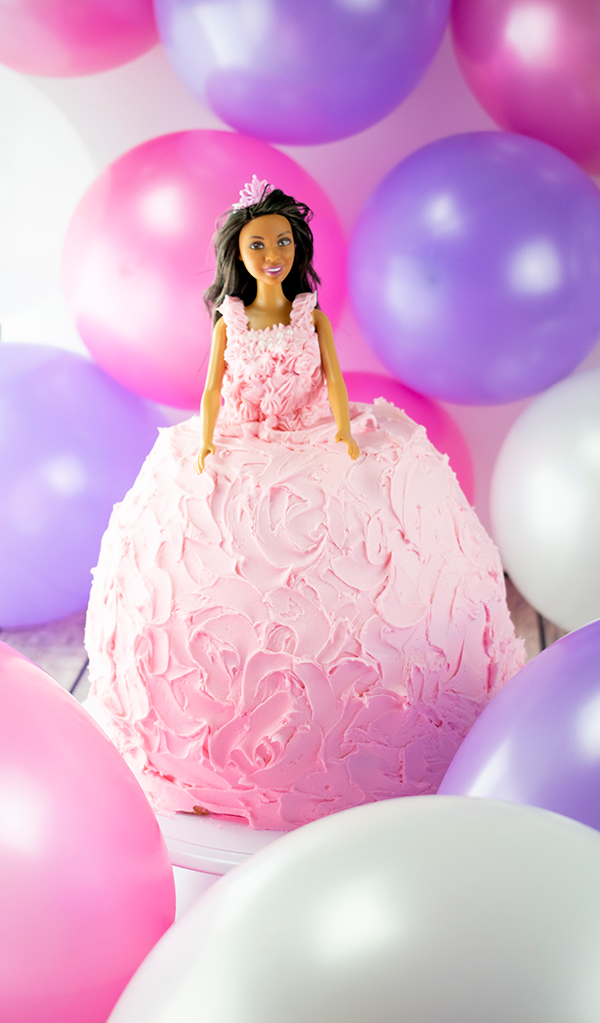
How to Make a Princess Cake
Let's have a Princess Party!!! Don't be intimidated, it's a lot easier to make than you think. Just follow the step-by-step instructions and you'll be rolling out this Princess Cake for all to admire and enjoy at your party.
Watch video to see how to make this party cake!!
What you'll need:
- 4- Cake box mixes (flavor of your choice) or make the cakes from scratch.
- 4-5 containers of premade buttercream icing - color of choice or you can buy white and tint your own - or you can use your favorite homemade buttercream icing recipe, your choice.
- 1 - Barbie doll
- 1 - Piping bag
- 1 - Piping tip - tip size and design of your choice
- 1 - Icing spatula
- 1 - bottle of sprinkles (style to your choice) - if desired
- Parchment Paper
- Oven safe – 2.5 quart glass bowl
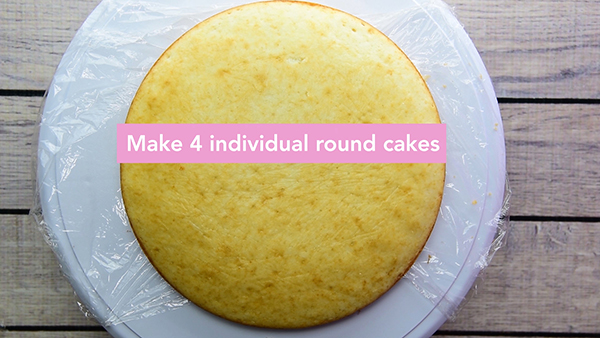
1. Make 4 - 8" round cakes. We used 2 - Duncan Hines White cake box mixes.
Tip: to make the cake white and moist, only add in the egg whites that the box calls for. Bake at 325°F for 25 minutes in metal pans. Cool on wire racks.
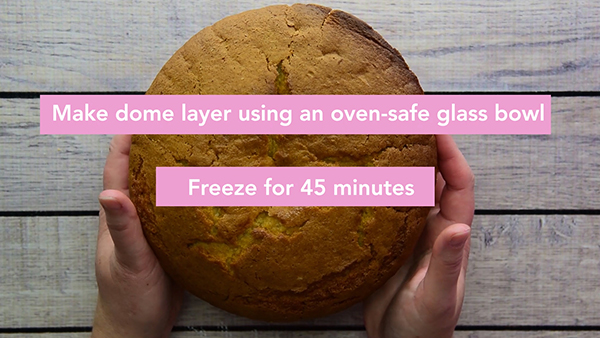
2. Make 2 more cake mixes and pour into the oven-safe glass bowl. Bake at 325°F. First, bake for 45 minutes then check every 15 minutes until cake is thoroughly baked. Cake is done when toothpick or straw comes out clean from the center of the cake. Our cake took a little over an hour to bake. Cool on wire rack. Carefully remove cake from glass bowl, do not force it.
3. Wrap all layers in cellophane and place in freezer for 45 minutes.
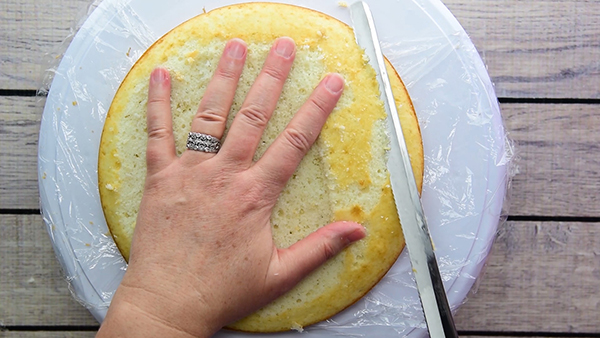
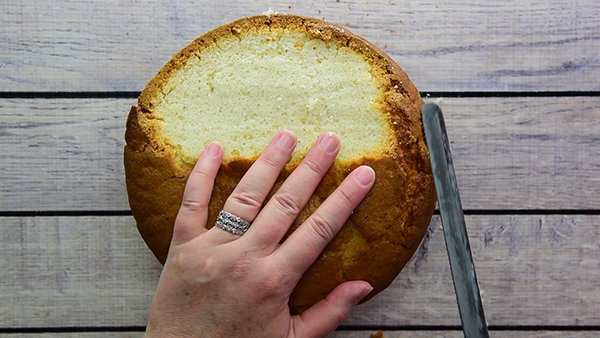
4. Trim off the top of the round layers to make layers more level.
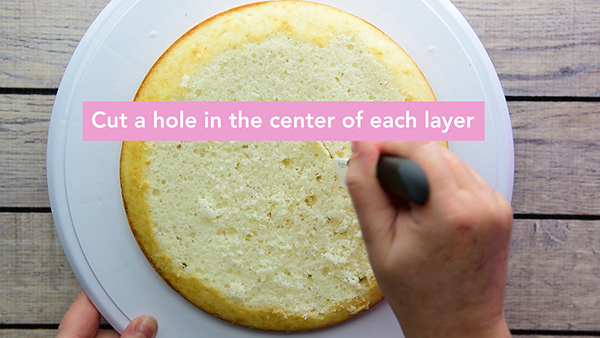
5. Cut a hole in the center of each round layer.
6. Trim off the flat end of the dome layer until it fits with one of the round layers. It may not fit exactly and that is perfectly fine.
7. Cut a hole in the middle of the dome layer.
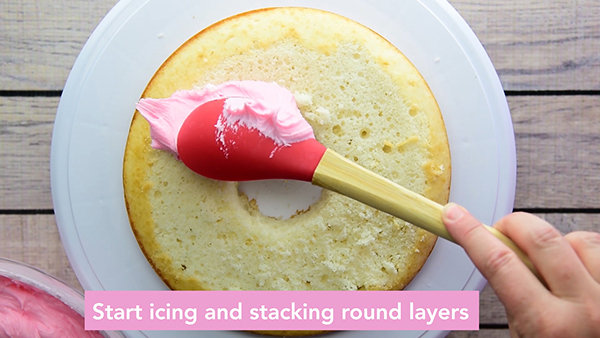
8. 1st layer: place the layer on top of either a plate or a cake turntable.
9. Put 3 dollops of icing on the first layer and spread around the top of the layer.
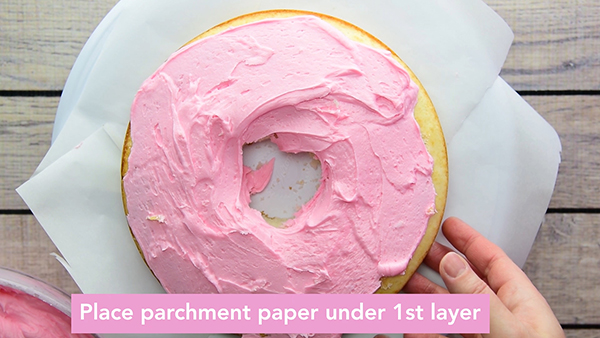
10. Place parchment paper pieces underneath the edge of the layer to keep plate or turntable clean of icing.
11. Place the 2nd layer on top of the 1st layer, lining up the cut-out center, then dollop with icing and spread over the top of that layer.
12. Do the same for the 3rd and 4th layer ensuring the cut-out center is lining up.
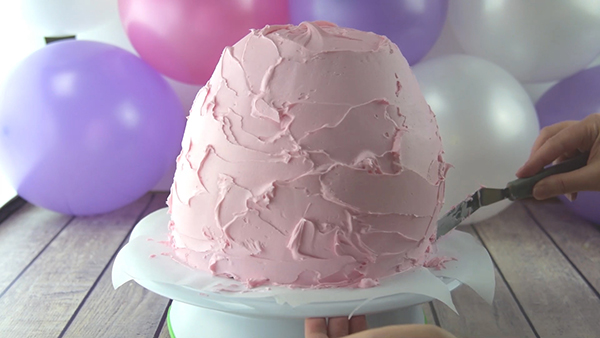
13. Place the final layer, the dome, on the top. Dollop the layer with icing and spread it over the dome.
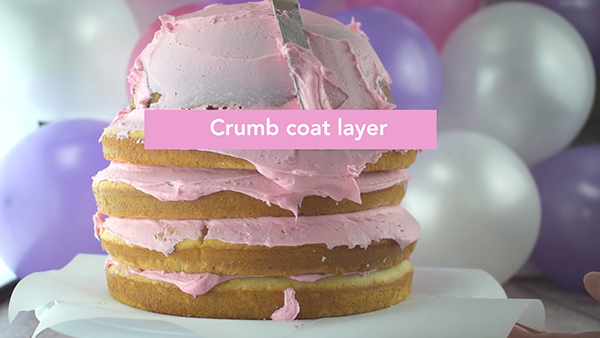
14. Crumb coat: Place a dollop of icing at the top of the cake and start working down the sides of the cake adding more icing to create a thin layer on the entire cake.
15. Place in freezer for 45 minutes.
16. Final Layer: Place a few generous dollops of icing at the top of the cake and start working your way down the sides of the cake adding more icing to completely cover the cake. Be sure to take your spatula and wipe icing inside the cut-out area.
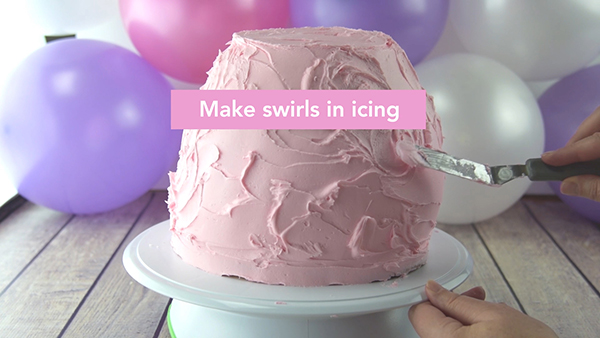
17. Take your icing spatula and make swirly moves all over the cake to give the cake some texture.
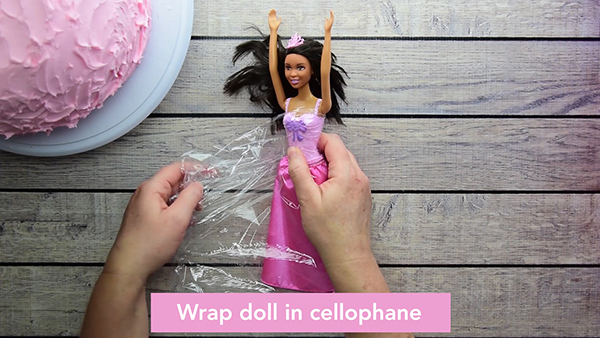
18. Wrap the doll in cellophane, under the arms to the feet, to protect the outfit that comes with the doll.
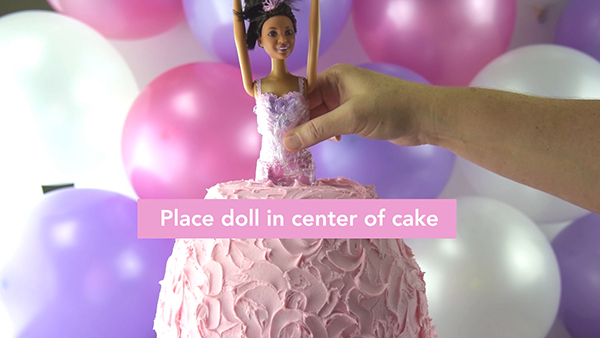
19. Place the doll in the center of the cake.
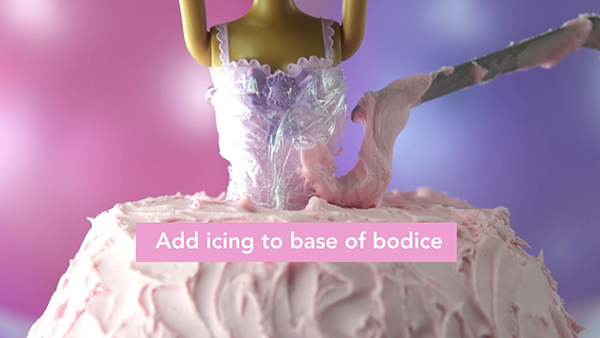
20. Using the icing spatula, add some icing where the doll and the cake meet to cover any gaps.
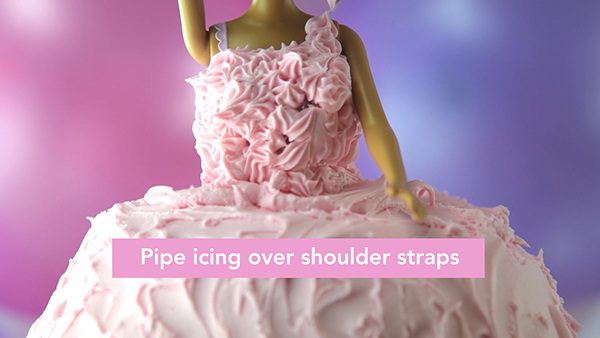
21. With the piping bag and tip, pipe on the bodice of the doll and over the shoulders for straps.
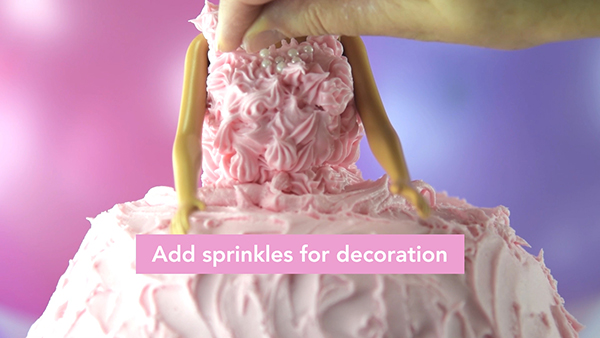
22. If desired, add sprinkles, of your choice, and put on the bodice or anywhere else you desire.
Voila!
Source: Culinary.net