
Simple Recipe Hacks for Time-Saving Meals
(Family Features) With many families spending more time than usual at home, scratch cooking trends are popular among home chefs. From homemade sourdough to elaborate multi-course dinners, the kitchen has become a place for creativity for many.
However, since summer brings all sorts of fun and outdoor activities, busy families may be looking for ways to spend less time in the kitchen without compromising on quality or flavor. Try to work smarter, not harder, and let your local grocery store do some of the heavy lifting.
Starting with pre-packaged salads, casseroles, fresh-baked breads or prepared items from the deli case, like a rotisserie chicken, opens an array of possibilities for quick family meals. For example, Signature Cafe and Signature Select, available exclusively at Albertsons and Safeway stores, can be your go-to for meal solutions, and you can find these products at a value compared to many leading national brands without giving up the quality you crave. With products available across the entire store, you can find easy-to-implement recipe hacks the whole family can enjoy.
Serving up a tasty and comforting dinner can be as easy as mixing together fresh ingredients like pre-made macaroni and cheese, rotisserie chicken, frozen broccoli and topping your dish with cracker crumbs in this Chicken and Broccoli Mac and Cheese. You’ll have food on the table in less than 30 minutes and more time to spend with family and friends.
With the resources available at your neighborhood store, you can build restaurant-quality Spicy Chicken Sandwiches with Nashville-Style Dressing at home by visiting the deli department for fried chicken and swinging by the bakery for a loaf of European-style bread. Crunchy fried chicken, cool lettuce, crisp pickles and spicy dressing including a handful of pantry staples make for the perfect flavor and texture combination.
End the day with a Neapolitan-Style Milkshake as classic flavors come together with vanilla bean ice cream, fudge striped shortbread cookies, strawberry preserves and whole milk. This ice cream treat is an indulgence that blends in a flash.
Visit Albertsons.com/exclusivebrands to shop for grocery delivery or pickup at your local store such as Albertsons, Safeway, ACME Markets, Jewel-Osco, Vons, Pavilions, Randalls, Tom Thumb, Shaw’s, Star Market, United Supermarkets and Carrs/Safeway.
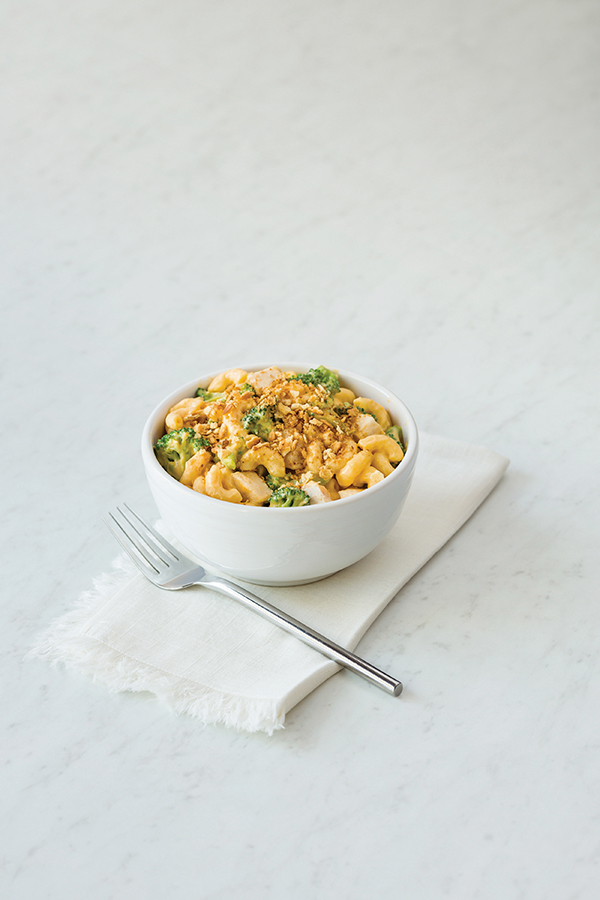
Chicken and Broccoli Mac and Cheese
Servings: 4
- Nonstick cooking spray
- 2 packages (12 ounces each) Signature Cafe Classic Macaroni and Cheese
- 1 cup frozen broccoli
- 2 Signature Cafe Whole Roasted Chicken Breasts (about 1 cup), skin removed and diced into 1/2-inch cubes
- 1/2 cup cracker crumbs
- Preheat oven to 400 F.
- Coat 6-by-9-inch baking dish with nonstick cooking spray. Add macaroni and cheese, broccoli and chicken, stirring to combine until well incorporated. Top with cracker crumbs.
- Bake 20 minutes, or until heated through.
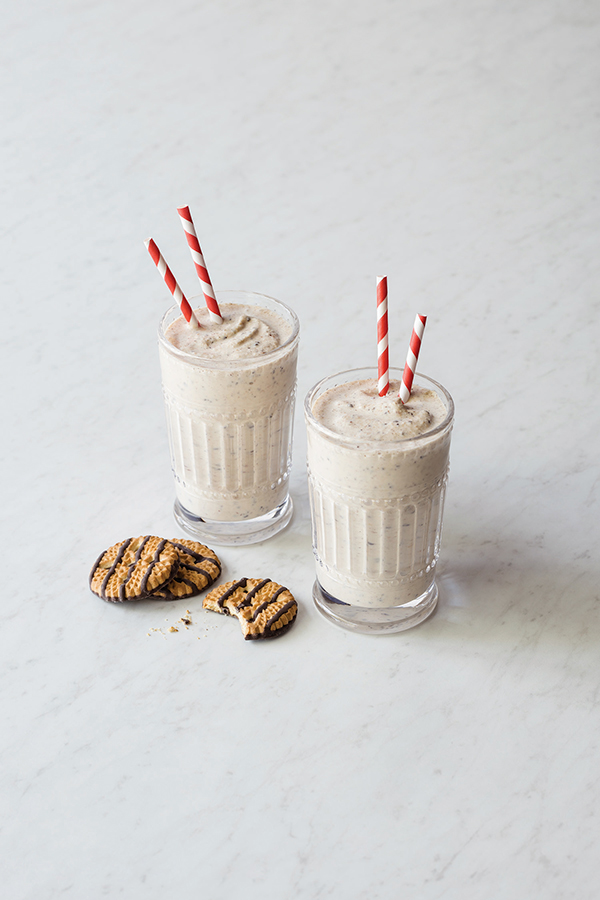
Neapolitan-Style Milkshake
Servings: 2-4
- 4 scoops (1/2 cup each) Signature Select Vanilla or Vanilla Bean Ice Cream
- 6 Signature Select Fudge Striped Shortbread Cookies
- 4 tablespoons Signature Select Strawberry Preserves
- 1 1/2 cups whole milk, plus additional (optional)
- In blender, process ice cream, cookies, strawberry preserves and whole milk.
- If desired, add milk to achieve desired thickness.
- Serve in chilled glasses.
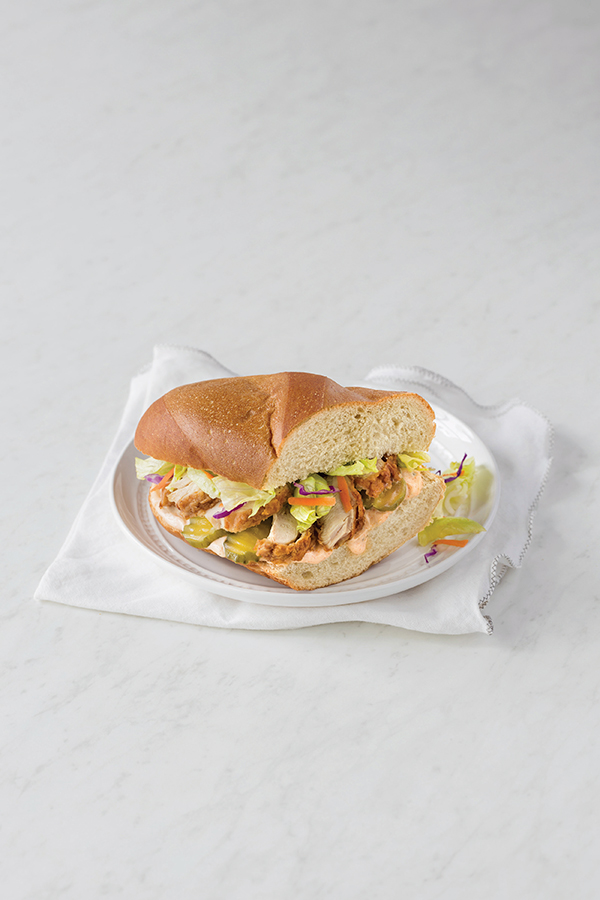
Spicy Chicken Sandwiches with Nashville-Style Dressing
Servings: 2
Nashville-Style Spicy Mayonnaise:
- 1/2 cup mayonnaise
- 1/2 teaspoon cayenne pepper
- 1/2 teaspoon paprika
- 1/4 teaspoon garlic powder
- 1/2 teaspoon salt
- 1/2 teaspoon black pepper
Spicy Chicken Sandwich:
- 1/2 cup Nashville-Style Spicy Mayonnaise, plus additional (optional)
- 4 slices Signature Select Artisan French or Italian Bread
- 2 pieces hand-breaded Signature Cafe Fried Chicken Breast, cut into slices
- 1 cup lettuce mix
- 8 sweet or dill pickle chips
- To make Nashville-Style Spicy Mayonnaise: In bowl, combine mayonnaise, cayenne pepper, paprika, garlic powder, salt and black pepper.
- To make Spicy Chicken Sandwiches: Spread Nashville-Style Spicy Mayonnaise onto bread slices. Arrange sliced chicken on half the bread slices and place lettuce and pickle chips on other half.
- Dress with additional Nashville-Style Spicy Mayonnaise, if desired. Fold sandwiches together, spear with toothpick and slice diagonally.
Source: Albertsons

Grilled Banana Pound Cake Kabobs
(Family Features) Summertime means plenty of grilling, giving you an opportunity to try this Grilled Banana Pound Cake Kabobs dessert recipe alongside your favorite entrees.
Find more grilling recipes at Culinary.net.
Watch video to see how to make this recipe!

Grilled Banana Pound Cake Kabobs
- 1 loaf (10 3/4 ounces) frozen pound cake, thawed and cubed
- 2 large bananas, cut into 1-inch slices
- metal or soaked wooden skewers
- 1/4 cup butter, melted
- 2 tablespoons brown sugar
- 1/2 teaspoon vanilla extract
- 1/8 teaspoon ground cinnamon
- ice cream
- desired toppings
- Heat grill to medium heat.
- Alternately thread cake and bananas on skewers.
- In small bowl, mix butter, brown sugar, vanilla extract and cinnamon. Brush mixture over kabobs.
- Place kabobs on greased rack and grill for up to 1 minute, turning once.
- Serve with ice cream and desired toppings.
Source: Culinary.net

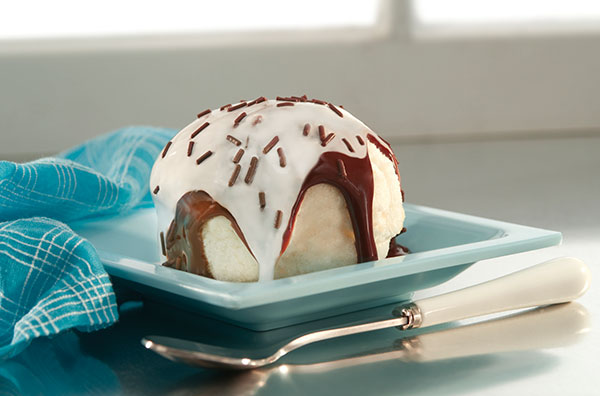
Baked Alaska
(Family Features) With its dramatic presentation, this freshly baked cake and ice cream-based dessert can impress guests at your next gathering.
Find more dessert recipes perfect for entertaining at Culinary.net.
Watch video to see how to make this delicious recipe!
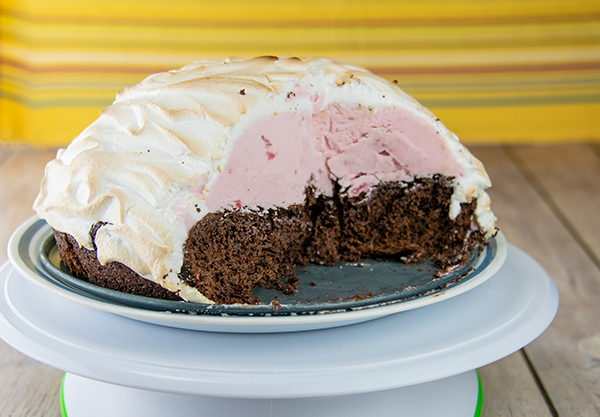
Baked Alaska
Recipe adapted from Milk Means More
- 1/2 cup, plus 6 tablespoons, all-purpose flour
- 6 tablespoons unsweetened cocoa powder
- 1 cup, plus 2/3 cup, granulated sugar, divided
- 1 1/2 teaspoons baking powder
- 1/2 teaspoon baking soda
- 1/4 teaspoon salt
- 1/2 cup 2% milk
- 1/4 cup canola oil
- 2 eggs
- nonstick cooking spray
- 1 1/2 quarts ice cream, any flavor
- 3 large egg whites
- 1/8 teaspoon cream of tartar
- 1 teaspoon vanilla extract
- Heat oven to 350° F.
- In large bowl, whisk flour, cocoa powder, 1 cup sugar, baking powder, baking soda and salt. Make well in center of dry ingredients. Add milk, canola oil and eggs. Whisk until blended. Beat batter until smooth, about 3 minutes.
- Pour batter into 9-inch, round, greased cakepan. Bake 25-28 minutes. Cool completely on wire rack. Wrap in plastic wrap and freeze 1 hour.
- In glass bowl, spray with nonstick cooking spray. Layer inside of bowl with plastic wrap, draping some over edges of bowl.
- Scoop ice cream into bowl until full. Level ice cream. Place overhang of plastic wrap over ice cream. Freeze 2 hours.
- Unwrap cake and place on plate. Unwrap ice cream and place on top of cake. Wrap both together and freeze 2 hours.
- In medium bowl, beat egg whites and cream of tartar until frothy. Add remaining sugar and vanilla extract; beat mixture to form stiff peaks.
- Heat oven to 500° F.
- Unwrap stacked cake. Place on oven-safe plate. Spread meringue, creating swirl motions around cake. Bake 2-4 minutes until meringue peaks are brown and remaining meringue takes on dry appearance.
- Serve immediately or cover with plastic wrap and place in freezer.
Source: Culinary.net

Mother's Day Delights
(Family Features) The Mother's Day brunch is arranged, the cards and flowers are picked out - now it's time to make a show-stopping dessert that will truly make her day. And it's easier than you might think.
When looking for the perfect way to treat mom on Mother's Day, try a simple search on Bing.com. Bing makes it easy to find recipes by meals, convenience, or even ingredients to find just the right recipe - like cheesecake, pie or blackberry cobbler - to truly delight the special mom in your life.
Show your mom just how much she means to you by making her something special and giving her a Mother's Day she won't forget. Here are three delicious ideas.
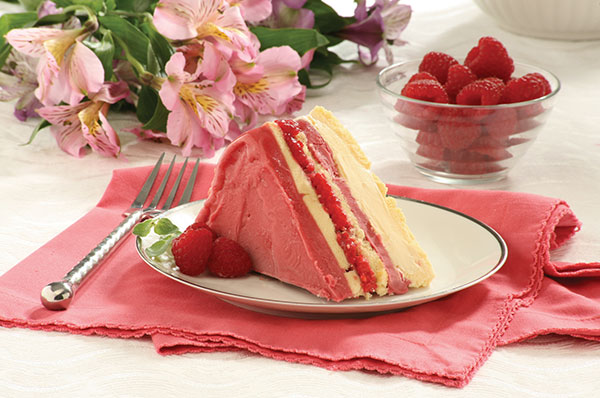
Frozen Raspberry Layer Cake
From Country Living
Prep Time: 20 minutes (not counting freezing times)
Total Freezing Time: 4 hours+
Servings: 8 to 10
- 2 10 3/4-ounce frozen pound cakes, crusts removed, sliced into 1/4-inch-thick slices
- 3 cups vanilla ice cream, slightly softened
- 4 cups raspberry sorbet, slightly softened
- 1 pint fresh raspberries, rinsed and picked over
- 3 tablespoons Chambord, or other raspberry-flavored liqueur
- Prepare the pan: Trace and cut out a 9-inch circle from parchment paper and fit it into the bottom of a 9-inch springform pan.
Cut out a 3- by 27-inch strip of parchment and fit around inside of pan. Tape to secure parchment paper and set aside. - Assemble the cake: Cover bottom of pan with a single layer of pound cake slices and spread ice cream evenly over cake. Freeze until ice cream hardens - about 25 minutes.
- Spread 2 cups sorbet over ice cream, followed by another layer of pound cake slices. Return cake to freezer for 10 minutes.
- Combine raspberries and Chambord together in small bowl. Remove cake pan from freezer and place berries evenly over cake.
- Top with a final layer of pound cake and remaining sorbet. Wrap tightly with plastic wrap and freeze until firm - at least 4 hours.
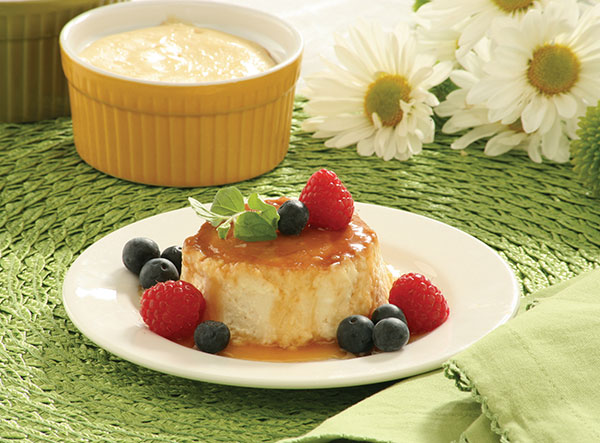
Upside-Down Honey Cheesecakes
From Bon Appétit
Prep Time: 25 minutes
Cook Time: 35 minutes
Chilling Time: 1 hour+
Servings: 12
- 1 cup sugar
- 1/3 cup honey
- 1/4 cup (1/2 stick) unsalted butter
- 1/3 cup water
- 3 8-ounce packages cream cheese, room temperature
- 2/3 cup (packed) golden brown sugar
- 1 cup sour cream
- 2 teaspoons fresh lemon juice
- 2 teaspoons vanilla extract
- 4 large eggs, room temperature
- Assorted fresh berries (for garnish)
- Preheat oven to 300°F. Butter twelve 3/4-cup ramekins or custard cups.
- Place 1 cup sugar, honey, and butter in heavy medium saucepan. Stir over medium heat until butter melts and mixture is blended.
Increase heat to medium-high and bring to boil. Whisk until mixture darkens slightly and candy thermometer registers 300°F, about 5 minutes. - Remove from heat; add 1/3 cup water (mixture will bubble vigorously); whisk to blend. Divide topping among ramekins (about 2 tablespoonfuls for each). Divide ramekins between 2 roasting pans and chill while preparing filling.
- Using on/off turns, blend cream cheese and brown sugar in processor, scraping bowl occasionally. Add sour cream, lemon juice, and vanilla; process until smooth. Add eggs 1 at a time, processing just to blend between additions. Divide filling among ramekins.
Add enough hot water to pans to come halfway up sides of ramekins. - Bake cheesecakes until set, about 35 minutes. Remove from roasting pans and chill until firm, about 1 hour. DO AHEAD: Can be made 2 days ahead. Cover and keep chilled.
- Run thin knife around sides of ramekins. Invert onto plates, scooping any remaining topping from ramekins over cheesecakes. Garnish with berries.

Strawberry Shortcake Cupcakes
From Redbook
Prep Time: 25 minutes
Cook Time: 24 minutes
Servings: 12
- 1 1/3 cups all-purpose flour
- 1/2 teaspoon baking powder
- 1/2 teaspoon baking soda
- 1/4 teaspoon salt
- 1/2 cup unsalted butter, softened
- 2/3 cup granulated sugar
- 2 large eggs
- 1 1/2 teaspoons vanilla extract
- 2/3 cup sour cream
Topping
- 1 quart strawberries, hulled, thickly sliced
- 1/3 cup granulated sugar
- 1 tablespoon lemon juice
- 1 1/2 cups cold heavy cream
- 3 tablespoons confectioners' sugar
- 1 tablespoon vanilla extract
- Heat oven to 350° F. Line 12 standard muffin cups with paper liners.
- In medium bowl, whisk flour, baking powder, baking soda, and salt. In large bowl with mixer on medium, beat butter and sugar until light and creamy. Beat in eggs, 1 at a time, then vanilla. With mixer on low, alternately beat in flour mixture and sour cream until combined. Continue to beat on medium until batter is thick and smooth.
- Spoon batter into a zip-top bag. Snip a 1/2-inch corner from bag and fill liners slightly less than two-thirds full. Bake 24 to 26 minutes, or until lightly golden and a pick inserted in the center of a cupcake comes out clean. Cool in pan on a wire rack 5 minutes; remove cupcakes from pan and cool completely.
- Toss strawberries several times in a bowl with sugar and lemon juice until very syrupy. In large bowl, beat cream, confectioners' sugar, and vanilla until soft peaks form.
- Use a skewer to poke several holes into top of each cupcake. Spoon some syrup from bowl over top, allowing it to absorb into cupcakes. Top with sliced berries and a dollop of cream. Arrange a few sliced berries in cream and drizzle with remaining strawberry syrup.
Source: Bing.com

Sundaes 101
(Family Features) When a trip to the ice cream parlor isn't in the cards, bring the ice cream parlor home with DIY sundaes! Making the perfect sundae might look like a hefty task, yet with a little creativity this all-American dessert is one of the easiest to make. By offering an assortment of ice cream flavors and toppings, everyone in the family can concoct their own personalized combinations.
There is no wrong way to craft this ice cream dessert, but read on for tips that will help you recreate the ice cream parlor in your kitchen.
Dishes. Glass bowls are traditional favorites, but be imaginative and rummage through your forgotten dishes to find something special. Chill the dishes for 30 minutes in the freezer to keep the ice cream from melting while creating your sundae.
Ice cream. Pick ice cream flavors that go well together or use vanilla, which tastes great with everything. Scoop the ice cream with a slightly warmed metal scoop to make it easier.
Mix-ins. From crushed cookies to gummy bears, there is no limit to what can go in a sundae. Fruit and chocolate chips are popular toppings and toasted nuts provide a crunchier texture. Create a mix-in buffet by placing all the goodies on the kitchen counter with a bowl and a spoon for each.
Toppings. Once dishes are filled with ice cream and mix-ins, drizzle syrup over top. Caramel, chocolate, strawberry, peppermint and English toffee are popular choices. Don't forget the whipped cream and cherry, if desired. Sprinkles, malt powder and mint leaves make good finishing touches as well.
Dig in! Long-handled spoons are great - they are ideal for scooping out everything, right down to the bottom. And remember kids love colorful spoons with funny characters or motifs on them.
Try these sundae recipes for creative combinations. For more summer sundae ideas, visit www.BlueBunny.com.

Caribbean Sundae
Makes 4 servings
- 1/2 cup canned crushed pineapple in juice, drained
- 1/2 cup chopped mango, thawed if frozen
- 2 cups Blue Bunny Premium Vanilla Ice Cream
- 8 teaspoons unsweetened shredded coconut, toasted
- 1 teaspoon grated lime peel
- 4 slices fresh lime
- Place one tablespoon crushed pineapple and one tablespoon chopped mango into each of four small parfait glasses. Top with quarter cup ice cream. Sprinkle with one teaspoon of toasted coconut. Repeat layering. Top each parfait with one-fourth teaspoon grated lime peel.
- Garnish rim of each parfait glass with a slice of lime. Serve immediately.
Cinnamon Bun Hot Apple Sundae
Makes 8 servings
- 1 4-inch frosted cinnamon roll
- 3 1/2 cups Blue Bunny Premium Vanilla Ice Cream, softened
- 1/2 cup glazed walnuts
- 1 can (21 ounces) apple pie filling
- 1/2 cup butterscotch-caramel topping
- Glazed walnuts, optional
- Cut cinnamon roll into half-inch pieces; set aside quarter cup for topping.
- Combine three cups of ice cream, cinnamon roll pieces (not reserved amount) and half cup glazed walnuts in large bowl; gently mix to combine. Freeze at least two hours.
- Warm apple pie filling in microwave-safe container or in small saucepan over medium-low heat. Spoon about one-third cup apple pie filling into eight serving bowls.
- Top each bowl with one scoop (scant half cup) of the ice cream. Drizzle each with one tablespoon butterscotch-caramel topping, several pieces of reserved cinnamon roll and glazed walnuts, if desired. Serve immediately.
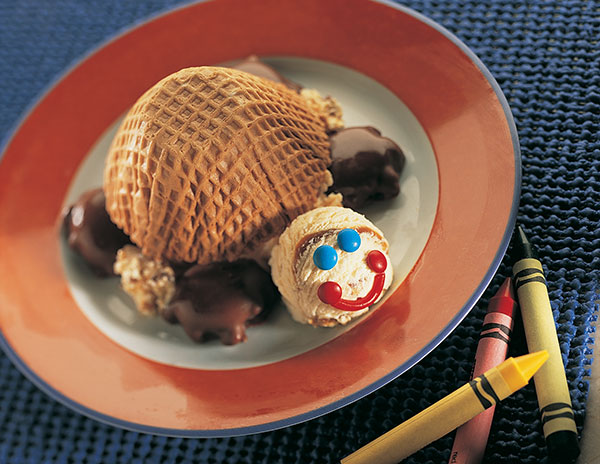
Turtle Sundae
Makes 4 servings
- 4 3 1/2-inch waffle bowls
- 5 cups Blue Bunny Premium Homemade Turtle Sundae Ice Cream
- 16 chocolate Turtle candies
- Assorted candy, for facial features
- 1 1.5-ounce package chocolate covered crisp wafer stick candy, such as Pepperidge Farm Pirouettes
- Form four scoops of ice cream and set aside. Fill each waffle bowl with remaining ice cream. Place each waffle bowl ice cream side down on an individual dessert plate. Place each of the four ice cream scoops that were set aside against each waffle bowl for the turtles' heads.
- Arrange four turtle candy pieces partially under the bottom of each waffle bowl to form the turtles' legs. Press assorted candy pieces into ice cream scoops for eyes and mouth. Place one chocolate wafer stick partially under waffle bowl for tail. Serve immediately.
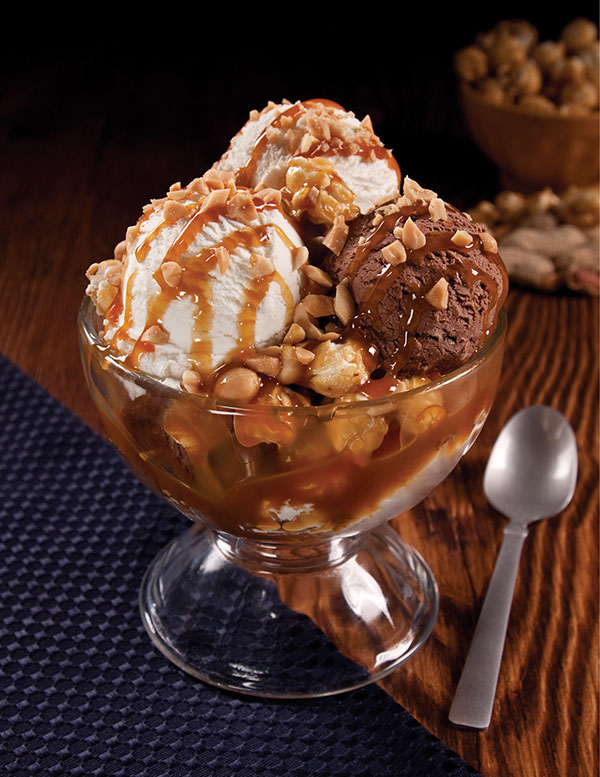
Caramel Corn Sundae
Makes 4 servings
- 2 cups (each) Blue Bunny Vanilla, Chocolate and Butter Pecan Ice Cream
- 3 cups caramel corn
- 1/4 cup caramel sauce
- 1/4 cup toasted peanuts
- Scoop vanilla ice cream onto frozen parchment-lined sheet pan. Repeat with chocolate and butter pecan ice cream. Using rubber gloves, coat each ice cream scoop with caramel corn. Repeat until all ice cream scoops are coated. Layer scoops in a sundae glass with peanuts and caramel sauce. Serve immediately.
Source: Blue Bunny Ice Cream

The Scoop on Sundaes
(Family Features) Sundaes are sweet, but maybe it's time for something sensational.
These recipes bring the simple sundae to a whole new level of goodness. From the kid-friendly Spaghetti and Meatballs Sundaes to the sophisticated Mini Coffee Ice Cream Sundaes, there's something to please everyone.
10 Tips for Sundae Making
1. Using store-bought ingredients makes sundae-making fast and easy. You can always doll things up, like dissolve some instant coffee in a little hot water and stir it into store-bought caramel sauce to make a coffee-caramel drizzle.
2. Using whole nuts and dried fruit for add-ins can give your sundae extra texture and a big crunch.
3. Roll scoops of ice cream in any kind of crumbs, crunched cereal or chocolate milk powder for an ice cream "truffle."
4. Use mini containers like egg cups, espresso cups and cordial glasses to make mini sundaes.
5. Make a quickie fresh-fruit topping by mashing your favorite berries with a little white or brown sugar.
6. To keep your ice cream from melting as fast, freeze your sundae bowls or dessert dishes overnight.
7. To make your scoops more perfect-looking, dip your ice cream scoop in hot water in between scoops.
8. Use two or more flavors of ice cream in a sundae to add extra flavor and flair.
9. Simply tucking a cookie next to a scoop of ice cream, standing up, can really dress it up.
10. Create an exotic-looking sundae by using a wooden skewer to thread fruit onto, and then stick it into a scoop of ice cream. Use things like berries, ripe peach wedges and banana slices.
For more tips and recipes, visit www.breyers.com or www.facebook.com/breyers.

Mini Coffee Ice Cream Sundaes
4 servings
Prep Time: 25 minutes
- 2 cups Breyers Coffee ice cream
- salted caramel sauce*
- almond whipped cream**
- 1 shot espresso coffee
- 4 amaretti cookies
- chocolate-covered coffee beans
- Arrange 2 (1/4-cup) scoops ice cream in 4 demitasse coffee cups. Drizzle with salted caramel sauce, then top with almond whipped cream.
- Pour a little espresso into each cup, then garnish with cookies and coffee beans.
- *For salted caramel sauce, bring 3/4 cup sugar and 1/4 cup water to a boil over high heat in heavy-duty saucepan until caramel-colored. Remove from heat, then slowly stir in 1/2 cup whipping or heavy cream. Let cool, then stir in 1/4 teaspoon kosher salt. Let stand at room temperature until ready to use.
- **For almond whipped cream, whip 1/2 cup whipping or heavy cream, 1 teaspoon sugar and 2 drops almond extract in mixing bowl with electric mixer until soft peaks form. Chill until ready to serve.
Snow Ball Sundaes
4 servings
Prep Time: 15 minutes
Freeze Time: 30 minutes
- 2 cups Breyers Mint Chocolate Chip ice cream
- 8 slices (1-1/2 inches thick) store-bought angel food cake
- 1/4 cup hot fudge topping, warmed
- 1/2 cup marshmallow creme, melted*
- chocolate sprinkles
- Freeze plate 30 minutes. Make 4 (1/2-cup) scoops ice cream and arrange on chilled plate.
- Place 1 ice cream ball on 1 cake slice, then top with second cake slice. Shape cake around ice cream to encase it, using your hands to completely cover ice cream. Return to freezer until ready to serve. Repeat with remaining ice cream and cake.
- To serve, arrange snow balls in 4 dessert bowls. Top with hot fudge topping, then marshmallow creme and sprinkles.
*TIP: Easily melt marshmallow creme in a glass measuring cup in the microwave.
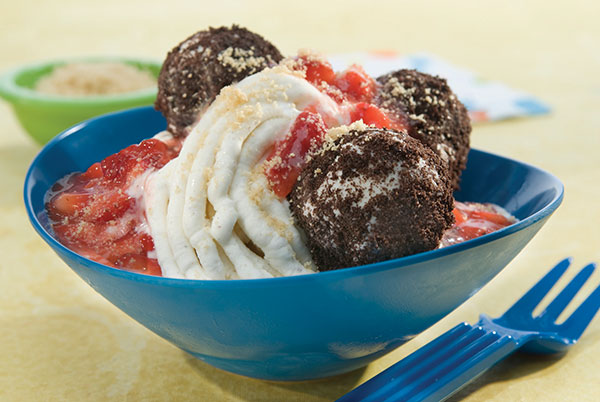
Spaghetti and Meatball Sundaes
4 servings
Prep Time: 30 minutes
Freeze Time: 30 minutes
- 12 small scoops Breyers Rocky Road ice cream
- 1 cup chocolate sandwich cookie crumbs
- 2 cups strawberries, trimmed
- 2 tablespoons sugar
- 1 cup Breyers Natural Vanilla ice cream, divided
- 2 store-bought shortbread cookies, crushed
- Freeze plate 30 minutes. For meatballs, arrange Rocky Road ice cream scoops on chilled plate. Place chocolate cookie crumbs on another plate. Roll scoops, one at a time, in cookie crumbs, then return to chilled plate until ready to serve.
- For sauce, mash strawberries with sugar in medium bowl using potato masher or fork to make chunky sauce. Stir in additional sugar if desired.
- To build sundaes, press vanilla ice cream through potato ricer* into 4 dessert bowls for spaghetti. Top each with 3 meatballs, then sauce. Top with crushed shortbread cookie cheese. Serve with a fork!
- *If a potato ricer is not available, simply scoop ice cream into bowls.
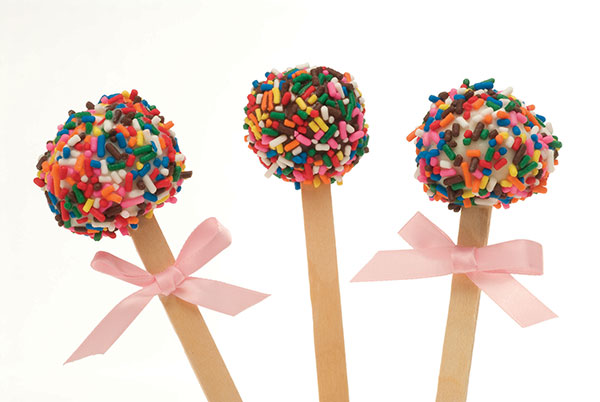
Ice Cream Lollipops
8 lollipops
Prep Time: 15 minutes
Freeze Time: 30 minutes
- 2 cups Breyers Chocolate Chip Cookie Dough ice cream
- chocolate-fudge flavor ice cream topping that freezes
- pink or rainbow sprinkles
- Freeze plate 30 minutes. Scoop 8 balls ice cream and place on chilled plate. Insert a wooden stick into each ball and freeze at least 30 minutes.
- Meanwhile, pour ice cream topping into bowl. Dip frozen balls into ice cream topping, twirling to coat. Quickly decorate with sprinkles. Keep frozen until ready to serve.
Source: Breyers

Sweetness Made Simple
(Family Features) It's time to enjoy summer entertaining with easy, no-bake desserts that let you relax and enjoy time with friends and family while your creations are chilling in the fridge. To help you keep your cool, Eagle Brand(r) Sweetened Condensed Milk is sharing expert tips and recipes to satisfy your family, friends and guests alike without ever turning on the oven.
Foolproof Ice Cream: Homemade ice cream is easy to make with Eagle Brand Sweetened Condensed Milk. It lends a rich, thick consistency, so no eggs are required - and you don't need an ice-cream maker, either. Try this luscious Butter Pecan Ice Cream recipe, or use your favorite fruit, candy pieces, nuts or coffee to create your own delicious and refreshing ice cream flavors.
Make It Mini: Mini desserts are perfect for summer parties - small, bite-sized treats are easy to handle and let guests enjoy something sweet without feeling like they're overindulging. Try different variations of Creamy Mini Tarts using chocolate, peanut butter or your favorite fruit to satisfy everyone's taste. Also try making mini-size Raspberry Mocha Mousse Parfaits by layering the ingredients in small juice glasses.
Fresh and Fun: Make the most of the season's freshest flavors with this Fresh Fruit Cream Cheese Pie. Mix and match your favorites for a show-stopping dessert.
Sweet Inspiration: If life hands you lemons, make easy, no-bake party desserts. When combined with acidic fruit juice from a lemon or lime, Eagle Brand Sweetened Condensed Milk thickens - without heating - to form velvety pie fillings, puddings and other desserts. Get inspired and whip up these Creamy Mini Tarts.
To get more easy dessert recipes, see how-to videos, and to download a free recipe book, visit www.eaglebrand.com.
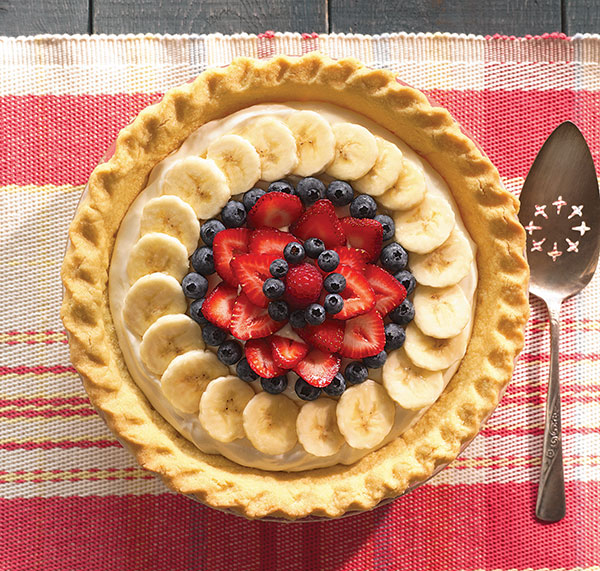
Fresh Fruit Cream Cheese Pie
Prep Time: 10 Minutes
Chilling Time: 3+ hours
Yield: 8 servings
- 1 8-ounce package cream cheese, softened
- 1 14-ounce can Eagle Brand Sweetened Condensed Milk OR 1 14-ounce can Eagle Brand Low Fat Sweetened Condensed Milk
- 1/3 cup lemon juice
- 1 teaspoon vanilla extract
- 1 9-inch frozen deep-dish pie crust, baked
- Fresh fruit (blueberries, strawberries, bananas*)
- Seedless red raspberry jam
- BEAT cream cheese in large bowl with an electric mixer until fluffy. Gradually beat in sweetened condensed milk until smooth. Stir in lemon juice and vanilla. Pour into baked pie crust.
- REFRIGERATE 3 hours or until set. Arrange fruit on top of pie. If coating berries, stir jam until smooth. Brush berries with jam and serve.
*If using bananas, dip in lemon juice before placing on pie to keep them from turning brown. Do not coat with jam.
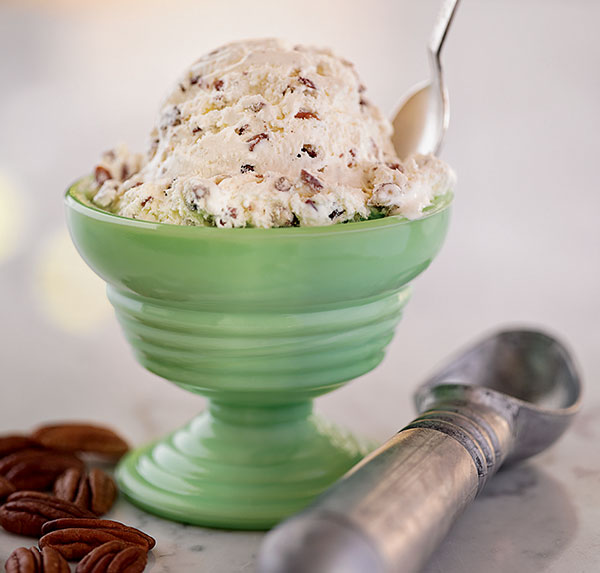
Butter Pecan Ice Cream
Prep Time: 15 minutes
Freezer Time: 6+ hours
Yield: 1 3/4 quarts
- 2 cups heavy cream
- 1 14-ounce can Eagle Brand Sweetened Condensed Milk
- 1 to 1 1/2 cups chopped pecans, toasted*
- 3 tablespoons butter, melted
- 1 teaspoon maple extract
- WHIP heavy cream to stiff peaks in large bowl. Combine sweetened condensed milk, pecans, butter and maple flavoring in large bowl. Mix well. Fold in whipped cream.
- POUR into 9 x 5-inch loaf pan or 2-quart container; cover. Freeze 6 hours or until firm. Store in freezer.
*To toast nuts: Place nuts in dry nonstick skillet. Cook over medium heat, shaking pan until nuts are lightly browned. To avoid over-browning, remove from pan immediately.
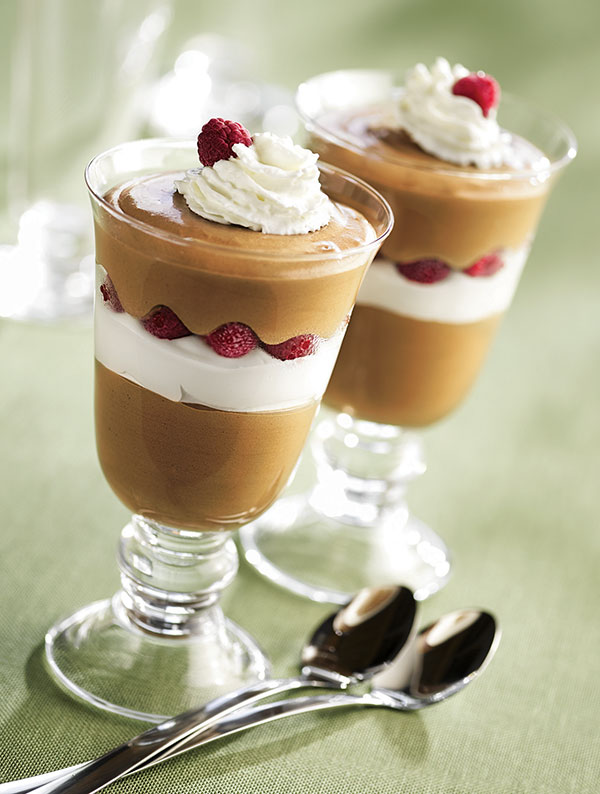
Raspberry Mocha Mousse Parfaits
Prep Time: 40 Minutes
Chilling Time: 20 Minutes
Yield: 8 servings
- 4 1-ounce squares unsweetened chocolate
- 1 14-ounce can Eagle Brand Sweetened Condensed Milk
- 1 1/2 teaspoons vanilla extract
- 1 tablespoon Folgers® Instant Coffee Crystals
- 1 teaspoon hot water
- 1 cup (1/2 pint) heavy cream
- 1 can refrigerated whipped cream
- 2 cups Nature's Peak® Frozen Raspberries OR 2 cups fresh raspberries
- MELT chocolate in a microwave-safe dish on HIGH (100% power) in 20 second intervals until melted. Stir until smooth.
- POUR sweetened condensed milk into large bowl. Beat in melted chocolate and vanilla. Dissolve coffee in hot water. Add to chocolate mixture, beating until smooth. Chill 15 minutes. Chill beaters and mixing bowl from electric mixer 10 minutes in preparation for next step.
- BEAT cream in chilled bowl with chilled beaters until stiff. Fold into chilled chocolate mixture. Reserve 8 raspberries for garnish. Layer parfait glasses as follows: 1/4 cup chocolate mousse, refrigerated whipped cream, 1/4 cup raspberries, 1/4 cup chocolate mousse. Refrigerate parfaits 20 minutes before serving. Just before serving, garnish each with refrigerated whipped cream and a single raspberry.
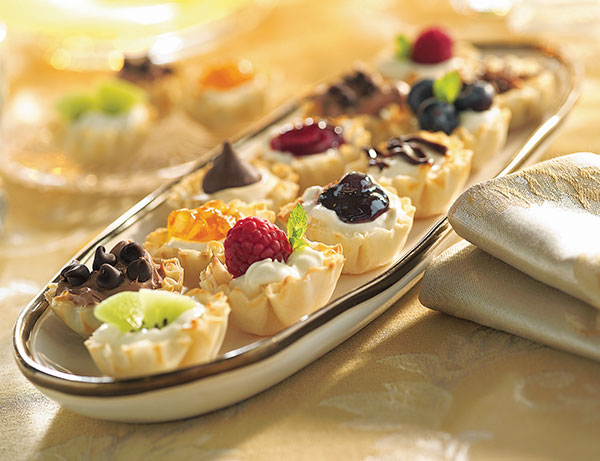
Creamy Mini Tarts
Prep Time: 1 hour
Chilling Time: 2 hours
Yield: 60 mini tarts
- 1 8-ounce package cream cheese, softened
- 1 14-ounce can Eagle Brand Sweetened Condensed Milk
- 1/3 cup lemon juice
- 1 teaspoon vanilla extract
- 4 1.9-ounce boxes mini phyllo shells
- 2/3 cup Smucker's® Blueberry Preserves
- BEAT cream cheese in large bowl until fluffy. Gradually beat in sweetened condensed milk until smooth. Stir in lemon juice and vanilla until blended. Spoon about 2 teaspoons into each mini shell. Refrigerate 2 hours or until firm.
- MAKE a slight indentation in the filling using the back of small round measuring spoon. Fill with 1/2 teaspoon preserves. Refrigerate until ready to serve.
Variations
Fresh Fruit: Top mini tarts with fresh fruit such as strawberries, blueberries, bananas, raspberries, cherries, kiwi, grapes or pineapple. Garnish with mint leaves.
Hot Fudge: Place 2 tablespoons hot fudge topping into corner of resealable plastic bag. Cut small corner off bag. Squeeze to drizzle over top of mini tarts.
Preserves: Use different flavors of preserves or orange marmalade to create a colorful assortment. Garnish with mint leaves.

Deliciously Easy Pumpkin Desserts
Enjoy an organic twist on seasonal sweets
(Family Features) Holidays are typically a joyous time filled with gatherings of friends and family, including time spent baking and enjoying seasonal dishes, all while making fond memories. Pumpkin has become a popular holiday ingredient, making it easy to create pumpkin-centric desserts, perfect for entertaining.
This season, try utilizing organic ingredients in holiday dishes as a simple way to add a better-for-you twist to your family’s favorite dishes – including baked goods and other desserts. The
O Organics product line, exclusive to the Albertsons Companies family of stores including Albertsons, Safeway, ACME Markets, Jewel-Osco, Pavilions, Randalls, Shaw’s, Star Market, Tom Thumb and Vons, includes 100 percent pure organic pumpkin, as well as more than 400 additional USDA-certified, non-GMO items for every occasion, from fresh fruits and vegetables to wholesome dairy, meats, baking ingredients, cereals, snacks and more.
When it comes to the dessert table, try a new twist on pumpkin with these seasonal sweets featuring high-quality, organic ingredients. Use the online store locator to find a store near you and discover more ways to add organic foods to your family’s meals.
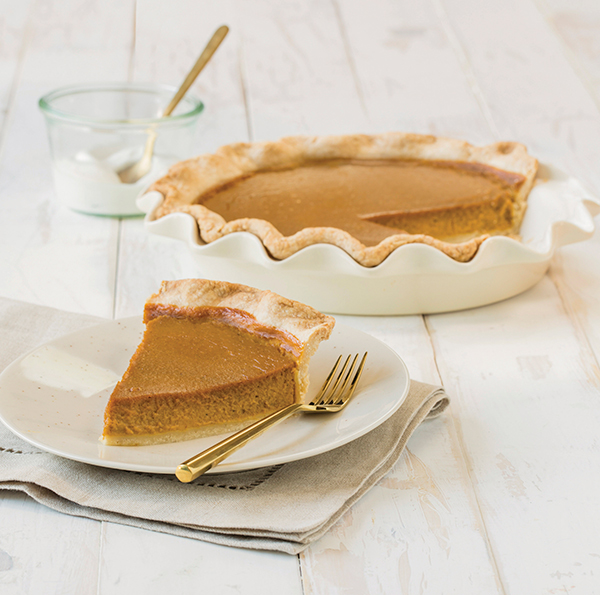
Organic Pumpkin Pie
Prep time: 15 minutes
Total time: 1 hour, 25 minutes
Servings: 8
Crust:
- 1 1/2 cups O Organics all-purpose flour
- 8 tablespoons unsalted butter, slightly softened
- 1 teaspoon kosher salt
- 1 tablespoon O Organics granulated sugar
- cold water, as needed (about 4-6 tablespoons)
Filling:
- 1 can (15 ounces) O Organics 100 percent pure pumpkin
- 1/2 cup whole milk
- 1/2 cup pure maple syrup
- 2 large eggs
- 1 teaspoon O Organics ground cinnamon
- 1/4 teaspoon ground nutmeg
- 1/2 teaspoon O Organics ground ginger
- To make crust: Place flour, butter, salt, sugar and water in large bowl. Using fingers, mix ingredients together until dough ball forms. Flatten into 1-inch thick disk and wrap in parchment paper. Let rest 1 hour in refrigerator before rolling out.
- Heat oven to 375° F. Roll out dough and press into pie plate.
- To make filling: In medium bowl, whisk together pumpkin, milk, syrup, eggs, cinnamon, nutmeg and ginger. Pour into pie plate.
- Bake 40-55 minutes until filling is slightly jiggly but set. Let cool 4 hours. Serve.
Notes: Using measuring cup as scoop for flour actually overfills it. Instead, fill cup lightly with spoon and level off top with butter knife. Do not roll dough all the way to edge to keep dough from sticking to surface. Keep surface and rolling pin floured and continue turning dough. Pie dough can be made and frozen ahead of time for easy use – just thaw in refrigerator before using. It can keep up to 6 months in freezer.
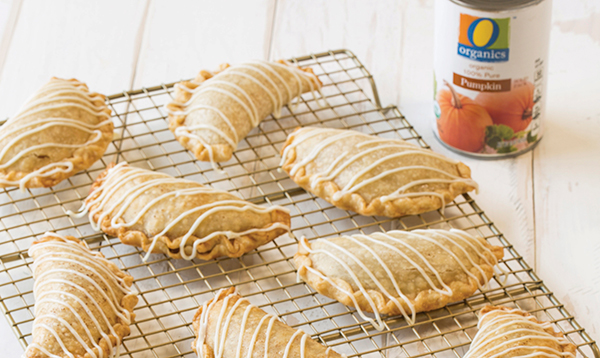
Pumpkin Hand Pies
Prep time: 15 minutes
Total time: 50 minutes
Servings: 6-8
- 1/2 cup O Organics 100 percent pure pumpkin
- 2 ounces cream cheese, softened
- 1 tablespoon pure maple syrup
- 1/8 teaspoon O Organics ground cinnamon
- 1/4 teaspoon pumpkin pie spice
- 1/2 teaspoon vanilla
- 2 premade pie dough crusts, rolled into 10-inch circles
For brushing pastry:
- 1 tablespoon whipping cream
- 1 tablespoon pure maple syrup
- 1/8 teaspoon cinnamon
Icing:
- 4 ounces softened cream cheese
- 1/4 cup powdered sugar
- 1 1/2 teaspoons milk
- Heat oven to 375° F. Using mixer, combine pumpkin, cream cheese, maple syrup, cinnamon, pumpkin pie spice and vanilla until well mixed. Set aside.
- Spread pie dough. Using 5-inch round cutter, make circles. Whisk together whipping cream, maple syrup and cinnamon for brushing.
- Taking round piece of dough, place about 3 tablespoons filling in center and fold dough over to create half-moon shape. Brush edges with whipping cream mixture. Using fork tines, seal edges of pastry. Repeat with each dough circle.
- Place pies on parchment-lined baking sheet. Brush tops with whipping cream mixture. Bake 16-20 minutes until bottoms are golden brown. Let cool 30 minutes.
- To make icing: Whisk to combine cream cheese, powdered sugar and milk. Drizzle over pies. Serve.
Notes: Use lid from small pan to cut dough circles for pies. For easier drizzling, load icing into small zip-top bag. Squeeze into corner and twist top to seal. Cut corner and drizzle over pies.
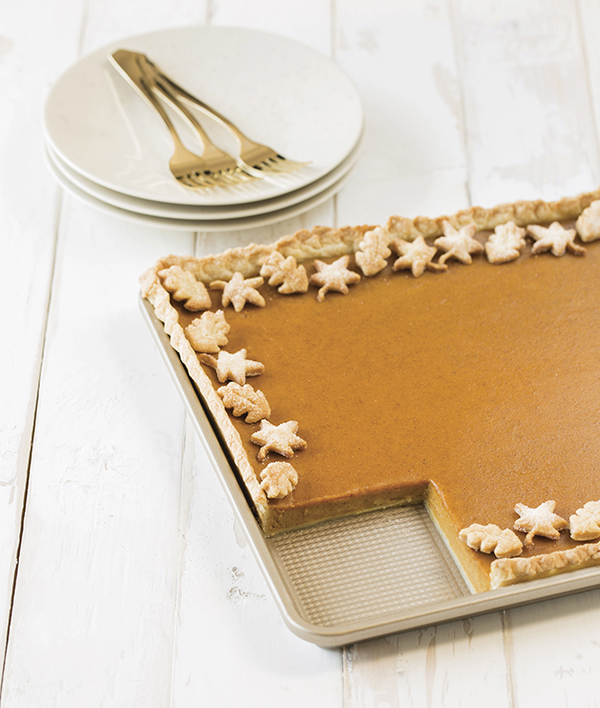
Pumpkin Slab Pie
Prep time: 20 minutes
Total time: 1 hour, 20 minutes
Servings: 36-40
Crust:
- 1 cup unsalted butter, cut into 1/2-inch cubes
- 8 ounces cream cheese, cut into 1/2-inch cubes
- 2 cups all-purpose flour
- 1 teaspoon kosher salt
Filling:
- 2 cans (15 ounces each) O Organics 100 percent pure pumpkin
- 4 eggs
- 2 cups whipping cream
- 1 1/4 cups granulated sugar
- 2 teaspoons pumpkin pie spice
- 1 teaspoon ground ginger
- 1/2 teaspoon kosher salt
- To make crust: In bowl, combine butter, cream cheese, flour and salt. Use fingers to mix ingredients until dough ball forms. Form into two flat rectangular disks about 1-inch thick and wrap with plastic. Refrigerate 1 hour.
- On lightly floured surface, roll out each crust into 13-by-10-inch rectangle. Carefully place dough on each side of 12-by-17-inch pan and pinch together, smoothing out crust so it fits into all corners of pan. Trim edges to 1/2 inch of crust and tuck edges under. Crimp edges with fork.
- Heat oven to 350° F.
- To make filling: In large bowl, whisk to combine pumpkin, eggs, whipping cream, sugar, pumpkin pie spice, ginger and salt. Pour into crust.
- Bake 35-45 minutes until filling is slightly jiggly but set. Let cool 3-4 hours before serving.

Pumpkin Spice Latte Ice Cream
Prep time: 10 minutes
Total time: 10 minutes
Servings: 2
- 1/2 cup frozen pumpkin puree made with O Organics 100 percent pure pumpkin
- 2 frozen bananas, cut or broken into 1-inch chunks
- 1 teaspoon espresso instant coffee granules
- 1 tablespoon cashew butter
- 1 1/2 teaspoons pumpkin pie spice
- 1 teaspoon maple syrup
- Remove pumpkin puree cubes from freezer and allow to soften slightly, about 5 minutes. In food processor or high-powered blender, combine pumpkin puree, bananas, coffee granules, cashew butter, pumpkin pie spice and syrup.
- Pulse until mixture begins to resemble ice cream consistency, about 5 minutes.
Notes: Freeze pumpkin in ice cube trays. Overripe bananas work best. Peel and place on parchment-lined baking sheet in freezer. Once frozen, store in zip-top bag.
Source: Albertsons Companies

Watermelon Soda Float
Ahhhh....soda floats. Remember being a kid and getting so excited for a root beer float or a coke float during the hot days of summer? One scoop, then two scoops of vanilla ice cream plopping into the glass. Oh and the root beer, the delectable liquid sugar being poured over the scoops of vanilla ice cream creating a frothy white foam at the top of the glass. You just couldn't wait to drop in a straw and slurp it all up.
Well, nowadays we like to change things up a bit. We like to take a classic and give it twist. VOILA! introducing the Watermelon Soda Float. Not only do you get to plop in scoops of your favorite vanilla ice cream, but you'll add in some watermelon balls, a bit of lime zest and fizzy water to give you the awesome fizz and frothy foam you loved as a kid.
When it's a hot summers day, you'll be pleasantly surprised with the refreshing taste of watermelon, vanilla ice cream and fizzy water in this frothy concoction.
For more beverage ideas, go to culinary.net.


Watermelon Soda Float
- Vanilla Ice cream (2 scoops)
- 12 watermelon balls
- 1/2 cup watermelon juice
- 1/2 teaspoon lime zest
- 1/2 cup fizzy water
- Mix lime zest with watermelon water.
- Place 6 watermelon balls in tall glass.
- Add 1 scoop of vanilla ice cream.
- Add in remaining watermelon balls.
- Add 2nd scoop of ice cream.
- Pour watermelon water over the watermelon balls and ice cream.
- Top off with fizzy water.
Recipe adapted from Watermelon Board.
Source: Culinary.net

Introduce Freshness to Your Family Table
The original farm-to-table food kids already love – milk
(Family Features) Locally sourced foods are becoming increasingly important to families across the country – and more moms are taking note of where their family’s food comes from. In fact, more than three-quarters of moms are actively looking for locally sourced food options when grocery shopping for themselves and their families, according to a new survey from the National Milk Life Campaign. ¹
From Farm to Glass
Many people are surprised to learn that milk is one of the original farm-to-table foods. Nearly two-thirds of moms think milk takes anywhere from more than two days to more than a week to travel from the farm to grocery stores throughout the country, when it typically arrives on shelves in just 48 hours, on average, after leaving the farm. In fact, milk often originates from many family-owned and operated farms about 300 miles away from your grocery store.²
Part of a Balanced Diet
As a minimally processed and farm-fresh beverage, milk is a wholesome way to help your family get natural protein and balanced nutrition. Whether it’s reduced fat, fat free or organic, dairy milk is remarkably simple, containing just three ingredients: milk, vitamin A and vitamin D.
Whether enjoyed as a beverage or used as an ingredient in your favorite recipe, milk is a versatile pairing for any meal. Even award-winning chefs and restaurateurs like Chef Giorgio Rapicavoli use milk as a foundational farm-to-table ingredient in many of their signature dishes.
For a traditional favorite that kids are sure to enjoy, try Giorgio’s homemade ice cream recipe. The whole family will love making (and eating) this treat, and you can feel good about the wholesome and delicious ingredients like milk.
For more information and delicious recipes, visit milklife.com.
Giorgio’s Homemade Ice Cream
Servings: nine 2/3 cup servings
- 1 1/2 cups whole milk
- 2 1/2 cups heavy cream
- 8 egg yolks
- 1 cup cane sugar
- 1/4 teaspoon sea salt
- 1 tablespoon vanilla extract
- In a medium saucepan, bring the milk and the heavy cream to a simmer, over medium heat.
- In a medium mixing bowl, whisk the sugar and egg yolks until they lighten in color. Temper the cream mixture into the eggs and sugar by gradually adding in small amounts and then return the entire mixture to the saucepan and place over low heat. Continue to cook until the mixture thickens slightly and coats the back of a spoon. Add the vanilla, adjust the seasoning and cook the ice cream base for 3-4 hours.
- Pour into an ice cream maker and process according to the manufacturer's directions.
Nutritional information per serving: 390 calories; 30 g fat; 18 g saturated fat; 260 mg cholesterol; 5 g protein; 27 g carbohydrates; 0 g fiber; 115 mg sodium; 113 mg calcium (10% of daily value).
¹ Weber Shandwick conducted an online Google survey among 1,010 moms between the ages of 18-54 on behalf of The National Milk Life Campaign between June 22 – June 26.
² “Milk: More Local Than You May Think,” http://dairygood.org, (August 06, 2014).
Source: MilkPEP