
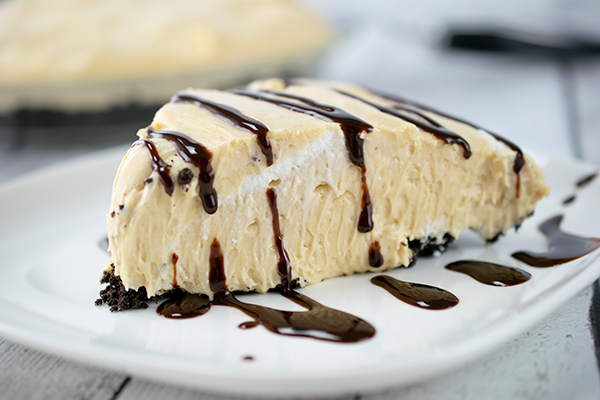
Fluffy Peanut Butter Pie
(Culinary.net) If you’ve ever taken a bite of something and the only word that came to mind was “yum,” you know what it’s like to experience this dessert. It’s fluffy, sweet, perfectly crumbly and tastes delicious. It’s rich but light. It’s a dessert that will likely never go out of style.
You can stop guessing what it may be: this treat is a scrumptious bite of Fluffy Peanut Butter Pie drizzled with chocolate syrup. You will understand the craze once you sink your fork into the chilled triangle resting on your plate. With a chocolate cookie crust and a thick, delicious peanut butter filling, this pie is everything many people want in a dessert.
Although it tastes like you have been in the kitchen all day, it’s a simple-to-make, delightful treat with luscious peanut butter flavor that melts in your mouth.
To make this pie, remove the filling from 20 chocolate cookies and crush them with a rolling pin until they are just crumbs. Mix cookie crumbs with melted butter and mold into a pie dish to create the crust.
Next, in a mixer, combine cream cheese and reserved cookie filling. Then add sweetened condensed milk, peanut butter, lemon juice and vanilla extract while you continue mixing.
In a mixing bowl, beat whipping cream until stiff peaks form. Fold peanut butter mixture in with the whipping cream.
Layer the peanut butter and whipping cream mixture on top of the crust in the pie pan. Chill for about 4 hours then drizzle with chocolate syrup just before serving.
This dessert is perfect for anyone with a sweet tooth. House guests, birthday parties or even just a simple treat after a meal; it’s an any-occasion kind of pie.
Find more dessert recipes at Culinary.net.
Watch video to see how to make this recipe!
Fluffy Peanut Butter Pie
Servings: 6-8
- 20 chocolate cream-filled cookies
- 1/4 cup butter, melted
- 1 package (8 ounces) cream cheese, softened
- 1 cup smooth peanut butter
- 1 can (14 ounces) sweetened condensed milk
- 3 tablespoons lemon juice
- 1 teaspoon vanilla extract
- 1 cup whipping cream
- chocolate syrup
- Remove cream filling from chocolate cookies; set aside. With rolling pin, finely crush chocolate cookies.
- In medium bowl, combine finely crushed cookies with melted butter.
- Press crumb mixture firmly into bottom and sides of 9-inch pie plate; chill while preparing filling.
- In large bowl, beat cream cheese until fluffy. Add reserved cookie cream filling, peanut butter and sweetened condensed milk; beat until smooth. Stir in lemon juice and vanilla extract.
- In medium bowl, beat whipping cream until stiff peaks form. Fold whipped cream into peanut butter mixture. Mix until combined.
- Pour into crust. Chill 4 hours, or until set. Drizzle chocolate syrup over pie before serving.
- Cover leftovers and store in refrigerator.

Power Up Athletic Performance with Real Milk-Inspired Dishes
(Family Features) From little ones learning the game to professional athletes pushing sports to new levels, nutrition impacts the ability to re-energize, stay hydrated and reach peak performance. Now, new data shows that one naturally nutrient-rich beverage provides more benefits than previously thought: dairy milk.
For years, real milk has been recognized as a powerhouse beverage that delivers nine essential nutrients, including calcium, protein and vitamin D. However, updated nutrient daily values for nutrition labeling and more robust government nutrition databases have provided data that shows real milk delivers 13 essential nutrients, making it a good or excellent source of four more vital nutrients: potassium, zinc, selenium and iodine. These nutrients help build strong bones, maintain a healthy immune system and maintain your central nervous system, all of which directly impact athletic performance.
“As a kid, you thought of dairy milk as the drink that helped you grow and have strong bones,” said Briana Butler, MCN, RDN, LD, a performance and sports dietitian who advises athletes. “As you get older and start paying more attention to drinks’ attributes, you realize that truth applies to adults and athletes as well. Real milk is a trustworthy and nutrient-rich way to repair, rehydrate and replenish muscles and bodies. It is truly an undeniable favorite of mine to fuel performance.”
As the “original sports drink,” real milk has fueled athletes for centuries and offers a natural nutrient combination not found in formulated sports drinks. It provides benefits for fitness enthusiasts of all ages including building lean muscle, maintaining strong bones and supporting a healthy immune system.
With 13 nutrients, real milk isn’t just the ultimate training fuel, it also makes your favorite recipes more tasty and nutritious. Dishes such as Zucchini Oatmeal Muffins are made in just 15 minutes and are a quick and nutritious snack that can be enjoyed on the go, crumbled over yogurt or paired with eggs for a morning power-up. You can also try Rattle Snake Pasta, a better-for-you version of a family favorite that combines rotisserie chicken, peppers and linguine.
Visit gonnaneedmilk.com for more information on real milk’s nutrition and for milk-inspired meals.
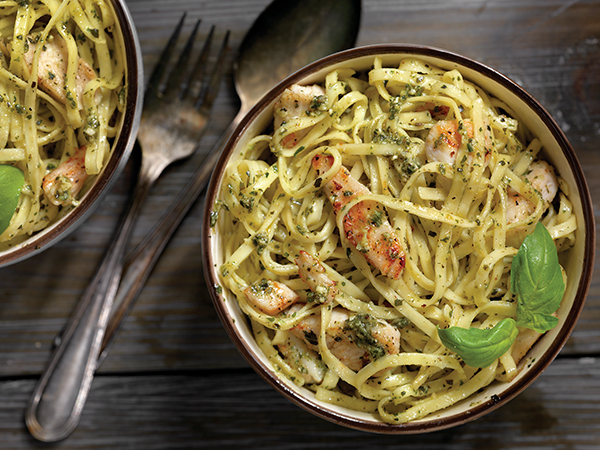
Rattle Snake Pasta
Recipe courtesy of registered dietitian Bri Butler and Power Portions
Total time: 15 minutes
Servings: 6
- 1/4 cup buttery spread
- 2 tablespoons all-purpose flour
- 3/4 cup dairy milk (2% recommended)
- 1/2 cup vegetable broth
- 1 tablespoon vegetable base
- 1/2 cup Parmesan cheese, shredded
- salt, to taste (optional)
- pepper, to taste (optional)
- 1/4 cup pickled jalapeno slices
- 3 tablespoons minced garlic
- 10 ounces cooked rotisserie chicken, shredded
- 1 green bell pepper, sliced
- 1 red bell pepper, sliced
- 1 handful fresh cilantro, minced
- 1 pound whole-wheat linguini, cooked
- In medium pot, melt buttery spread then add flour; mix well. Slowly add dairy milk and vegetable broth, stirring well.
- Add vegetable broth and Parmesan cheese; heat slowly until thickened. Add salt and pepper, to taste, if desired.
- Add jalapenos, garlic, bell peppers and roasted chicken; heat thoroughly.
- Serve over cooked linguini.
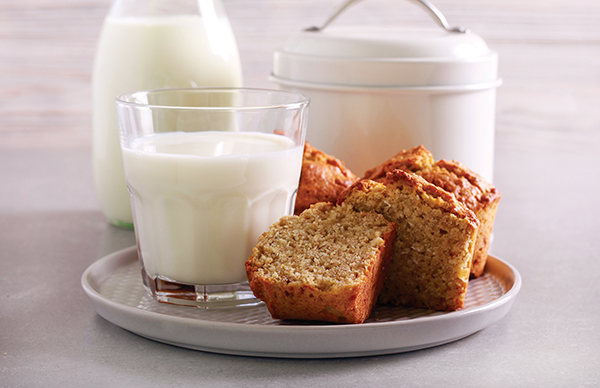
Zucchini Oatmeal Muffins
Recipe courtesy of registered dietitian Bri Butler and Power Portions
Total time: 15 minutes
Servings: 12
- 1 zucchini
- 1 1/2 cups dairy milk (2% recommended)
- 3 bananas
- 6 pieces pitted Deglet Noor dates
- 1 teaspoon vanilla extract
- 2 tablespoons safflower oil
- 2 1/2 cups old-fashioned oats
- 1 1/2 teaspoons baking powder
- 1 1/2 teaspoons salt
- 1 teaspoon ground cinnamon
- Preheat oven to 350 F.
- Grate zucchini. Using kitchen towel or cheesecloth, wring as much water as possible. Set aside.
- In blender, blend dairy milk, banana, dates, vanilla and oil until smooth. Set aside.
- In large bowl, combine oats, baking powder, salt and cinnamon.
- Combine milk mixture, zucchini and oat mixture until well combined. Pour into coated 12-muffin pan.
- Cook 30 minutes, or until golden brown.
- Tips: Pair muffin (counts as one grain) with eggs and unsweetened nut butter for a balanced meal. Crumble over plain yogurt for parfait twist.
Photos courtesy of Getty Images
Source: MilkPEP

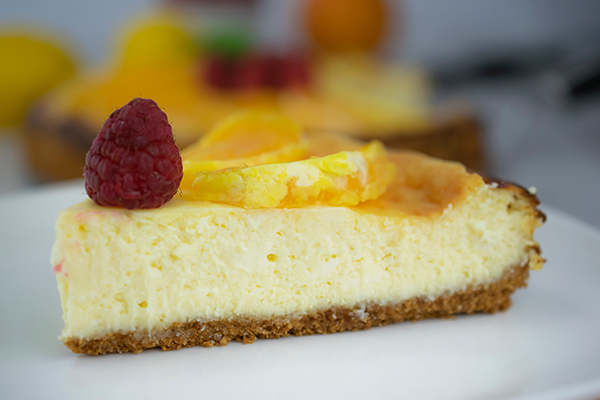
Lemon Cheesecake with Fresh Fruit
Fresh fruit is finally in season. When the sun is out and kids are hitting the pool, it’s also time to indulge in some sweet fruit flavors. Watermelon, berries, bananas and more can all be found near perfect ripeness at grocery stores or farmer’s markets during the warm summer months.
On a hot day, there is almost nothing better than trying something new that sounds delicious. Throw your apron on, prepare your kitchen and get baking.
If you’re craving something sweet with no ideas where to start, try this sweet Lemon Cheesecake with Fresh Fruit. It’s tangy and rich, and allows you to escape to the summer oasis of your dreams, at least for a few minutes.
It has the smooth, creamy texture of cheesecake mixed with a hint of tart lemon juice. Topped with raspberries, mint and oranges, the burst of fresh fruit enhances the cheesecake flavor. It’s the perfect sweet treat for summer for people of all ages with its bright colors and varying flavors.
In a bowl, mix graham cracker crumbs, sugar and melted butter then press into a springform pan.
Beat cream cheese, sweetened condensed milk, three eggs, lemon juice and vanilla extract then pour it on top of the graham cracker mixture.
Bake for 50-55 minutes before cooling completely in the fridge and adding fruit and mint leaves.
The outcome is a fluffy cheesecake with a small hint of lemon topped with your favorite fresh fruits. It’s a delightful, sweet and satisfying recipe your family can make again and again to enjoy during those warm summer months.
Find more recipes perfect for summer at Culinary.net.
Did you make the recipe? We would love to see it! Use #MyCulinaryConnection on your favorite social network and let us see your work!
Watch video to see how to make this recipe!
Lemon Cheesecake with Fresh Fruit
Servings: 6-8
- 1 1/4 cups graham cracker crumbs
- 1/4 cup sugar
- 1/4 cup butter, melted
- 2 packages (8 ounces each) cream cheese, softened
- 1 can (14 ounces) sweetened condensed milk
- 3 eggs
- 1/4 cup fresh lemon juice
- 1 teaspoon vanilla extract
- 1 orange, peeled and separated
- 8 raspberries
- 3 mint leaves, for garnish
- Heat oven to 350 F.
- In medium bowl, combine graham cracker crumbs, sugar and melted butter. Press firmly into 9-inch springform pan.
- In large bowl, beat cream cheese until fluffy. Gradually beat in sweetened condensed milk until smooth. Add eggs, fresh lemon juice and vanilla extract; mix until combined.
- Pour into pan. Bake 50-55 minutes, or until center springs back when lightly pressed.
- Chill in refrigerator until completely cooled. Arrange orange slices around border of cake and place raspberries in middle. Top with mint leaves.

Go Gluten-Free with Family Favorites
(Family Features) Time available to cook, your family's preferred dishes, ingredients you have in the pantry - there are plenty of considerations that may limit your options for an at-home menu. Add in a gluten allergy, or simply a desire to avoid it, and it may feel impossible to appease everyone.
However, all it takes is simple ingredient swaps to turn a family favorite into a gluten-free recipe. From pizza at dinnertime to a chocolatey dessert, these dishes offer easy, flavorful ways to make your menu gluten-free.
A Healthier Homemade Pizza
Creating a gluten-free dinner can be as easy as tweaking some of your loved ones' favorite meals. Even pizza can offer a gluten-free solution when you rethink the ingredients included.
Satisfy your family's needs with an option like Toufayan Gluten-Free Wraps in place of traditional crust in this Gluten-Free Barbecue Skillet Pizza. Made from wholesome, all-natural ingredients with no cholesterol or trans fats, these easily foldable wraps are available in four flavors, making them perfect for homemade pizza.
Visit Toufayan.com to find more mealtime solutions.

Gluten-Free Barbecue Skillet Pizza
Servings: 6
- 1 tablespoon olive oil, divided
- 1 Toufayan Gluten-Free Original Wrap
- 3 tablespoons gluten-free barbecue sauce
- 4 cooked sausage links, crumbled
- 2 cups diced Mozzarella cheese
- 2 tablespoons chopped green onion
- fresh Parmesan cheese, for garnish (optional)
- fresh fennel fronds, for garnish (optional)
- crushed red pepper, for garnish (optional)
- salt, to taste
- pepper, to taste
- Heat oven to broil.
- Heat cast-iron skillet over medium heat. Add 1-2 teaspoons olive oil; spread to cover bottom of skillet.
- Place wrap in skillet, brush with barbecue sauce and add sausage, Mozzarella and green onion.
- Fry 2-3 minutes, or until bottom of wrap is golden and crispy.
- Place skillet under broiler until cheese is melted and bubbly, about 2 minutes.
- Remove from broiler, place on cutting board and sprinkle with Parmesan, fennel fronds and crushed red pepper, if desired.
- Season with salt and pepper, to taste; drizzle with remaining olive oil, cut and serve.
Dish Up a Dynamic Dessert
Going gluten-free isn't just for meals from breakfast to dinner - you can cut gluten from delicious desserts, too.
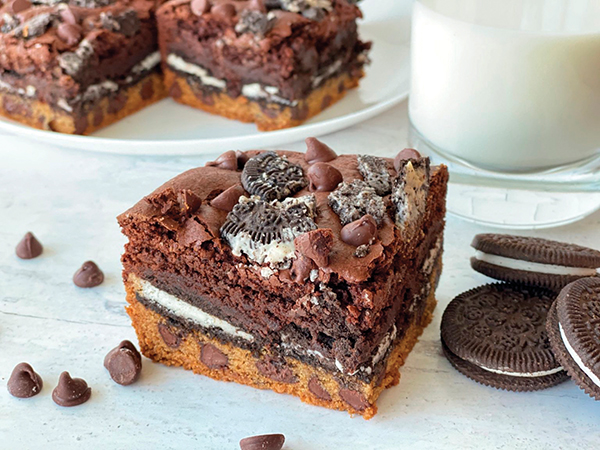
This Cookie Brownie Supreme calls for layers of cookie dough, cookies and brownies for a taste bud tempting way to round out a meal with those you love. One of the key ingredients is Goodie Girl Chocolate Creme Sandwich Cookies, made with real cocoa and a sweet cream filling between two chocolate wafers. They're made without artificial flavors, colors or preservatives for a gluten-free, vegan and peanut-free treat.
Find more varieties and dessert ideas at goodiegirl.com.
Cookie Brownie Supreme
Recipe courtesy of glutenfreewith3.com
Cookie Dough Layer:
- 1 stick softened butter
- 1/2 cup brown sugar
- 1/4 cup sugar
- 1 1/4 teaspoons vanilla extract
- 1 egg
- 1/2 teaspoon baking soda
- 1/4 teaspoon salt
- 1 1/4 cups gluten-free flour
- 1 cup semi-sweet chocolate chip
Cookie Layer:
- 25 Goodie Girl Chocolate Creme Sandwich Cookies
Brownie Layer:
- 1 stick butter
- 1 1/2 cups sugar
- 1/2 teaspoon salt
- 1 teaspoon vanilla extract
- 3/4 cup cocoa powder
- 3 eggs
- 3/4 cup gluten-free flour
- 1 teaspoon baking powder
- 6 Goodie Girl Chocolate Creme Sandwich Cookies, crushed
- 1/4 cup semi-sweet chocolate chips
- vanilla ice cream (optional)
- chocolate syrup (optional)
- Preheat oven to 350 F. Prepare 9-by-9-inch cake pan with parchment paper.
- To make cookie dough layer: In large bowl, combine softened butter, brown sugar, sugar and vanilla. Mix with handheld mixer until combined and creamy. Add egg and beat until combined.
- In small bowl, combine baking soda, salt and flour. Beat flour mixture gradually into sugar mixture. Once completely combined, fold in chocolate chips. Add cookie dough layer to bottom of prepared pan and spread evenly.
- To make cookie layer: Layer cookies on top of cookie dough layer.
- To make brownie layer: In saucepan, melt butter, sugar and salt until completely combined. Remove from heat and transfer to large bowl. Add vanilla, cocoa and eggs; mix. Slowly add flour and baking powder. Mix until completely combined.
- Pour brownie mixture over cookie layer. Spread evenly.
- Top with crushed cookies and chocolate chips.
- Bake 50 minutes. Let cool completely before removing from pan. Slice and top with vanilla ice cream and chocolate syrup, if desired.
Source: Toufayan

Sunshine Smoothie
It’s that time of year again when nearly everyone wants to be outside all day, every day. These are the times kids have been waiting for all year long.
The sun is shining bright in the sky, the flowers are blooming and the temperature is rising every minute. Spring and summer are typically full of fun, laughter, family and friends – not to mention great recipes everyone can enjoy indoors and outdoors throughout the warmer months.
Try this Sunshine Smoothie for something cool and refreshing during the sunny seasons. This recipe will have nearly everyone feeling reenergized and ready for more warm weather. It’s a perfect afternoon pick-me-up after a long day of yard work, sunbathing or swing-set climbing. It can cool you down and has a fruity flavor that is almost irresistible.
When thinking about recipes to try this spring, consider taking advantage of fresh fruits and vegetables at grocery stores and farmer’s markets. There can be so many wonderful flavors to try. For example, this recipe includes grapefruit (a less commonly used fruit), fresh orange and ripe bananas.
With the heat coming and fresh ingredients available, this smoothie may quickly become one of your family’s new favorites. It’s light, smooth and has that fresh fruit taste you often crave when the sun is blazing.
To make this recipe, blend 2 cups of grape juice, 2 cups of orange juice, two ripe bananas, 1 cup of vanilla yogurt and 1 teaspoon of vanilla extract until the ingredients are smooth. Be sure to serve cold.
It’ll be nearly impossible to resist a sweet, bright and creamy smoothie after a long day of play out in the sun.
Find more seasonal recipes and ideas at Culinary.net.
Watch video to see how to make this recipe!
Sunshine Smoothie
Servings: 2-4
- 2 cups orange juice
- 2 cups grapefruit juice
- 2 bananas, peeled and cut into chunks
- 1 cup vanilla yogurt
- 1 teaspoon vanilla extract
- In blender, blend orange juice, grapefruit juice, banana chunks, yogurt and vanilla extract until smooth. Serve immediately.
Note: If smoothie is too tart, reduce to 1 cup grapefruit juice.

Bacon Banana Bread
(Family Features) Warmer spring weather makes the season a perfect time for families to enjoy brunch together. From classic combinations like bacon and eggs to more extravagant offerings, a brunch spread offers a blank canvas for creativity and opportunities to enjoy your loved ones’ favorite morning noshes.
For your next brunch celebration, whether it’s a special occasion or just an excuse to spend time together, consider adding what may become a new family favorite to the menu. This Bacon Banana Bread combines two morning meal classics in one easy-to-enjoy bite.
Plus, it’s made using Coleman Natural Bacon so you can feel confident you’re feeding your family all-natural pork sourced from American Humane Certified family farmers who raise their animals the way nature intended – 100% crate-free without antibiotics or added hormones. The preparation is simple (just 10 minutes in the kitchen) so you can put this dish together and catch up with loved ones while baking a sweet and savory snack.
For more brunch recipe ideas, visit ColemanNatural.com.
Watch video to see how to make this recipe!

Bacon Banana Bread
Prep time: 10 minutes
Cook time: 70-80 minutes
Servings: 6-8
- Nonstick cooking spray
- 1 1/4 cups all-purpose flour, divided
- 1 teaspoon baking soda
- 1 teaspoon baking powder
- 1 cup sugar
- 3 medium bananas, mashed
- 1/2 cup canola oil
- 2 eggs
- 1 teaspoon vanilla extract
- 8 slices Coleman Natural Bacon, cooked and cut into 1/4-1/2-inch pieces
- Preheat oven to 325 F. Lightly grease 9-by-5-inch loaf pan with nonstick cooking spray.
- In large bowl, combine 1 cup flour, baking soda, baking powder and sugar. In separate bowl, combine mashed bananas, canola oil, eggs and vanilla extract.
- Add banana mixture to dry ingredients, stirring until just combined.
- In small bowl, toss bacon and remaining flour until bacon is lightly coated.
- Fold flour-coated bacon into batter. Pour batter into prepared loaf pan.
- Bake 70-80 minutes, or until toothpick inserted near center comes out clean.
- Cool in pan on wire rack 20 minutes before inverting bread onto wire rack to cool completely.
- Cut and serve.
Source: Coleman Natural Foods

Frothy Banana Shake
Some mornings can be such a drag and make you feel exhausted. On those days, it looks like everyone is moving slow (especially the kids), getting ready seems like a big chore and making a wholesome and hearty breakfast feels nearly impossible.
You look at the clock and minute by minute you’re running even more behind. There is no time for a big breakfast with syrups and jams. You’re in a pinch but you need something fast, nutritious and filling for you and your loved ones.
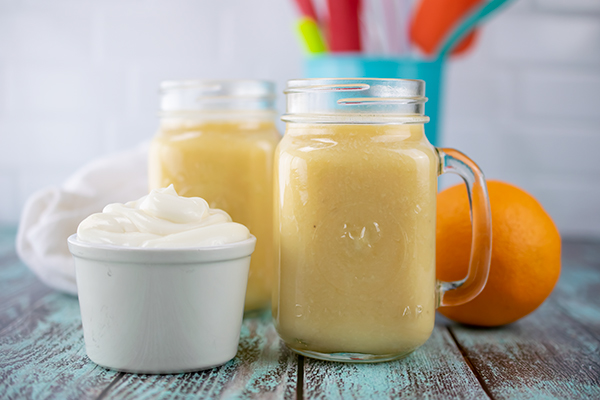
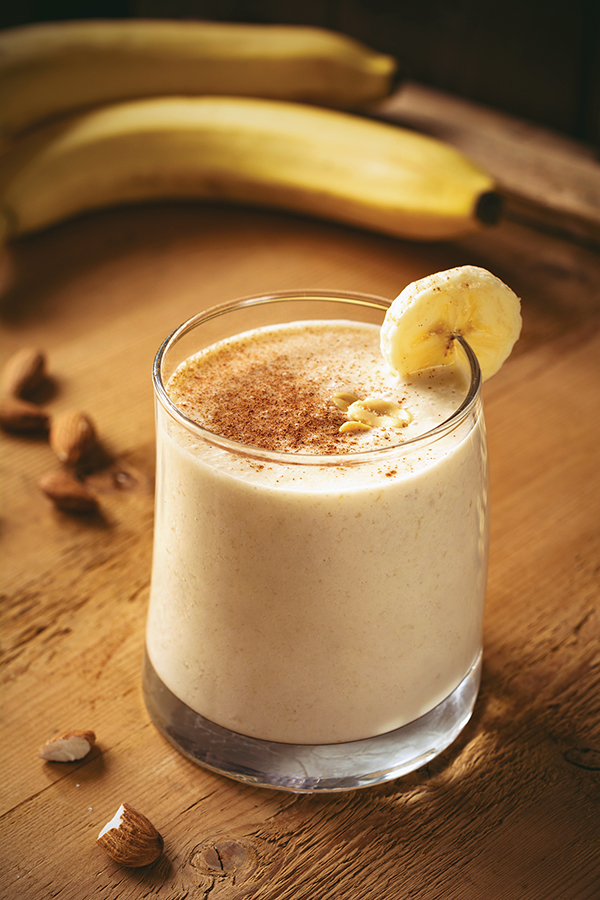
Freshen up your morning with this Frothy Banana Shake, which is a simple and perfect on-the-go breakfast option. It’s healthy with fresh bananas, sweet with a hint of vanilla and frothy with blended dairy products.
To make this shake, add three cups of milk, frozen bananas, vanilla and almond extract to a blender. Blend the ingredients together until smooth.
Pour into your favorite glass or to-go cup, dust with cinnamon and garnish with a banana slice.
This recipe is so simple and can be made in a hurry. Even the little ones can help with pouring the ingredients and pushing a button to blend if you have a little extra time for a lesson in the kitchen.
This is something you can make while on your way out of the door. There is little clean up and it’s something kids enjoy at home or on their way to school.
Find more easy, on-the-go breakfast recipes at Culinary.net.
Watch video to see how to make this recipe!

Frothy Banana Shake
Servings: 2-4
- 3 cups milk
- 2 frozen bananas
- 1 teaspoon vanilla extract
- 1/2 teaspoon almond extract
- cinnamon, for garnish
- banana slices, for garnish
- In blender, blend milk, frozen bananas, vanilla extract and almond extract until smooth.
- Pour into glasses, dust with cinnamon and garnish with banana slices.

Kitchen Staples Helpful for Heart Health
(Family Features) Taking care of your heart health requires a commitment to the right routines and smart decisions, such as adopting a heart healthy diet. Foods you might already have in your kitchen can offer powerful vitamins, minerals and beneficial plant compounds that may help contribute to heart health.
Decades of research shows that each 8-ounce serving of 100% orange juice, such as Florida Orange Juice, is packed with key nutrients and valuable plant compounds, which may play a beneficial role in helping lower blood pressure and other risk factors for heart disease. Consider these additional heart health benefits of 100% orange juice:
- While many people associate vitamin C with its ability to help promote a healthy immune system, it’s also been shown to support cardiovascular health. Orange juice is an excellent source of vitamin C providing more than 100% of the recommended daily value in an 8-ounce glass.
- In several research studies, higher intakes of the flavonoids typically found in citrus were associated with reduced risk for cardiovascular disease and stroke.
- In one 8-ounce serving, 100% orange juice provides 10% of the daily value of potassium, which is an electrolyte that helps maintain fluid balance affecting blood pressure. Diets containing foods that are good sources of potassium and low in sodium may reduce the risk of high blood pressure and stroke.
- Some studies found folate and vitamin B6, both water-soluble vitamins, may help protect against heart disease by lowering homocysteine levels in the blood, an amino acid believed to cause damage to the arteries and increase the risk of blood clots when elevated. One 8-ounce glass of orange juice contains 15% of the daily value of folate and 8% of the daily value of vitamin B6.
“Drinking Florida Orange Juice is not only delicious, it delivers a powerful combination of vitamins, minerals, antioxidants and beneficial plant compounds,” said Dr. Rosa Walsh, director of scientific research at the Florida Department of Citrus. “From helping to reduce hypertension to fighting inflammation, it is an excellent choice to include in a heart-healthy diet.”
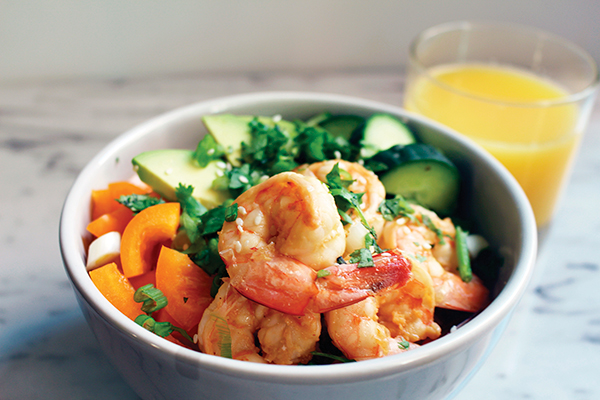
You can add the heart health benefits of 100% orange juice to your diet with the powerfully nutritious punch of Orange Juice Shrimp Quinoa Bowls, the perfect mixture of textures with tangy, spicy and sweet flavors. Or start the day strong with a Florida Sunshine Grapefruit Smoothie for a breakfast beverage that requires just a few minutes of prep and blending.
Find more heart healthy inspiration at floridacitrus.org.
Orange Juice Shrimp Quinoa Bowls
Servings: 2
- 2 cups water
- 1 cup quinoa
- 1 cup Florida Orange Juice
- 1 tablespoon hot sauce
- 1 tablespoon honey
- 1 tablespoon soy sauce
- 6 tablespoons vegetable oil, divided
- 2 tablespoons lime juice
- 1 tablespoon white miso
- 1 1/2 pounds shrimp, peeled and deveined
- 1/4 teaspoon kosher salt
- 1/8 teaspoon ground black pepper
- 1 bell pepper, diced
- 1 English cucumber, sliced into half moons
- 3 scallions, sliced
- 1 avocado, sliced
- 1 teaspoon sesame seeds
- 2 tablespoons cilantro, chopped
- In pot, bring water to boil.
- Add quinoa, reduce to simmer, cover and cook 15 minutes. Fluff with fork.
- In bowl, whisk orange juice, hot sauce, honey, soy sauce, 4 tablespoons vegetable oil, lime juice and miso. Remove half and set aside.
- Add shrimp to remaining half and marinate 15 minutes.
- Heat large skillet over medium-high heat and add remaining oil.
- Season shrimp with salt and pepper then add shrimp to wok and saute, cooking approximately 2 minutes per side until pink and cooked through.
- Place 1/2 cup quinoa in bowl and top with bell pepper, cucumber, scallions, avocado and shrimp.
- Drizzle with dressing that was set aside and garnish with sesame seeds and cilantro.
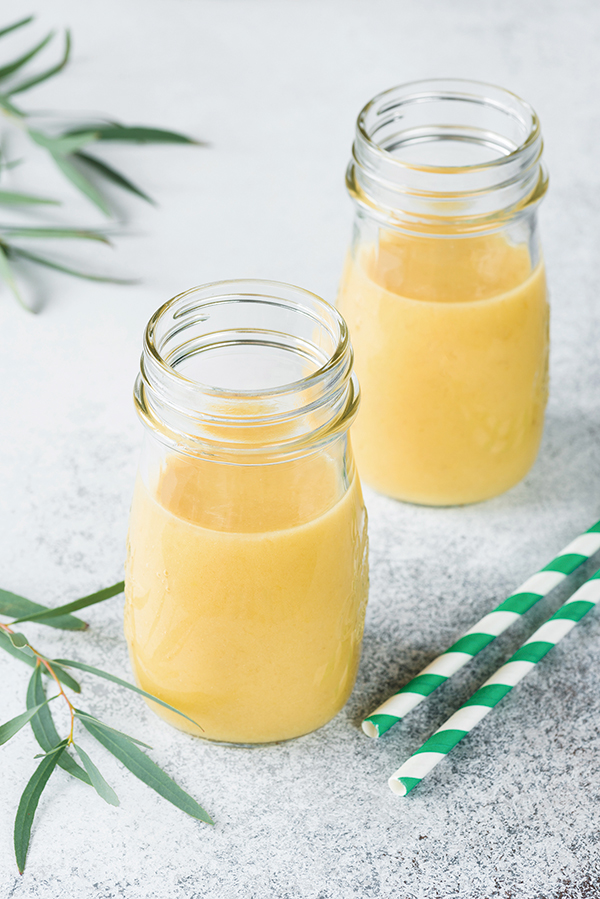
Florida Sunshine Grapefruit Smoothie
Servings: 1
- 1 cup Florida Orange Juice
- 1/2 cup Florida Grapefruit Juice
- 1 ripe banana
- 1/2 cup low-fat vanilla yogurt
- 1/2 teaspoon vanilla extract
- In blender, blend orange juice, grapefruit juice, banana, yogurt and vanilla extract until smooth. Serve immediately.
Photo courtesy of Getty Images (smoothie)
Source: Florida Department of Citrus

Better-for-You Family Breakfasts
(Family Features) Making sure your family members get a nutritious start to the day is an important job, and by focusing on a few wholesome ingredients, such as real milk, simple and healthful dishes can quickly become family favorites.
Each day should begin with a balanced breakfast, so when mornings get hectic and meal prepping isn’t possible, you can still start strong with a convenient, iconic pairing – cereal and real milk. Enjoyable on their own, real milk and General Mills Big G Cereals, like Honey Nut Cheerios, are even better together, delivering essential nutrients to help fuel the morning with the taste kids – and adults – can call a daily favorite.
In fact, dairy milk is the top food source of calcium, vitamin D and potassium, and cereal is the top food source of fiber – which are four nutrients of public health concern identified by the Dietary Guidelines for Americans. This nutritious breakfast combination costs only around 50 cents per serving – so parents can give their children nutrients they need without breaking the bank.
Another delicious breakfast option is a Cheesy Bacon-Broccoli Quiche, which offers 11 grams of protein per serving while introducing picky eaters to veggies in an appetizing way. If a busy schedule calls for an on-the-go option, real milk provides essential nutrients and can be blended into a Banana Breakfast Shake for a tasty and portable way to start the day.
About 90% of the U.S. population does not meet dairy recommendations outlined in the Dietary Guidelines for Americans. Most individuals would benefit by increasing intake of nutrient-dense, calcium-rich dairy milk. One 8-ounce glass of dairy milk contains almost as much calcium as six cups of kale and the same amount of protein found in 1 1/2 medium eggs, making real milk an easy and delicious way for your little ones to get important nutrients they need.
Visit milklife.com for more health-focused, simple and delicious family meal inspiration.

Cheesy Bacon-Broccoli Quiche
Servings: 6
- 1 package (10 ounces) frozen broccoli with cheese sauce
- 3 slices turkey bacon, chopped
- 1/2 cup white mushrooms, sliced
- 1/2 cup green onions, chopped
- 1 frozen prepared pie shell (9 inches)
- 4 eggs
- 1 cup fat free or low fat dairy milk
- 1/2 cup cheddar cheese, shredded
- Preheat oven to 350 F.
- In microwave, prepare broccoli and cheese sauce according to package directions; set aside to cool slightly.
- In nonstick skillet over medium heat, cook bacon, mushrooms and green onions until bacon is cooked through and mushrooms are tender. Scatter bacon mixture in bottom of pie shell; place pie shell on baking sheet.
- In bowl, whisk eggs and dairy milk then stir in broccoli and cheese sauce along with cheddar cheese. Pour custard into pie shell and bake 35-45 minutes, or until center is just set and knife blade comes out clean when inserted into center of quiche.
- Let cool at least 10 minutes before cutting into wedges and serving.
Nutritional information per serving: 280 calories; 16 g fat; 6 g saturated fat; 160 mg cholesterol; 11 g protein; 22 g carbohydrates; 2 g fiber; 510 mg sodium; 150 mg calcium. Nutrition figures based on using fat free milk.
Banana Breakfast Shake
Servings: 2 (6 ounces milk per serving)
- 1 1/2 cups fat free or low fat dairy milk
- 1 frozen medium banana, peeled and sliced
- 1/2 teaspoon vanilla extract (optional)
- 1/4 teaspoon almond extract (optional)
- cinnamon, for garnish (optional)
- In blender container, combine dairy milk, banana, vanilla extract and almond extract. Blend until smooth, about 20 seconds.
- Pour into two glasses and garnish with sprinkle of ground cinnamon, if desired.
Nutritional information per serving: 120 calories; 0 g fat; 0 g saturated fat; 0 mg cholesterol; 7 g protein; 23 g carbohydrates; 2 g fiber; 100 mg sodium; 190 mg calcium. Nutrition figures based on using fat free milk.
Photos courtesy of Getty Images
Source: MilkPEP

Easter Bunny Butt Cake
Warmer days at the start of spring mean Easter is almost here, and the big bunny himself will be hopping around in no time delivering goodies.
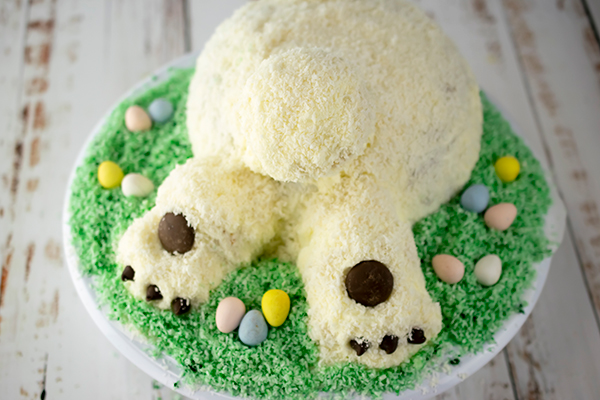
This Easter, celebrate with your loved ones with a delicious and colorful Easter Bunny Butt Cake. It can bring smiles and laughter while putting everyone in a light, joyful mood.
This cake is fun and bright with a fluffy, moist interior. Complete with chocolate candy eggs, shredded coconut and chocolate chips for little bunny toes, this recipe goes all out to paint a picture of the Easter bunny.
Start by combining whole eggs, egg whites, cream of coconut, crushed pineapple, coconut extract and vanilla extract.
In a food processor, pulse flour, sugar, baking powder and salt. Then add butter gradually, 6 tablespoons at a time, for a total of 12 tablespoons.
Add dry mixture to a mixing bowl then add egg mixture half at a time. Beat until cake batter is formed.
Fill muffin tins 2/3 full and bake 18-20 minutes. The remaining batter goes into an oven-safe bowl to bake for 1 hour, 40 minutes.
The buttercream frosting is made with powdered sugar, butter, milk, vanilla extract and coconut extract.
Assemble the cake using pretzel sticks to blend it together to make the bunny butt shape. Frost the cake and spread shredded coconut over it to create a textured appearance. Stick chocolate chips on the bunny’s feet to create toes. Place your favorite Easter or bunny candies around the cake for extra garnish.
This cake is worth every step. It’s delicious and as cute as can be, plus it’s perfect for dessert after a big Easter dinner.
Find more creative and scrumptious holiday recipes at Culinary.net.
Watch video to see how to make this recipe!
Easter Bunny Butt Cake
Servings: 10-12
- Nonstick cooking spray
- 2 eggs, plus 4 egg whites, at room temperature
- 3/4 cup cream of coconut
- 1/2 cup crushed pineapple, drained
- 2 teaspoons coconut extract
- 1 teaspoon vanilla extract
- 2 1/4 cups flour
- 1 cup sugar
- 2 teaspoons baking powder
- 1/2 teaspoon salt
- 12 tablespoons unsalted butter, at room temperature
Buttercream Frosting:
- 3 cups powdered sugar
- 2 sticks unsalted butter, softened
- 3 tablespoons milk
- 1 teaspoon vanilla extract
- 1/2 teaspoon coconut extract
- 4 thin pretzel sticks
- 1 bag (10 ounces) sweetened shredded coconut
- 8 drops green food coloring
- 2 large round chocolate candy melts
- 6 chocolate chips
- mini candy-coated chocolate eggs, for garnish
- Heat oven to 325 F.
- Line muffin pan with four paper liners. Spray oven-safe glass bowl with nonstick cooking spray.
- In large bowl, whisk eggs, egg whites, cream of coconut, pineapple, coconut extract and vanilla extract until combined.
- In food processor, pulse flour, sugar, baking powder and salt until combined. Add 6 tablespoons butter. Pulse until combined. Add remaining butter. Pulse until coarse meal forms.
- In large mixing bowl, add coarse flour butter meal. Add half of egg mixture. Beat 1-2 minutes. Add remaining egg mixture; beat until combined.
- Fill each muffin cup 2/3 full. Bake 18-20 minutes, or until done. Cool completely.
- Pour remaining batter into prepared oven-safe bowl. Bake 1 hour, 40 minutes, or until done. Cool completely.
- To make buttercream frosting: In large bowl, add powdered sugar and butter; beat until fluffy. Add milk, vanilla extract and coconut extract; beat until creamy.
- Turn bowl upside-down on cake stand until cake removes from bowl. If cake needs leveled, turn cake over and trim to flatten. Frost cake.
- Remove wrappers from cupcakes. Using two pretzel sticks, press into base of cupcakes
- and anchor to bottom rim of bowl cake to create bunny feet. Frost feet.
- Take third cupcake and cut muffin top off. Cut muffin top in half. Using one pretzel stick, anchor one muffin top half at bottom of full cupcake to form toes. Repeat with second muffin top half for other foot. Frost toes.
- Attach final cupcake with remaining pretzel stick to butt area of cake to make tail. Frost tail.
- Apply 1 1/2 cups shredded coconut all over cake. Press chocolate candy melts into bottoms of bunny feet to resemble foot pads. Add chocolate chips to resemble pads for toes.
- Place remaining coconut in plastic bag. Add green food coloring. Toss in bag until coconut is colored. Spread around base of cake for grass. Decorate grass with chocolate eggs.
Tips: Spoon flour into dry measuring cup and level off excess. Scooping directly from bag compacts flour, resulting in dry baked goods. Add 1 tablespoon additional milk if frosting is too stiff. Keep adding until desired consistency.