
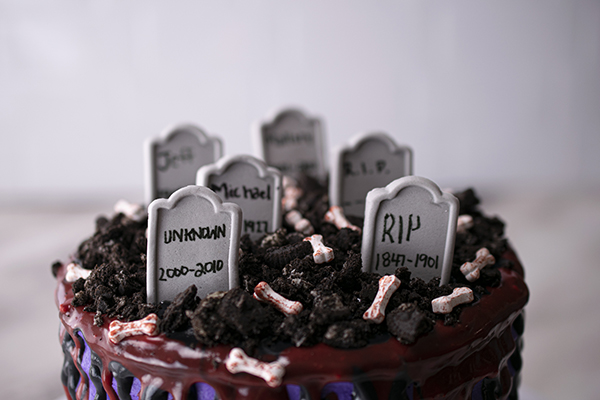
Ghostly Graveyard Cake
(Family Features) For a frighteningly fun time in the kitchen this Halloween, gather your family around the cauldron to create a sweet, spooky dessert. Tricks and treats may provide thrills, but a homemade concoction can be the star of your hauntingly happy evening.
This Ghostly Graveyard Cake takes imagination and creativity from everyone with tombstones, skulls and spooky icing daring all to try a bite. With looks this chilling, it’s a perfect treat to enjoy while watching everyone’s favorite scary movie.
Find more deliciously devious desserts at Culinary.net.
Watch video to see how to make this recipe!

Ghostly Graveyard Cake
- 1 box chocolate cake mix
- 10 chocolate creme cookies
- 1 cup black melting chips
- 1 cup red melting chips
- 1 cup heavy whipping cream
- 3 cans buttercream icing
- 1 purple food coloring
- 1 black food coloring
- skull sprinkles
- tombstones and bones candies
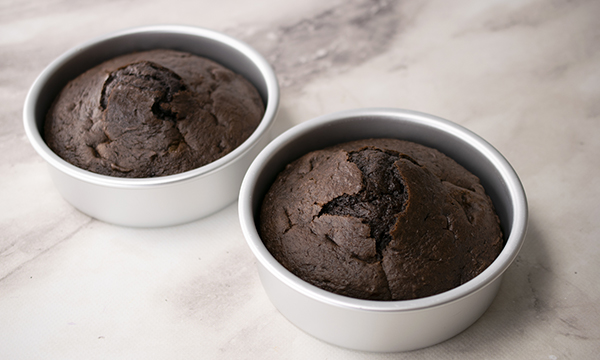
1. Prepare cake mix according to package instructions in three 6-inch baking pans. Once baked, allow to completely cool outside of pans.
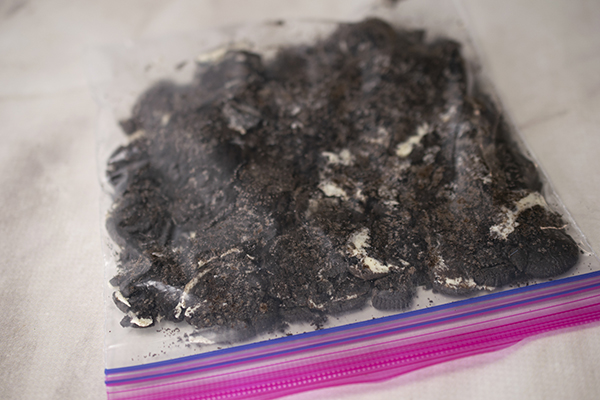
2. In zip-top bag, using rolling pin, crush chocolate creme cookies; set aside.
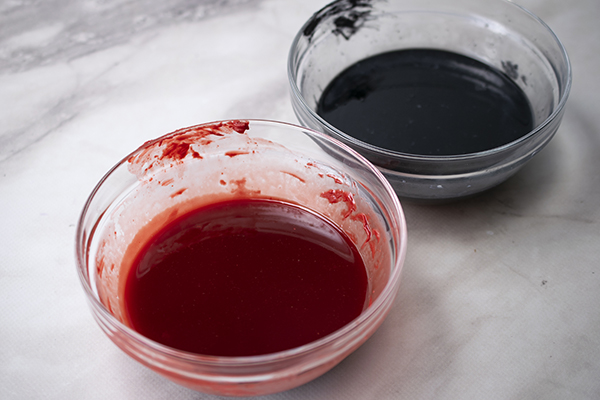
3. In separate small bowls, add black melting chips and red melting chips.
4. In microwave, heat heavy whipping cream 1 1/2 minutes. Pour half the mixture into one bowl of chips and other half into other bowl of chips. Stir until chips are completely melted; set aside.
5. After cakes cool, on cake board, add small amount of buttercream icing so cake sticks. Using bread knife, level cakes.
6. Place one cake on cake board and add thin layer of icing on top. Place second layer of cake on top and add thin layer of icing on top. Place final layer of cake on top and add thin layer of icing on top. Add thin layer of icing to entire cake. Freeze 15 minutes.
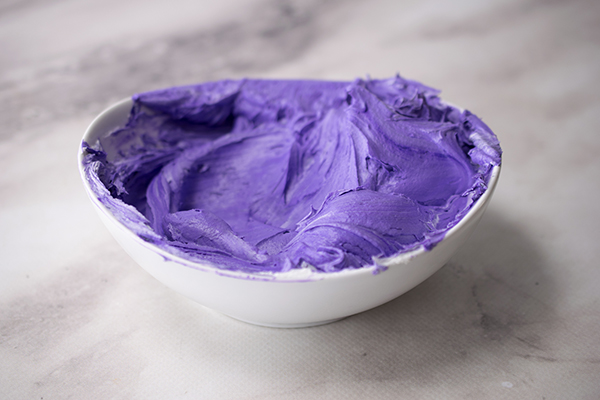
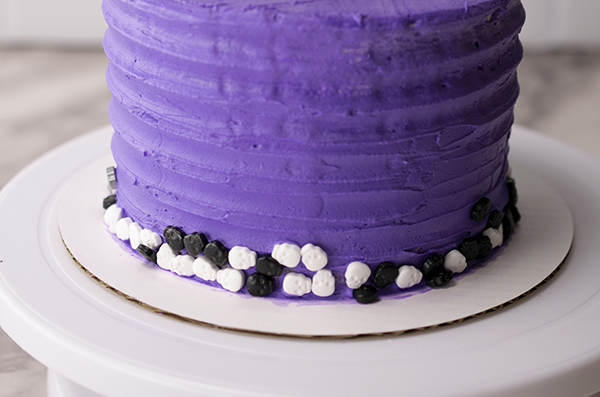
7. In small bowl, mix two parts purple food coloring to one part black food coloring. Ice cake with deep purple icing. Using grooved scraper, scrape along sides of cake. Using angled spatula, smooth top of cake.
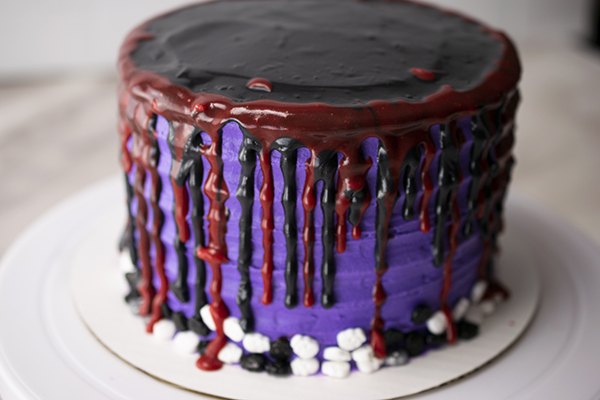
8. Add skull sprinkles around edges of cake. Using piping bag with small opening at tip, drip black drip mixture around top edges of cake. Repeat using red drip mixture.
9. Add chocolate creme cookie crumbs to top of cake. Add tombstones and bone sprinkles to top of cake.

Holiday Entertaining is Back with Sweet, Savory and Oh So Cheesy Ideas
Real California Milk helps impress guests with the California Cheese Centerpiece and Cookie Exchange Board
(Family Features) This holiday season, entertaining is back on the table and that means endless opportunities to showcase Instagram-worthy ideas. For those looking to impress friends and family, Real California Milk has two unique culinary ideas to take holiday traditions to the next level: The Cheese Centerpiece and Cookie Exchange Board. From fresh food as bountiful décor to camera-ready cookie presentations, incorporating California dairy into your entertaining is a winning holiday strategy.
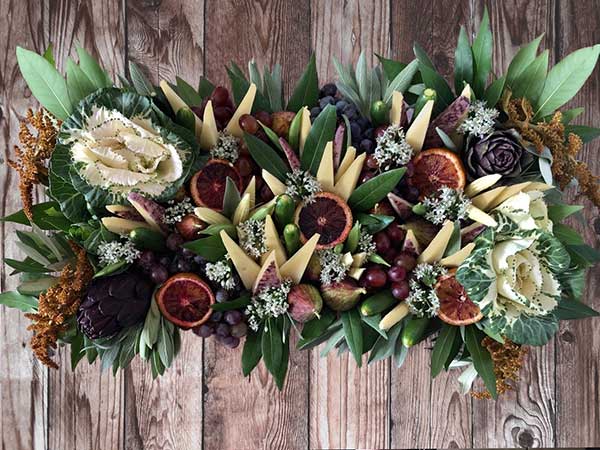
California Cheese Centerpiece
The mission? Create a holiday centerpiece but make it delicious. Real California Milk partner Jessica Lawrenz, Founder of Monger, Mold and Milk, took the challenge with the California Cheese Centerpiece, the ultimate in edible entertaining with a beautiful display of Real California Cheeses, salami, fruits and vegetables arranged with fragrant herbal garnishes in a display sure to impress family and friends. As a bonus, it creates less waste than a stand-alone floral bouquet (and you’ll have less to clean up!).
Find additional cheese displays and holiday recipes at realcaliforniamilk.com.
INGREDIENTS:
Variety of firm to medium (semi-firm) Real California Cheeses (find them here: https://www.realcaliforniamilk.com/cheese-makers)
Shown in arrangement:
- Real California Dry Jack cheese wedges
- Real California Wine-soaked Cheddar wedges
- Real California Triple Cream cheese wedges
- Salumi or salami, made into roses
Fresh fruits and vegetables:
- Mini clementines or kumquats
- Grapes or currants (both shown)
- Fresh figs
- Gooseberries
- Cucamelons or mini cucumbers
- Cherry tomatoes (tiger stripe tomatoes shown but any small tomato works)
Garnishes:
- Bay leaf stems
- Olive leaf stems
- Rosemary branches
- Lavender stems
- Sage bunches
- Chive or garlic flowers or any edible flower with a stem
Tools and Materials:
- Circular tray or plate
- Craft or flora foam (half sphere shape that is at least 1-inch smaller in diameter than your tray)
- Double-sided tape
- Plastic wrap
- Toothpicks, U-shape bamboo toothpicks (optional)
- Cookie cutter shapes (optional)
DIRECTIONS:
- Cover foam in plastic wrap to protect food from making contact with the foam.
- Use double-sided tape to secure the foam to the tray.
- Now you can start assembling the centerpiece. Start from the bottom and work your way up to the top of the sphere.
- Use the bulk of your leafy garnishment (bay leaf stems, olive leaf stems, sage bunches) on the bottom layer to create a base and coverage by poking the stems into the foam. If needed you can trim the bottom of the stem in a diagonal direction to create a more pokey end OR use a toothpick to pierce a hole in the place where you want to insert stems.
- For best visual appeal, fruits like grapes and currants should be arranged to kind of flow over the edge of the tray near the bottom as well. PRO TIP: Use “U” shaped bamboo toothpicks to secure the stems of the hanging fruits into the foam.
- From here use toothpicks to secure cheese wedges, salumi roses, fruits and vegetables into the foam. Cut shorter, triangular pieces of cheese (as opposed to longer triangular pieces used for a long/rectangular centerpiece). Use any tall wedges near the bottom where they will be easy to grab but not sticking out too far if placed near the top. You can use cookie cutter shapes as well for the cheeses, if desired.
- Finally, take any of the smaller garnish pieces you have (lavender, chive flowers, rosemary ends, loose leaves) to fill in the spaces between all the items.

Holiday Cookie Exchange Board
If a cookie exchange is on the docket for this year’s holiday or you’re simply looking to upgrade your dessert table, take some tips from this stunning cookie exchange presentation. Mix and match Real California Milk cookie recipes to create a mouthwatering arrangement and decorate with mini candy canes, holiday lollipops, various holiday décor and lights. Add napkins, cookie bags for take-away, and recipe cards for sharing, and let your guests go to town.
- Hot cocoa or coffee
- Milk shooters
- Coconut Walnut Cake Bars
- Chocolate Mint Cookies
- Stroopwafel Cookies
- Mini Gingerbread Cupcakes
- Madeleines
Dipped in melted dark chocolate and rolled in crushed peppermint candies or Holiday sprinkles
Leave out ice cream, exchange holiday sprinkles for rainbow sprinkles, and dip in melted white chocolate with color for extra festivity
California is the nation’s leading milk producer and is responsible for producing more butter, ice cream and nonfat dry milk than any other state. The state is the second-largest producer of cheese and yogurt. California milk and dairy foods can be identified by the Real California Milk seal, which certifies they are made exclusively with milk from the state’s dairy farm families.
About Real California Milk/California Milk Advisory Board
The California Milk Advisory Board (CMAB), an instrumentality of the California Department of Food and Agriculture, is funded by the state’s dairy farm families who lead the nation in sustainable dairy farming practices. With a vision to nourish the world with the wholesome goodness of Real California Milk, the CMAB’s programs focus on increasing demand for California’s sustainable dairy products in the state, across the U.S. and around the world through advertising, public relations, research, and retail and foodservice promotional programs. For more information and to connect with the CMAB, visit RealCaliforniaMilk.com, Facebook, YouTube, Twitter, Instagram and Pinterest.
Source: Real California Milk

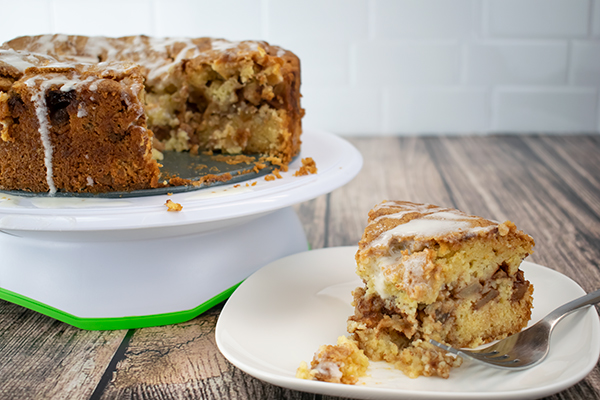
Apple Cake
(Culinary.net) It’s almost impossible to beat the combination of sweet fruit and decadent desserts. This delicious recipe for Apple Cake highlights the crisp fruit but also the cinnamon sugar-flavored pastry. It’s luscious but doesn’t overdo it on the sweet meter with just the right mix of flavors.
The cake is baked with the apples inside as the middle layer, which creates a moist, finished product. The apples are gooey, baked in a cinnamon sugar coating, making them a sweet and light complement to the perfectly baked cake.
Start by mixing the apples with cinnamon and, of course, sugar. Set the mixture aside. Now it’s time for cake. First, mix all the dry ingredients together then mix in the wet ingredients.
The secret to this cake is creating layers that will hold up. Pour half of the batter into a round springform pan first then add apple mixture and top it all with the rest of the cake batter.
Finally, for a little extra sweetness, sprinkle 1 tablespoon of sugar over the top of the cake before baking.
Once baked, this cake can be drizzled with icing (if you’d like) to make it an even more delightful treat to satisfy any sweet tooth.
This cake is perfect for any get-together, families looking for an after-dinner indulgence or anyone who just loves fruity desserts. It’s delectable enough for fancy occasions, but also simple enough to make at home for just a couple.
With fluffy cake layers and a soft apple center, this cake does it all. Not to mention the drip of icing at the end that all but guarantees everyone will be asking for seconds.
Find more recipes and sweet desserts at Culinary.net.
Watch video to see how to make this recipe!
Apple Cake
Servings: 8-16
- 3 cups Honeycrisp apples, peeled, cored and diced
- 3 teaspoons cinnamon
- 6 tablespoons, plus 2 cups, sugar, divided
- 3 cups flour
- 3 teaspoons baking powder
- 1 teaspoon salt
- 1 cup oil
- 4 eggs, beaten
- 1/4 cup orange juice
- 1 teaspoon vanilla
- icing (optional)
- Heat oven to 350 F.
- In medium bowl, mix apples, cinnamon and 5 tablespoons sugar until combined. Set aside.
- In large bowl, mix flour, 2 cups sugar, baking powder and salt until combined. Form well in middle of mixture. Add oil, eggs, orange juice and vanilla; mix until blended.
- In springform pan, pour half of batter. Add apple mixture. Pour remaining batter over apple mixture. Sprinkle remaining sugar over batter.
- Bake 40-50 minutes, or until top is golden brown and tester comes out clean and dry.
- Drizzle with icing, if desired.

Blueberry Cake Donuts
(Culinary.net) From the first ring of the alarm to tying shoes and heading out the door, busy mornings can be stressful for the entire family. While many shortcuts exist to make the start to your day easier, one simple solution is to have breakfast ready to eat on the go.
Handheld foods make it easier to enjoy morning meals while at the office or in the classroom. These Blueberry Cake Donuts provide a tasty way to add sweetness to your morning as a convenient breakfast option for starting the day strong. Just take a few minutes over the weekend to whip up the batter and bake before adding a sweet glaze to take some of the stress out of the week.
Plus, because they’re a kid favorite, you won’t have to convince your little ones it’s important to eat breakfast before starting a full day of learning at home or in the classroom.
Find more breakfast recipes perfect for busy, on-the-go mornings at Culinary.net.
Watch video to see how to make this recipe!

Blueberry Cake Donuts
- 1 cup cake flour
- 2 cups all-purpose flour
- 1 teaspoon baking soda
- 2 teaspoons baking powder
- 1/3 cup butter, softened
- 1 cup sugar
- 1/4 teaspoon salt, divided
- 2 teaspoons vanilla extract, divided
- 2 eggs, plus 1 egg yolk
- 1 cup buttermilk
- 2 cups blueberries
- 2-4 cups powdered sugar
- 1/2 cup milk
- Heat oven to 350 F.
- In large bowl, whisk cake flour, all-purpose flour, baking soda and baking powder.
- In large bowl or stand mixer bowl, beat butter, sugar, 1/8 teaspoon salt and 1 teaspoon vanilla until fluffy. Add eggs and yolk; mix until creamy. Alternate adding buttermilk and flour mixture until blended.
- Remove bowl from stand mixer, add blueberries and stir until combined.
- Fill piping bag with batter. Fill mini donut pan cavities about halfway.
- Bake 8-10 minutes. Cool completely.
- In medium bowl, whisk 1 cup powdered sugar, milk, remaining salt and remaining vanilla extract. Add additional 1-3 cups powdered sugar until mixture reaches desired thickness.
- Dip cooled donuts in glaze and place on wired rack to drip off excess.
Substitution: If cake flour isn’t available, measure 1 cup all-purpose flour and remove 2 tablespoons. Add 2 tablespoons cornstarch.

Raspberry Goodness from Morning to Night

(Family Features) From breakfasts to salads, desserts and beyond, fruit is unique in its ability to add both flavor and nutrition to family-favorite dishes. As you look for ways to incorporate produce in your family’s recipes, consider an option with a sweet-tart flavor and eye-catching color: red raspberries.
In the cool, marine climate of the Pacific Northwest, Washington state produces approximately 90% of the nation’s frozen red raspberry crop. Picked at the peak of ripeness and frozen within hours of being harvested, flavor and nutrition are locked in to offer convenience and consistent quality out of the freezer section at most grocery stores, perfect for better-for-you desserts like Pecan-Topped Raspberry Cake and Red Raspberry Whole-Fruit Sorbet.
With a distinct flavor that works well in dishes from sweet to savory, red raspberries can add bright flavor and balance to recipes ranging from salads like Spinach and Frisee Salad with Raspberry Pickled Onions and Raspberry Vinaigrette to a morning meal such as this Raspberry Coconut Smoothie Bowl. Plus, 1 cup of the flavorful red fruit includes just 80 calories and contains 6 grams of fiber while providing 28% of the recommended daily allowance of vitamin C, a powerful antioxidant.
Find more recipes at redrazz.org
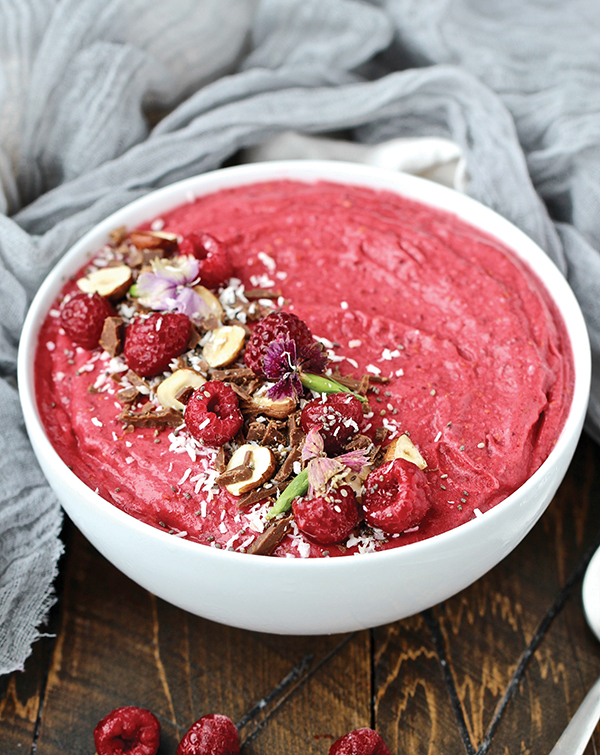
Raspberry Coconut Smoothie Bowl
Servings: 2
- 2 cups frozen raspberries
- 1 large frozen banana
- 2/3 cup light coconut milk
- 1 tablespoon chia seeds
Toppings (optional):
- shredded coconut
- shaved dark chocolate
- hazelnuts
- chia seeds
- edible flowers
- In blender, puree raspberries, banana, coconut milk and chia seeds until smooth. Mixture will be thick; ingredients may need pushed down to get blender going. If necessary, add more coconut milk.
- Pour into two bowls. Garnish each with shredded coconut, shaved dark chocolate, hazelnuts, chia seeds and edible flowers, if desired.
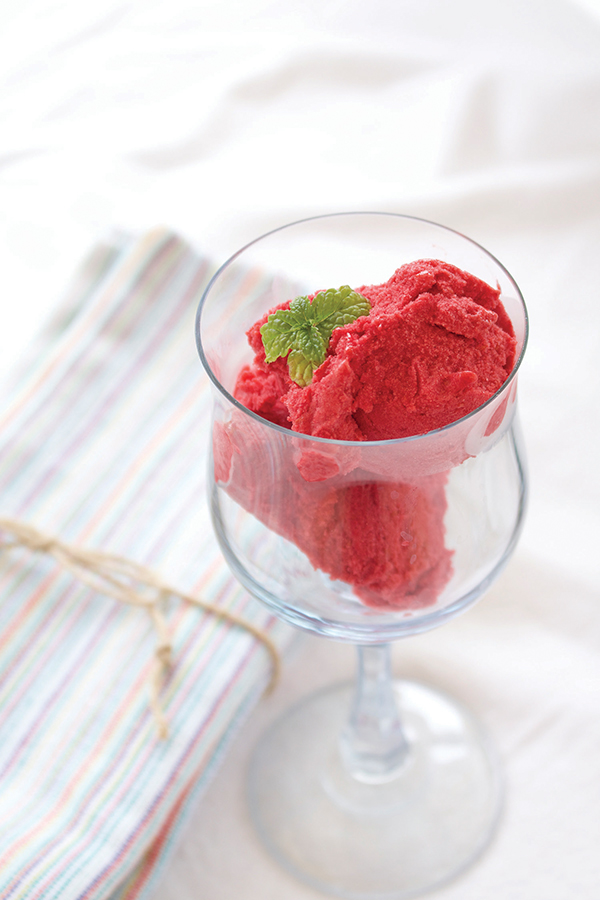
Red Raspberry Whole-Fruit Sorbet
Servings: 8 (1/2 cup each)
- 4 tablespoons powdered sugar
- 18 ounces frozen raspberries
- 1 egg white, pasteurized
- In blender, blend sugar and frozen raspberries until smooth.
- Add egg white and blend 30 seconds.
- Serve immediately or place in container, cover and store in freezer.

Spinach and Frisee Salad with Raspberry Pickled Onions and Raspberry Vinaigrette
Servings: 4
Raspberry Vinegar:
- 1 cup frozen raspberries
- 2 cups vinegar
Raspberry Pickled Onions:
- 1/2 cup Raspberry Vinegar
- 1 teaspoon olive oil
- 2 tablespoons sugar
- 2 teaspoons kosher salt
- 1 pound sweet onions, peeled and julienned
- 1 cup frozen raspberries, partially thawed
Raspberry Vinaigrette:
- 1 cup Raspberry Vinegar
- 1 teaspoon fresh shallot, peeled and minced
- 2 teaspoons Dijon mustard
- 1/2 tablespoon honey
- 1/2 teaspoon kosher salt
- 3/4 cup olive oil
Spinach and Frisee Salad:
- 8 ounces baby spinach, cleaned and dried
- 8 ounces frisee lettuce, cleaned, dried and torn
- 2 ounces Raspberry Vinaigrette
- 6 ounces Raspberry Pickled Onions
- 2 ounces feta cheese, crumbled
- 2 ounces almonds, slivered and toasted
- To make Raspberry Vinegar: In clean glass container, combine frozen raspberries and vinegar; cover tightly. Refrigerate 3-7 days prior to use.
- Pour vinegar through fine strainer or cheesecloth-lined strainer into clean glass container. Cover container tightly and store in refrigerator. Discard raspberries.
- To make Raspberry Pickled Onions: In medium, non-reactive container, combine Raspberry Vinegar, oil, sugar and salt. Stir to dissolve sugar. Add onions and raspberries. Toss well to blend and coat onions.
- To make Raspberry Vinaigrette: In blender, combine Raspberry Vinegar, shallot, Dijon mustard, honey and salt. With motor running, slowly add oil in steady stream. Reserve remaining Raspberry Vinegar.
- Once blended, pour Raspberry Vinaigrette into clean, non-reactive container; cover and reserve in refrigerator until ready to use.
- To make Spinach and Frisee Salad: In medium mixing bowl, combine spinach and lettuce. Add Raspberry Vinaigrette and toss well to coat.
- Plate 4 ounces mixed greens.
- Top mixed greens with 1 1/2 ounces Raspberry Pickled Onions, 1/2 ounce feta cheese crumbles and 1/2 ounce toasted almonds. Repeat with remaining greens, Raspberry Pickled Onions, feta cheese crumbles and toasted almonds.
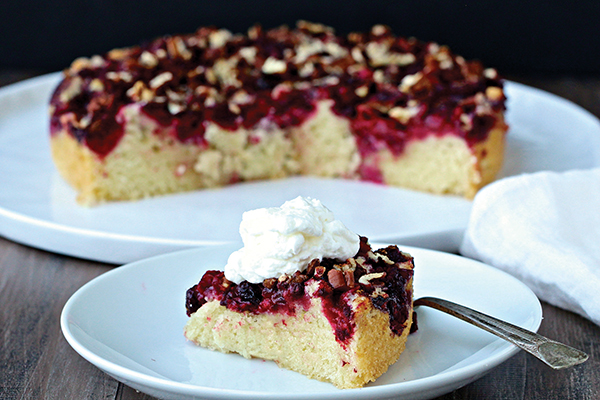
Pecan-Topped Raspberry Cake
Servings: 8
- 3/4 cup granulated sugar, plus 1 tablespoon, divided
- 1/2 cup unsalted butter, softened
- 2 eggs
- 1 cup all-purpose flour, sifted
- 1 teaspoon baking powder
- 1 teaspoon vanilla
- 1 bag (12 ounces) frozen raspberries
- 1/2 cup chopped pecans
- 1 tablespoon lemon juice
- 1 teaspoon cinnamon
- whipped cream
- Heat oven to 350 F.
- In bowl, cream 3/4 cup sugar and butter. Add eggs one at a time and continue beating until well incorporated. Add flour, baking powder and vanilla; beat well.
- Pour batter evenly into 9- or 10-inch prepared pan.
- Place frozen raspberries on top of batter. Sprinkle with pecans, remaining sugar, lemon juice and cinnamon.
- Bake about 1 hour. Remove from oven and let cool.
- Serve with whipped cream.

Eeek, Eat and Be Scary
(Family Features) Brew up a witch’s cauldron of fun this Halloween with special spooky treats. The Haunted House Cake looks almost too spooky to eat, but this masterpiece will disappear as if by magic. Invite guests to tread through the graveyard of creative chocolatey treats you’ve conjured up with some of your favorite candies.

Haunted House Cake
Prep time: 20 minutes
Decoration time: 40 minutes
Makes: 1 cake
2 cans (16 ounces each) vanilla frosting
orange food coloring
2 frozen pound cakes (16 ounces each), thawed
1 box thin chocolate wafer cookies
1 tube (.68 ounces) black decorating gel
1 bag Twix Fun Size Bars
1 bag M&M’S Milk Chocolate Candies Pumpkin Patch Mix
1 bag M&M’S Peanut Chocolate Candies Pumpkin Patch Mix
In bowl, tint frosting orange using food coloring; set aside.
Spread 1/2 cup frosting on bottom of both pound cakes; press together. Stand cakes vertically on serving plate.
Create pitch of roof by trimming top of one cake at slight angle. Trim other cake at steeper angle to make roof look tipsy.
Completely cover cake with remaining frosting. For roof tiles, break chocolate wafers in half and arrange, overlapping slightly.
Pipe black decorating gel for windows. Add candy bars for door and chimney. Use broken wafer cookies for shutters. Use chocolate candies to outline top of roof and sides of house.
In food processor, grind remaining cookies along with a few candy bars. Spread mixture around base of house for “dirt” and scatter chocolate candies on top.

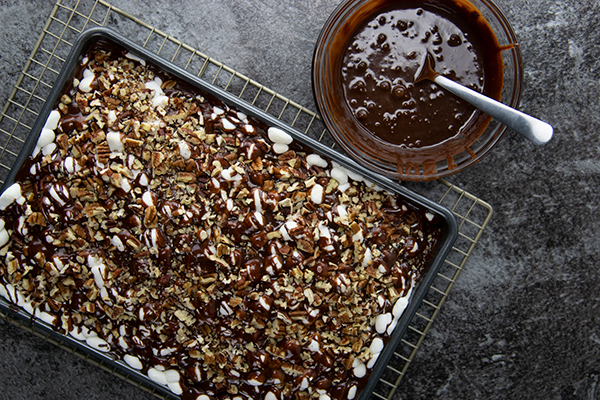
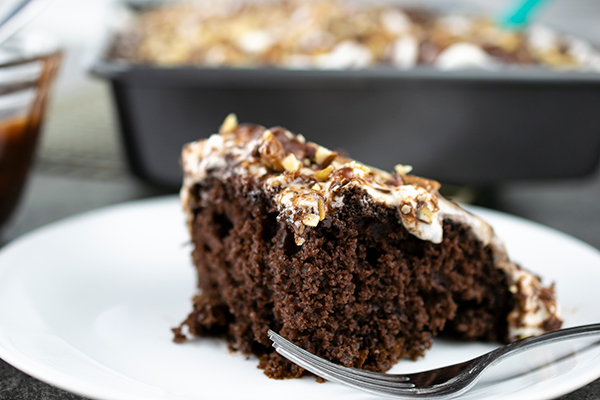
Mississippi Mud Cake
(Family Features) Delight the chocolate lovers in your family with this easy recipe for a Southern classic like Mississippi Mud Cake.
Find more sweet recipes at Culinary.net.
Watch video to see how to make this recipe!
Mississippi Mud Cake
- 1 chocolate cake mix (15 1/4 ounces)
- 1 1/4 cups water
- 1/3 cup canola oil
- 1/3 cup creamy peanut butter
- 3 eggs
- 1 cup semisweet chocolate pieces
- 1 can (16 ounces) chocolate fudge frosting
- 1 bag (16 ounces) miniature marshmallows
- 1 cup chopped pecans
- Heat oven to 350° F.
- Grease 13-by-9-by-2-inch baking pan.
- In large bowl, using electric mixer on low speed, combine cake mix, water, oil, peanut butter and eggs. Stir in chocolate pieces. Pour into prepared pan.
- Bake 30-35 minutes, or until toothpick inserted in center of cake comes out clean.
- Pour marshmallows over top of cake. Return to oven and bake 2-3 minutes, or until marshmallows are somewhat melted.
- In microwave-safe bowl, melt fudge frosting in microwave.
- Drizzle frosting over melted marshmallows.
- Sprinkle pecan pieces over frosting.
- Allow cake to cool completely before serving.
Source: Culinary.net

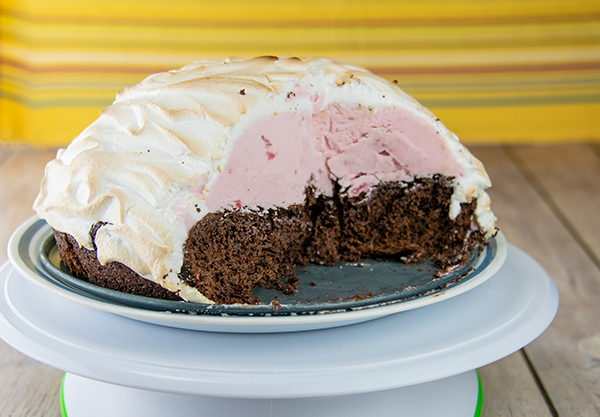
Baked Alaska
(Family Features) With its dramatic presentation, this freshly baked cake and ice cream-based dessert can impress guests at your next gathering.
Find more dessert recipes perfect for entertaining at Culinary.net.
Watch video to see how to make this delicious recipe!
Baked Alaska
Recipe adapted from Milk Means More
- 1/2 cup, plus 6 tablespoons, all-purpose flour
- 6 tablespoons unsweetened cocoa powder
- 1 cup, plus 2/3 cup, granulated sugar, divided
- 1 1/2 teaspoons baking powder
- 1/2 teaspoon baking soda
- 1/4 teaspoon salt
- 1/2 cup 2% milk
- 1/4 cup canola oil
- 2 eggs
- nonstick cooking spray
- 1 1/2 quarts ice cream, any flavor
- 3 large egg whites
- 1/8 teaspoon cream of tartar
- 1 teaspoon vanilla extract
- Heat oven to 350° F.
- In large bowl, whisk flour, cocoa powder, 1 cup sugar, baking powder, baking soda and salt. Make well in center of dry ingredients. Add milk, canola oil and eggs. Whisk until blended. Beat batter until smooth, about 3 minutes.
- Pour batter into 9-inch, round, greased cakepan. Bake 25-28 minutes. Cool completely on wire rack. Wrap in plastic wrap and freeze 1 hour.
- In glass bowl, spray with nonstick cooking spray. Layer inside of bowl with plastic wrap, draping some over edges of bowl.
- Scoop ice cream into bowl until full. Level ice cream. Place overhang of plastic wrap over ice cream. Freeze 2 hours.
- Unwrap cake and place on plate. Unwrap ice cream and place on top of cake. Wrap both together and freeze 2 hours.
- In medium bowl, beat egg whites and cream of tartar until frothy. Add remaining sugar and vanilla extract; beat mixture to form stiff peaks.
- Heat oven to 500° F.
- Unwrap stacked cake. Place on oven-safe plate. Spread meringue, creating swirl motions around cake. Bake 2-4 minutes until meringue peaks are brown and remaining meringue takes on dry appearance.
- Serve immediately or cover with plastic wrap and place in freezer.
Source: Culinary.net

A Father's Day to Remember
(Family Features) While Father's Day is for honoring dads, it's also a great opportunity to honor the men who have been father figures to us - stepfathers, grandfathers, uncles, even friends who have played that role in our lives.
This year, take some extra time to tell those men how much they've meant to you. A card or letter, a phone call or a face to face conversation - you'll give them a Father's Day gift they'll never forget.
To show them your appreciation, have them over for a special dinner. Grill up some chicken and top it with this Cilantro Cream Sauce. Serve with some southwestern-inspired rice and follow it all up with these Double Chocolate Warm Pudding Cakes for a homey dessert.
For more Father's Day dinner and dessert ideas, visit VeryBestBaking.com.
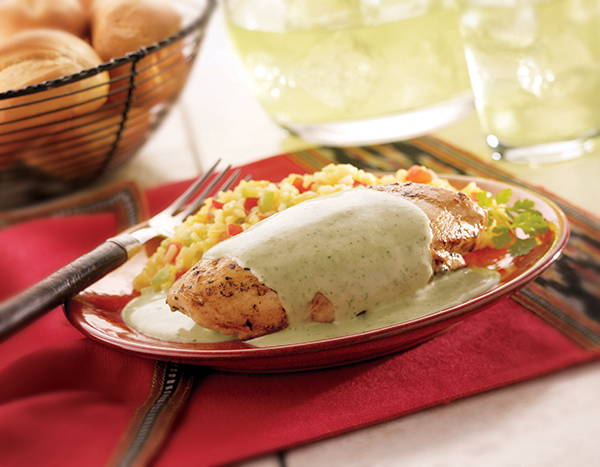
Cilantro Cream Sauce over Chicken
Makes 6 to 8 servings
- 6 to 8 boneless, skinless chicken breast halves, cooked and kept warm
- 2 cups loosely packed fresh cilantro
- 1 can (12 fluid ounces) Nestlé Carnation Evaporated Milk
- 1 cup water
- 2 teaspoons granulated chicken flavor bouillon
- 3 tablespoons butter or margarine
- 3 tablespoons all-purpose flour
- Ground black pepper to taste
- PLACE cilantro, evaporated milk, water and bouillon in blender; cover. Blend until smooth.
- MELT butter in medium saucepan over medium heat. Remove from heat. Stir in flour, stirring constantly until smooth. Stir in cilantro mixture. Cook over medium-low heat, stirring constantly, until mixture comes to a boil and thickens slightly. Season to taste with pepper.
- POUR sauce over chicken breasts.
Nutrition Information per serving: 330 calories; 120 calories from fat; 14g total fat; 8g saturated fat; 130mg cholesterol; 380mg sodium; 9g carbohydrate; 0g fiber; 6g sugars; 40g protein; 10% Vitamin A; 20% Calcium
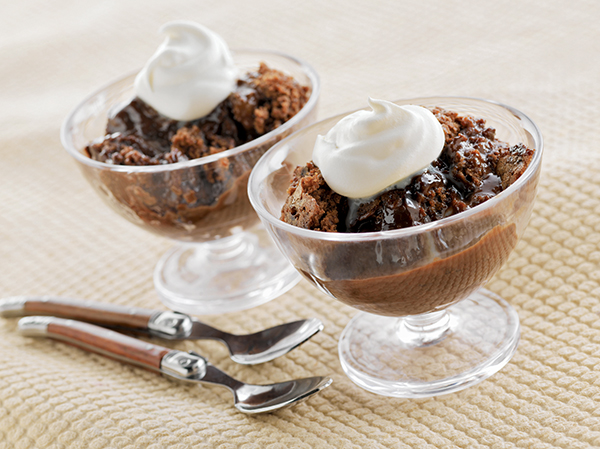
Double Chocolate Warm Pudding Cakes
Makes 8 servings
- Nonstick cooking spray
- 1 cup all-purpose flour
- 1 1/4 cups granulated sugar, divided
- 3 tablespoons plus 1/4 cup Nestlé Toll House Baking Cocoa, divided
- 2 teaspoons baking powder
- 1/4 teaspoon salt
- 1 can (12 fluid ounces) Nestlé Carnation Evaporated Lowfat 2% Milk, divided
- 1 tablespoon vegetable oil
- 1 teaspoon vanilla extract
- 2 tablespoons water
- Lowfat whipped topping or ice cream (optional)
- PREHEAT the oven to 350° F. Spray 8-inch-square baking pan or dish with nonstick cooking spray.
- COMBINE flour, 3/4 cup sugar, 3 tablespoons cocoa, baking powder and salt in medium bowl. Add 1/2 cup evaporated milk, oil and vanilla extract; whisk until just blended. Spread batter into prepared baking pan.
- COMBINE remaining 1/2 cup sugar and 1/4 cup cocoa in small bowl. Microwave remaining 1 cup evaporated milk and 2 tablespoons water in small, uncovered microwave-safe bowl on HIGH (100%) power for 1 minute. With wire whisk, stir in sugar-cocoa mixture into milk mixture until blended. Gently pour over chocolate batter in pan.
- BAKE for 20 to 25 minutes (25 to 30 minutes if using glass dish) or until cake layer forms on top and edges are bubbly. Let stand for 10 minutes. Spoon into serving dishes, spooning chocolate sauce over cake. Top with whipped topping.
TIP: Individual servings can be reheated in microwave for 10 seconds.
Nutrition Information per serving: 250 calories; 25 calories from fat; 3g total fat; 1g saturated fat; 5mg cholesterol; 220mg sodium; 45g carbohydrate; 1g fiber; 32g sugars; 5g protein; 15% Calcium
Source: VeryBestBaking.com

Swoon-Worthy Sweets Made Easy
(Family Features) Do you think that beautiful and delicious desserts must all be made from scratch? Think again. With a cake mix and a new cookbook, you can be on your way to making spectacular sweets in no time.
The "Betty Crocker Fix-With-a-Mix Desserts" cookbook, (Wiley Publishing, 2010), features 100 mix masterpieces from bite-size delights to full-size show-stoppers. The book includes:
* Delectable desserts from cakes and cupcakes to cookies and bars, fruit cobblers, tarts, cheesecake and more.
* Luscious full-color photos of every recipe.
* Flavors that take mixes beyond the basics, like Chocolate-Marshmallow Pillows, Citrus Mini Cheesecakes and Banana Turtle Torte.
* A handy index by mix so you can pick recipes based on the mixes you already have in your pantry.
All recipes start with Betty Crocker's trusted mixes, including SuperMoist® Cake Mix, angel food cake mix, brownie mix, cookie mix, Bisquick®, and all-new gluten-free mixes for cookies, brownies, and cakes.
See how easy it is to turn a mix into a mouthwatering dessert with this Ooey-Gooey Caramel Cake recipe featured in the cookbook.
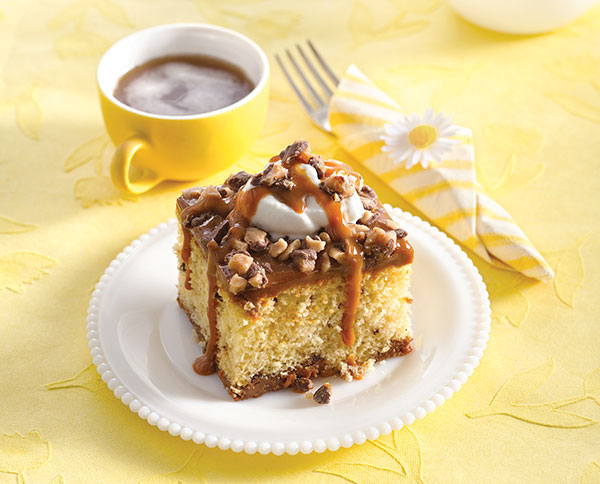
Ooey-Gooey Caramel Cake
Prep time: 20 minutes
Start to finish: 2 hours 5 minutes
15 servings
- 1 box (1 lb 2.25 ounces) Betty Crocker SuperMoist® yellow cake mix
- 1/4 cup all-purpose flour
- 1 cup water
- 1/3 cup vegetable oil
- 3 eggs
- 1 bag (8 ounces) milk chocolate-coated toffee bits
- 1 can (13.4 ounces) dulce de leche (caramelized sweetened condensed milk)
- Sweetened whipped cream, if desired
- Caramel topping, if desired
- Heat oven to 350°F (325°F for dark or nonstick pan). Spray bottom and sides of 13 x 9-inch pan with baking spray with flour.
- In large bowl, beat cake mix, flour, water, oil and eggs with electric mixer on low speed 30 seconds. Beat on medium speed 2 minutes, scraping bowl occasionally. Stir in 1/2 cup of the toffee bits. Pour into pan.
- Reserve 1/2 cup dulce de leche. Spoon remaining dulce de leche by teaspoonfuls onto batter.
- Bake 30 to 40 minutes or until toothpick inserted in center comes out clean. Cool 5 minutes. Drop reserved dulce de leche by spoonfuls over top of cake and spread evenly. Sprinkle with remaining toffee bits. Cool about 1 hour before serving. Top each serving with whipped cream and caramel topping.
Sweet Note: Crushed, chocolate-covered English toffee candy bars can be used instead of the toffee bits.
Source: Wiley Publishing