
School-Night Meals that Deliver Taste at a Low Cost
(Family Features) Regardless of what back to school looks like this year, preparing family meals throughout the week does not have to be a challenge. Shopping at a store like ALDI can stretch your budget and help you make five different meals over five days for about $5 a meal pretax for a family of four.
Using a mix of kitchen staples you already may have, along with fresh ingredients, you can make delicious, affordable recipes for the whole family. Simply select a protein or main ingredient and explore versatile ways to build other meals around it during the week.
Grilled chicken breasts are ideal for on-the-go lunches or weekday dinners. Busy parents can get dinner on the table in less than 30 minutes with an easy Chicken Cacciatore in the pressure cooker or simple prep-ahead Chicken Enchiladas. These convenient dishes make it a snap to add variety by substituting chicken with shrimp, beans or vegetables.
Serving organic produce, fresh and frozen meats, seafood and on-the-go snacks can be easy when you shop at a store like ALDI for the back-to-school season. Plus, you can find foods to fit any dietary style without breaking the bank.
Find more family meal solutions at aldi.us.
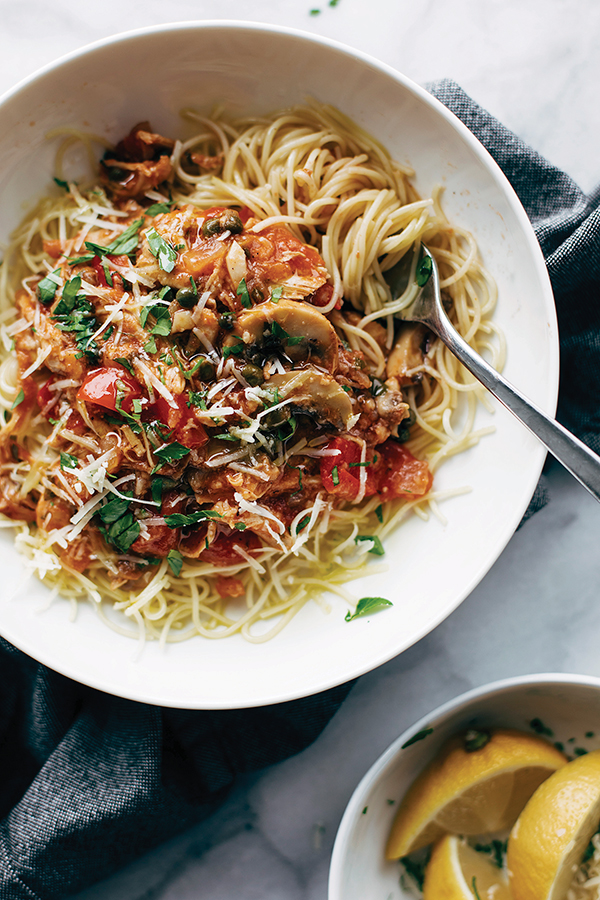
Pressure Cooker Chicken Cacciatore
Recipe courtesy of “Pinch of Yum” on behalf of ALDI
Prep time: 15 minutes
Cook time: 15 minutes
Servings: 6
- 1-1 1/2 pounds chicken breasts or chicken thighs
- flour
- 1 pinch salt, plus 2 teaspoons, divided
- 2 tablespoons extra-virgin olive oil
- 1 onion, diced
- 16 ounces mushrooms, sliced
- 3 cloves garlic, minced
- 1/2 cup chicken broth
- 1 bell pepper, diced
- 1 can (28 ounces) diced tomatoes
- 4 tablespoons butter
- capers (optional)
- parsley, plus additional for topping (optional)
- lemon
- preferred pasta
- Parmesan cheese (optional)
- Dredge chicken in flour and pinch of salt. Turn on saute function on pressure cooker. Add oil; saute chicken 2-3 minutes on each side. Remove and set aside (chicken will finish cooking later).
- Add onion, mushrooms and garlic. Saute until softened. Add broth and let sizzle out.
- Add chicken, bell pepper, tomatoes and remaining salt to pressure cooker. Cook on high pressure 15 minutes. Release pressure.
- Shred chicken. Stir in butter, capers, parsley and lemon. Serve with preferred pasta and top with additional parsley and Parmesan cheese, if desired.
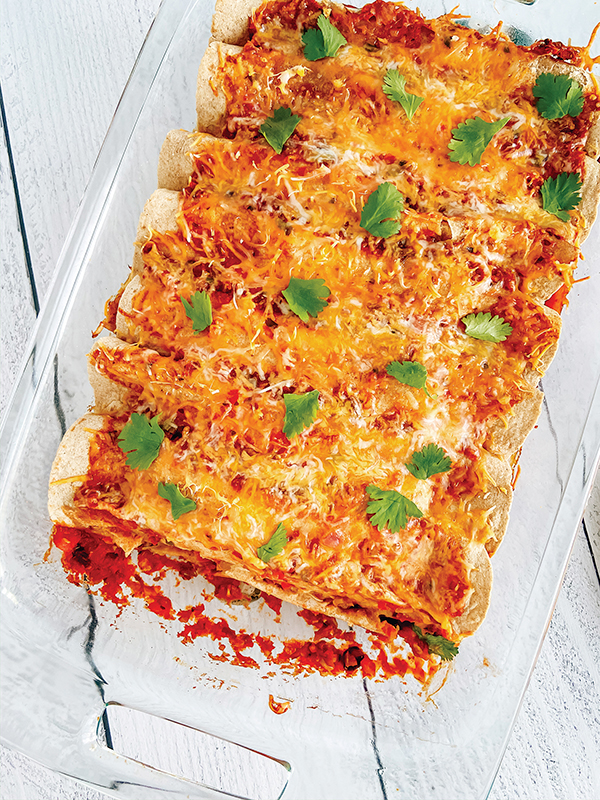
Easy Chicken Enchiladas with Black Beans
Recipe courtesy of “Wellness for the Win” on behalf of ALDI
Prep time: 25 minutes
Cook time: 25 minutes
Servings: 10
- Nonstick cooking spray
- 1 medium onion, chopped
Chicken:
- 1 pound chicken breasts
- 1/4 teaspoon garlic powder
- 1/4 teaspoon onion powder
- 1/4 teaspoon chili powder
- 1/4 teaspoon cumin
- salt, to taste
- pepper, to taste
Enchiladas:
- 15 ounces black beans, drained and rinsed
- 10 ounces diced tomatoes and green chilies, drained
- 2 cups shredded Mexican cheese, divided
- 16 ounces restaurant-style salsa, divided
- 10 whole-wheat tortillas
Optional Toppings:
- diced avocado
- plain Greek yogurt
- cilantro
- Preheat oven to 400 F. Spray 9-by-13-inch pan with nonstick cooking spray and set aside.
- In medium skillet over medium-high heat, cook onion until translucent, about 3-5 minutes. Transfer to large bowl and set aside.
- To make chicken: Season chicken breasts with garlic powder, onion powder, chili powder, cumin and salt and pepper, to taste. Add chicken to same skillet over medium-high heat. Cook 5-7 minutes on each side, or until cooked through. Use fork and knife to shred chicken.
- To make enchiladas: In large bowl with cooked onion, add shredded chicken, black beans, diced tomatoes, green chilies and 1 cup shredded Mexican cheese. Use spoon to mix well.
- Pour 1 cup salsa on bottom of greased pan and use spatula to spread evenly. Scoop about 1/2 cup chicken and veggie mixture into each tortilla. Roll tightly and place seam side down in pan.
- Top enchiladas with 3/4 cup salsa and remaining shredded cheese; use spatula to spread evenly.
- Cover pan tightly with foil and bake 25-30 minutes. Remove from oven; serve hot. Add avocado, yogurt and cilantro, if desired.
Source: ALDI

Flavorful, Fun Japanese-Inspired Lunches to Cook with Your Kids
(Family Features) Cooking with your kids is a fun way to bond while teaching basic culinary skills. It provides practical lessons like counting ingredients and dividing portions. Plus, meals cooked together offer kids something to look forward to during lunchtime. They can enjoy the food they helped prepare, and you’ll be able to check at least one meal off your to-do list while teaching valuable life lessons.
One way to make cooking more exciting for the family is to prepare food for a bento box using pantry staples. Bento boxes are considered an act of love in Japan and are a fun way to get your family involved in the kitchen. Bento boxes are similar to single-portion lunchboxes except they feature small compartments for each element of your meal, making it easy to encourage kids to eat fresh fruits and veggies. They also offer a whimsy visual appeal that can make mealtime more entertaining.
Next time you plan a meal with loved ones, try incorporating authentic Japanese recipes like a Simple Teriyaki Bowl, a Miso-Glazed Salmon Bento or Garlic Shrimp with Jasmine Rice. These dishes call for simple preparations, short cook times and pantry basics, making it easy to involve your family in the process.
To create a taste-tempting family meal with genuine Japanese flavors, try Mizkan premium sauces and rice vinegars. For more than two centuries, the vinegars have helped chefs and families around the world delight in the flavors of Japan. Now the taste can be at your table, helping you create authentic meals your whole family can enjoy.
Find more tips and ideas for creating flavorful and authentic Japanese recipes at mizkanflavors.com.
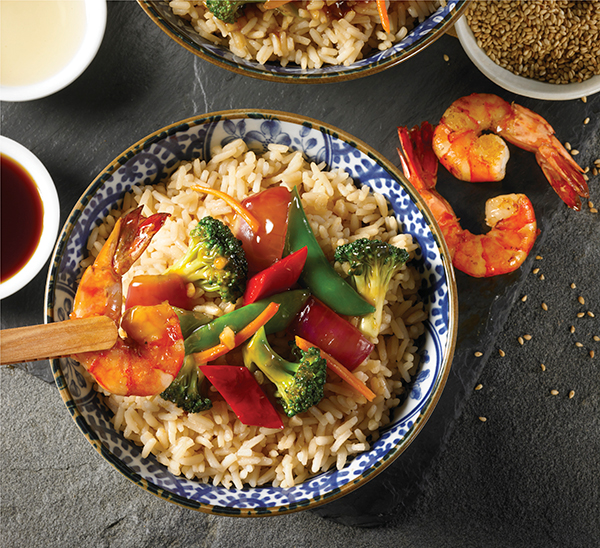
Garlic Shrimp with Jasmine Rice
Prep time: 15 minutes
Cook time: 10 minutes
Servings: 6
Ponzu Rice:
- 1 cup jasmine rice
- 1/2 cup Mizkan Ponzu Citrus Seasoned Soy Sauce
- 1 1/2 cups water
Stir Fry:
- 2 tablespoons Mizkan Organic Rice Vinegar
- 1/4 cup Mizkan Ponzu Citrus Seasoned Soy Sauce
- 1/4 cup brown sugar
- 1 teaspoon sesame oil
- 1/2 cup vegetable stock
- 1 teaspoon cornstarch
- 2 tablespoons oil
- 1 pound (about 21-25) raw shrimp, peeled and deveined
- 1/4 cup red onion, large chopped
- 2 teaspoons garlic, minced
- 1 cup red bell pepper, chopped
- 1/2 cup carrots, shredded
- 1 cup sugar-snap peas
- 1 cup broccoli florets
- 2 scallions, sliced
- 2 teaspoons sesame seeds
- To make ponzu rice: In small saucepan, combine jasmine rice, ponzu and water; cook according to rice directions.
- To make stir fry: In bowl, whisk rice vinegar, seasoned soy sauce, brown sugar, sesame oil, vegetable stock and cornstarch to combine. Set aside.
- In large saute pan over high heat, heat oil; add shrimp and cook 2-3 minutes until pink.
- Add red onion and cook 1 minute. Add garlic, red bell peppers, carrots, snap peas and broccoli; cook 3 minutes until tender.
- Add reserved sauce and cook 2 minutes until thickened.
- Divide rice among six bowls and top with shrimp stir fry. Garnish with scallions and sesame seeds; serve.
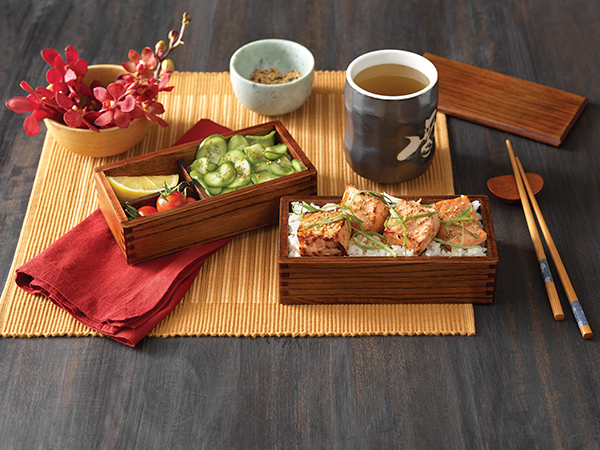
Miso-Glazed Salmon Bento
Prep time: 20 minutes, plus marinating
Cook time: 6 minutes
Servings: 2
- 1/4 cup miso paste
- 2 tablespoons Mizkan Mirin Sweet Cooking Seasoning
- 1 tablespoon sake
- 2 skinless center-cut salmon fillets (6 ounces each)
- 1 cup thinly sliced seedless cucumbers
- 1 teaspoon kosher salt
- 2 tablespoons Mizkan Seasoned Rice Vinegar
- 2 cups cooked short-grain sushi rice, cooled
- 1 tablespoon thinly sliced green onions
- 1 teaspoon toasted sesame seeds
- 6 cherry tomatoes
- 2 lemon wedges
- In medium bowl, whisk miso paste, mirin and sake. Add salmon, turning to coat evenly. Marinate 10-30 minutes. Discard remaining marinade.
- Heat large nonstick pan on medium-high heat. Cook fish 2-3 minutes on each side, or until internal temperature reaches 145 F. Cut each fillet into four small pieces.
- In strainer or colander, toss cucumbers with salt; let stand 5 minutes. Squeeze out excess liquid; toss with rice vinegar.
- Pack each bento box evenly with rice, pickled cucumbers and salmon. Sprinkle with green onions and sesame seeds. Garnish with tomatoes and lemons.
Substitutions: If ingredients are unavailable or difficult to find: Use 1/4 cup soy sauce to glaze salmon in place of miso paste; use low-carb rice such as cauliflower or broccoli rice in place of sushi rice.
Tip: To prevent sogginess, separate wet components like cucumber pickles by using aluminum foil or silicone muffin liners inside bento box.

Simple Teriyaki Bowl
Prep time: 10 minutes
Cook time: 35 minutes
Servings: 2
- 1 large boneless chicken thigh
- 2 tablespoons soy sauce
- 3 tablespoons Mizkan Mirin
- 3 tablespoons Mizkan Natural Rice Vinegar
- 1/2 scallion
- 1 tablespoon cooking oil
- 2 servings hot, cooked rice
- 1 teaspoon dried seaweed sheet (nori), sliced (optional)
- Slice chicken thigh meat into bite-size pieces. In bowl, mix soy sauce, mirin and rice vinegar; marinate chicken pieces in seasoning mix 10 minutes.
- Cut scallion into 2-inch pieces. In frying pan, saute until soft, about 1 minute. Set aside.
- In frying pan, heat oil and cook chicken until browned.
- When meat is browned, pour marinade over chicken and continue cooking on low heat until sauce thickens.
- Place hot, cooked rice in individual bowls. Spread sliced dried seaweed pieces over rice, if desired, and top with chicken and scallions to serve.
Photo courtesy of NPDstock/Shutterstock (Simple Teriyaki Bowl)
Source: Mizkan

Master Family Meals with Ease
(Family Features) Comforting family meals are a tradition in many homes with time spent around the table sharing stories and laughs while enjoying great food. These meals can include lavish or complicated recipes, but you can also enjoy dinner with loved ones by turning to easy-to-make dishes that still follow through with delicious flavor.
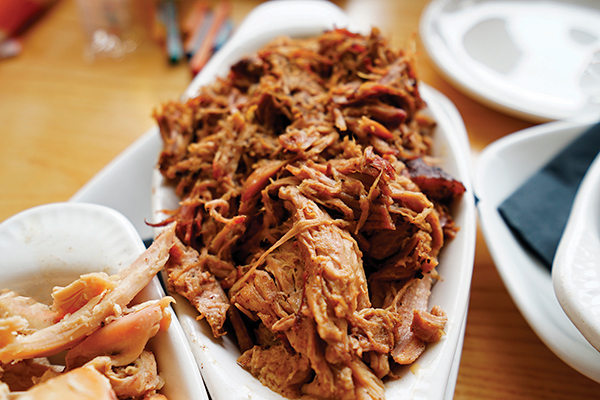
Serve up snack-sized sandwiches, for example, with this recipe for Pulled Pork Sliders with Tangy Red Slaw made using Aunt Nellie’s Whole Holland Style Onions and Sweet & Sour Red Cabbage to add a zesty zip to tender pork sandwiches.
Ready in less than half an hour and requiring only a handful of ingredients, Lemon-Butter 4 Bean Ravioli is an easy solution for a comfort food craving. Cheesy ravioli, READ Bean Salad and veggies make a simple, satisfying, meatless pasta dinner in minutes.
Visit auntnellies.com and READsalads.com for more easy family meal inspiration.

Pulled Pork Sliders with Tangy Red Slaw
Prep time: 25 minutes
Servings: 6
Slaw:
- 1 tablespoon olive oil
- 2 tablespoons apple cider vinegar
- 3/4 teaspoon sugar
- 1/8 teaspoon cayenne pepper
- 1/4 cup thinly sliced celery
- 1/4 cup finely diced green bell pepper
- 1 cup Aunt Nellie’s Whole Holland Style Onions, drained and coarsely chopped
- 1 jar (16 ounces) Aunt Nellie’s Sweet & Sour Red Cabbage, drained
Sliders:
- 1 pound pulled pork, heated through
- 1/4 cup hickory smoked barbecue sauce, warm
- 12 small pull-apart dinner rolls, split crosswise and lightly toasted
- To make slaw: In large bowl, combine oil, vinegar, sugar and cayenne pepper; whisk to combine. Add celery, bell pepper, onions and red cabbage; toss to coat.
- To make sliders: In medium bowl, mix pork and barbecue sauce. To assemble, spoon pork evenly over bottom half of each roll. Top with slaw and top half of each roll.
Note: If desired, slaw can be served warm. In saucepan over medium-low or medium heat, cook slaw about 5 minutes, or until heated through, stirring frequently.
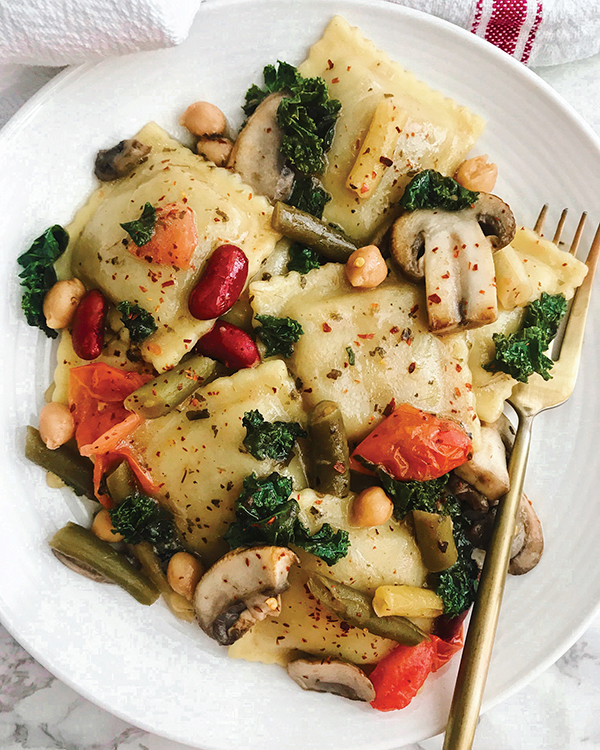
Lemon-Butter 4 Bean Ravioli
Recipe courtesy of “Winnie’s Balance” on behalf of Seneca Foods
Prep time: 15 minutes
Cook time: 12 minutes
Servings: 4
- 1 package (10 ounces) fresh cheese ravioli
- 1 teaspoon olive oil
- 2 cups combination of sliced button mushrooms, chopped kale and grape tomatoes
- 2 tablespoons unsalted butter, divided
- 2 large cloves garlic, minced
- 1 can (15 ounces) READ 4 Bean Salad
- 1-2 tablespoons fresh lemon juice
- crushed red pepper flakes (optional)
- Cook ravioli according to package directions. Drain and set aside.
- Heat medium skillet over medium heat. Add olive oil; swirl to coat.
- Add mushrooms, kale, tomatoes and 1 tablespoon butter. Cook 6 minutes, or until mushrooms are soft and tomatoes burst, stirring occasionally. Remove from heat.
- Return pasta to medium heat. Add remaining butter and minced garlic. Cook 2 minutes, or until garlic is fragrant, stirring frequently. Stir in bean salad; cook 1 minute, or until heated through.
- Gently stir vegetables into pasta. Drizzle with lemon juice. Toss gently and top with red pepper flakes, if desired.
Source: Seneca Foods

Cookout Cravings: Appease summer appetites with grilled fare
(Family Features) The first thought that comes to mind when picturing grilling in the summer sun might be a perfectly cooked steak or a juicy burger, but no backyard barbecue is complete without the all-important sides and beverages that complete the meal.
Whether you're pairing a main protein with separate side dishes or going all-in-one by combining tender chicken with veggies on skewers, the opportunities are endless for a crave-worthy cookout.
Find more summer grilling recipes at Culinary.net.
5 Steps for Sizzling Steak
A sizzling steak is a surefire sound of summer, and the flavors achieved from one that's perfectly grilled are hard to match.
Before you fire up your grill, consider these five basics for cooking a chef-worthy steak:
Prepare Your Cut
Taste preferences (and prices) may differ among sirloins, ribeyes, T-bones and more, but the way you prepare steaks likely won't change much from cut to cut. You'll want to trim the thickness down to 1/2-1 inch for proper cooking, and setting the meat out ahead of time allows it to warm to room temperature before hitting the grill.
Add Some Salt
Feel free to add any spices you prefer, but remember a good steak typically doesn't require fancy seasoning - a pinch of salt works just fine. Add your salt anywhere between 30 minutes to a few hours before grilling time to help retain moisture and improve flavor.
Aim for High Heat
A two-zone fire is usually the way to go - one side of the grill should be hot (using direct heat) with the other side not quite as warm (indirect heat). This allows you to create a sear over direct heat before finishing cooking through - without burning - over indirect heat.
Sear and Slide
Cooking your steak over direct heat 1-2 minutes on each side is normally about right for creating a proper sear. At this point, depending on the thickness of your steak, you'll want to check for doneness. If it's not quite to the temperature you're looking to achieve, simply slide it over to the indirect heat for a finishing touch. Keep in mind these general guidelines for doneness: 120-125 F is rare, 130-135 F is medium-rare, 140-145 F is medium, 150-155 F is medium-well and 160-175 F is well done.
Let Rest
Finally, as hungry as you may be at this point, resting steaks is an important last step before diving in. Giving your steaks 5-10 minutes (foil or no foil) allows flavors to redistribute and moisture to be retained in the meat.
Less Prep, More Summer with a Skewered Solution
Make summer grilling easy and delicious by cooking your side dish and main dish together so you can spend more time outdoors and less time meal planning. These Grilled Greek Kebabs pair cubed chicken thighs with little potatoes on skewers, making for a classic cookout combo.
With no washing or peeling required, Creamer potatoes from The Little Potato Company require little prep, which helps make this recipe a breeze, and they cook quickly on the grill. Just marinate your chicken and potatoes with this zesty dressing and prepare for a taste bud-tingling backyard barbecue.
Visit littlepotatoes.com/summertime for more summer grilling recipes.
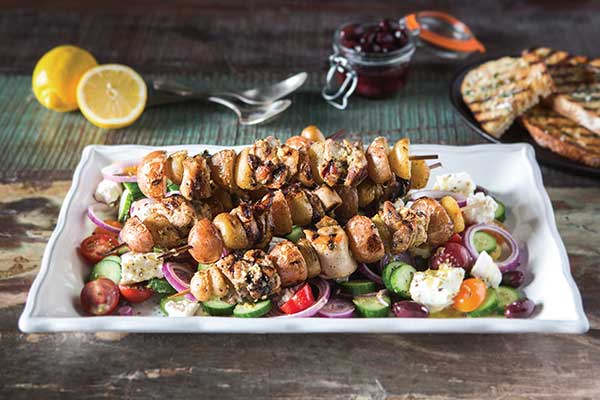
Grilled Greek Kebabs
Dressing/Marinade:
- 3/4 cup olive oil
- 2 lemons, zest and juice only
- 1 teaspoon dried oregano
- 2 teaspoons Dijon mustard
- 1 garlic clove, finely chopped
- 1 teaspoon sugar
- salt, to taste
- pepper, to taste
- 3 teaspoons mayonnaise
- Skewers:
- 2 cups The Little Potato Company Dynamic Duo bagged Creamer Potatoes, cut in half
- 4-6 boneless, skinless chicken thighs, cut into 1-inch cubes
- 8 wooden skewers dipped in water
- pita bread (optional)
Salad:
- 2 cups cherry tomatoes, halved
- 4 sliced Lebanese cucumbers
- 1/4 cup red onion, finely sliced
- 1 cup feta cheese
- 1 cup pitted kalamata olives
To make dressing/marinade: In measuring cup, mix olive oil, lemon juice, lemon zest, oregano, Dijon mustard, garlic and sugar. Season generously with salt and pepper, to taste. Pour 1/3 cup marinade into large bowl. Refrigerate remaining.
To prepare skewers: Add potatoes and chicken pieces to bowl with marinade. Mix well to coat and marinate 30 minutes, or as long as overnight in refrigerator.
Preheat grill to medium heat.
Skewer potatoes and chicken cubes alternately on wooden skewers. Grill 6-8 minutes on both sides. Grill pita bread, if desired.
Finish dressing by adding mayonnaise.
To make salad: In large serving dish, mix tomatoes, cucumber, onions, feta cheese and olives. Place kebabs on top and drizzle with dressing.
Serve with grilled pita bread, if desired.
Sipping on Sweetness
When it's summertime, many people crave something cold and fruity. Simply combine frozen strawberries with frozen pink lemonade concentrate to create a cool concoction perfect for a sizzling day. This fizzy summertime treat can delight your taste buds and keep you quenched while enjoying the sun's rays.
Find more summer drink recipes at Culinary.net.

Strawberry Spritzer
Recipe adapted from Taste of Home
- 1 package (10 ounces) frozen sliced strawberries, sweetened and thawed
- 2 liters lemon-lime soda, chilled
- 1 can (12 ounces) frozen pink lemonade concentrate, thawed
- In blender, process strawberries until blended thoroughly.
- Pour strawberries into large pitcher; stir in soda and pink lemonade.
A Simple Stuffed Side
Whether you need a quick appetizer or something to snack on, these Stuffed Cherry Tomatoes make for an appealing bite.
Find more snack recipes at Culinary.net.
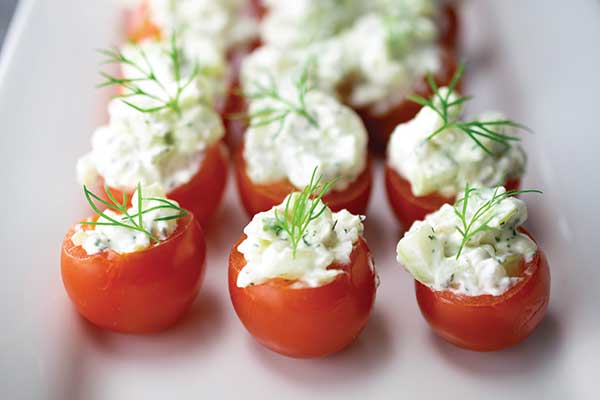
Stuffed Cherry Tomatoes
Recipe courtesy of Culinary.net
- 24-48 cherry tomatoes
- 1 package (8 ounces) cream cheese, softened
- 2 tablespoons mayonnaise
- 1 medium cucumber, peeled and diced
- 3 green onion stalks, diced
- 2 teaspoons minced dill
- fresh dill, for garnish
- Cut thin slice off top of each tomato. Scoop out pulp. Invert tomatoes on paper towel to drain.
In medium bowl, combine cream cheese and mayonnaise until smooth. Stir in cucumber, green onion and dill. Spoon mixture into tomatoes. Top with fresh dill. - Refrigerate until ready to serve.
Photo courtesy of Getty Images (Steak)
Source: The Little Potato Company

Fire Up the Grill for Smoked Fruit
(Family Features) As summer grilling season sets in, Americans grab their tongs to take advantage of backyard barbecue opportunities.
In addition to classic cookout fare like ribs, steak, chicken, burgers and hot dogs, the experts at Dole recommend giving fruits and vegetables a shot on the grill to bring out new tastes and ways to enjoy everyday favorites. For example, many barbecue enthusiasts know about grilling corn, asparagus, Brussels sprouts, onions, zucchini and artichokes, but consider trying cauliflower, portobello mushrooms, yellow-black plantains and even pineapple on the grill this summer.
In fact, this recipe for Smoked Hasselback Pineapple with Spiced Turkey Chorizo and Onion provides an easy way to make grilled fruit a fun addition to your backyard barbecue.
For other flavorful ideas, try grilled Romaine lettuce for a delightfully smoky salad or side dish, or skewer peeled and sliced bananas, chicken, shrimp and veggies for a tropical kebab. You can even throw an unpeeled banana on the grill for a uniquely caramelized dessert.
Visit dole.com for more summer grilling recipes featuring fresh fruits and vegetables.
Watch video to see how to make this recipe!
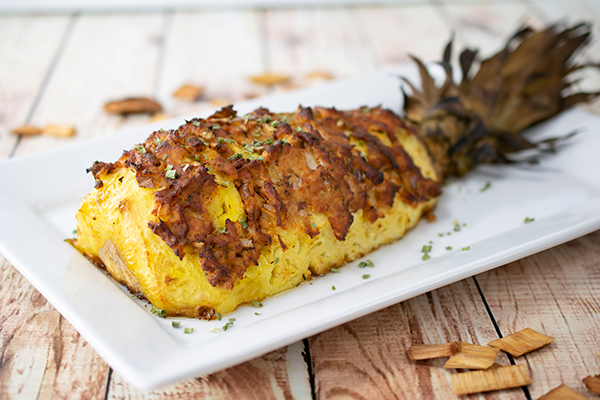
Smoked Hasselback Pineapple with Spiced Turkey Chorizo and Onion
Total time: 2 hours
Servings: 4
- 4 cups favorite wood chips
- water
- 1 pound 93% lean ground turkey breast
- 1 small DOLE® Red Onion, diced
- 2 tablespoons olive oil
- 2 teaspoons fresh thyme leaves
- 2 teaspoons smoked paprika
- 1 teaspoon ancho chile powder
- 1 teaspoon ground cumin
- 1/2 teaspoon kosher salt
- 1 large Dole Pineapple, top on, peeled and halved lengthwise
- chopped fresh cilantro, for garnish (optional)
- In large bowl, cover wood chips with water; soak as label directs. Prepare outdoor grill for indirect grilling over medium heat.
- In medium bowl, stir turkey, onion, oil, thyme, paprika, chile powder, cumin and salt.
- Drain wood chips; place 2 cups in foil boat or pie tin and place on hot grill rack over lit side of grill (place chips directly on coals for charcoal grill). Place pineapple halves, flat side down, on cutting board; cut crosswise slices into pineapple halves, about 1/2 inch apart, cutting only 3/4 of the way through. Place medium bowl upside down; one at a time, place pineapple halves, flat side down, over bowl to separate slits. Fill slits with turkey mixture.
- Place pineapple halves, flat side down, on hot grill rack over unlit side of grill; cover and cook 1 hour, 45 minutes, or until turkey mixture is golden brown and internal temperature reaches 170 F, rotating once and adding remaining chips halfway through cooking.
- Transfer pineapple halves to cutting board; cut crosswise in half. Serve pineapple garnished with cilantro, if desired.

Taste of Summer
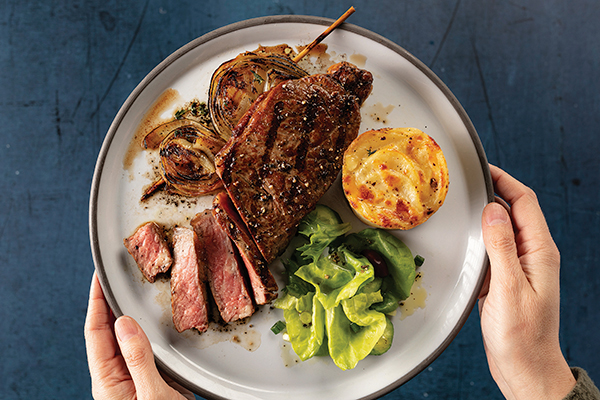
(Family Features) A summer weekend isn’t complete until you fire up the grill, but flame-kissed steaks are just the start to an unforgettable meal that celebrates all the best of the season.
To create the perfect main dish, start with high-quality protein, like Omaha Steaks’ Private Reserve Boneless New York Strips. Thick, juicy and full of flavorful marbling, these premier steaks are meticulously aged for optimal taste and tenderness with robust, beefy flavor brought out when cooked properly on the grill.
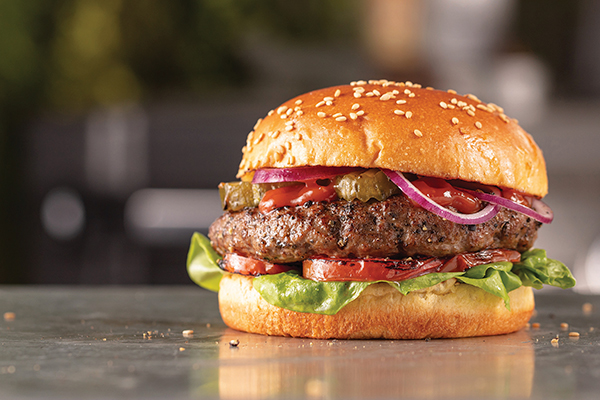
If you’re opting for burgers, elevate your menu with flavorful accompaniments like crisp candied bacon, sauteed shrimp and zesty homemade pickles for a menu you won’t soon forget.
Find more ideas for upgrading the grilling experience in your own backyard at OmahaSteaks.com.

Candied Bacon
Prep time: 5 minutes
Cook time: 25 minutes
Servings: 8
- 1 pound (1 package) Omaha Steaks Applewood Smoked Steak-Cut Bacon
- 1 tablespoon fresh ground black pepper
- 1 cup packed light brown sugar
- Heat oven to 375° F.
- Place wire rack on foil-lined baking sheet. Place strips of bacon on wire rack and sprinkle with black pepper. Lightly pat brown sugar on top of bacon in thin layer.
- Place baking sheet on center rack in oven and bake 25 minutes, or until brown sugar melts and bacon is crisp.
- Remove from oven and cool 10 minutes. Using tongs, transfer bacon to parchment-lined baking sheet and cool to room temperature.
- Store in airtight container up to 3 days at room temperature.
Quick Pickles
Prep time: 10 minutes
Cook time: 5 minutes
Yield: 1 1/2 cups
- 1/2 cup white vinegar
- 2 teaspoons sugar
- 1 teaspoon mustard seed
- 1 teaspoon salt
- 1 clove garlic, crushed
- 1/2 teaspoon red pepper flakes (optional)
- 1 teaspoon dried dill, chopped, or 2 tablespoons fresh dill leaves
- 1 bay leaf
- 4 cucumbers, cut into angled 1-inch slices
- Heat small saucepan over medium high heat. Add vinegar, sugar, mustard seed, salt, garlic and red pepper flakes, if desired; cook until mixture begins to simmer and sugar dissolves. Remove from heat.
- In heat-proof bowl, toss dill, bay leaf and sliced cucumbers. Pour simmering liquid over cucumbers and stir to evenly coat. Cool to room temperature or chill before serving.
Note: Pickles may be made up to 3 days in advance. Refrigerate in covered non-reactive container.

Connecticut-Style Shrimp
Prep time: 5 minutes
Cook time: 10 minutes
Servings: 4
- 4 tablespoons unsalted butter
- 2 tablespoons chives
- 1/4 teaspoon salt
- 1/8 teaspoon black pepper
- 12 large, cleaned, uncooked Omaha Steaks Wild Argentinian Red Shrimp
- Heat medium skillet to medium-high heat. Add butter; cook until melted.
- Add chives, salt, pepper and shrimp to pan. Cook 2 minutes, turn shrimp and cook 2 minutes, or until shrimp is opaque and cooked through. Remove from heat and serve.
Dry-Brined New York Strips with Grilled Brown Butter Balsamic Onions
Prep time: 1-12 hours
Cook time: 30-40 minutes
Servings: 4
Dry Brine:
- 4 tablespoons Kosher salt
- 1 tablespoon coarse ground pepper
- 4 (11-ounce) Omaha Steaks Private Reserve Boneless New York Strips, thawed
Butter and Balsamic:
- 4 tablespoons salted butter
- 2 tablespoons balsamic vinegar
- 2 teaspoons fresh thyme
Grilled Onions:
- 2 large sweet onions
- 4 wooden skewers, soaked
- 1 tablespoon olive oil
- salt, to taste
- pepper, to taste
- To make dry brine: Combine salt and pepper; season steaks generously on all sides. Place steaks on elevated rack on baking sheet and refrigerate at least 1 hour or overnight.
- To make butter and balsamic: Heat small skillet to medium high heat. Add butter and cook until butter begins to brown and smell nutty. Remove from heat and add balsamic vinegar and thyme. Set aside.
- To make grilled onions: Peel off outer layers of onions. Slice into 1/2-inch slices. Lay onions on flat surface. Push skewers through centers of onions; two onion slices per skewer. Brush onions with olive oil and season with salt and pepper, to taste.
- To cook steaks and onions: Make two-zone fire on charcoal grill with coals on one side and no coals on the other.
- Place onions on cool side of grill; flip and rotate every 10 minutes until golden brown, approximately 25-30 minutes. Total time will depend on how hot coals are and how close onions are to fire. When onions are golden and tender, brush with brown butter balsamic mixture.
- On hot side of grill, during last 15 minutes of cook time for onions, cook steaks to desired temperature. When steaks are 5 F from desired temperature, remove from grill and let rest 5-10 minutes.
- Remove onions from grill. Carefully remove onions from skewers and place in serving dish. Top with remaining brown butter balsamic mixture and serve with steaks.
Source: Omaha Steaks

A Simply Sensational Summer Meal
(Family Features) Whipping up a fresh cooked meal is one of the true joys of summer, especially when grilled grub is paired with tantalizing sides and tempting desserts.
Spice things up with Mexican Beef Sliders with Jalapeno Salsa and Avocado Cream coupled with a side like Roasted Potatoes then cap off a filling meal with these sweet and decadent Strawberry Cream Cheese Tartlets. If you’re looking for ways to mix meat and veggies all at once, these ideas for kebabs are a surefire way to please a variety of palates.
Find more summer meal ideas at Culinary.net.
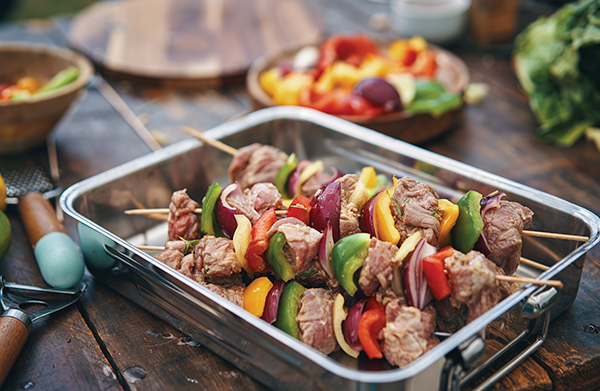
Cook Up Kebabs
As one of the most versatile main courses that can be grilled, kebabs offer nearly endless opportunities for customization. From protein to veggies, soaked wooden skewers can be loaded with just about any favorite flavors before hitting the grates. Consider these options for kicking your kebabs up a notch:
- Steak, cut into chunks
- Chicken, cut into chunks
- Bratwurst or sausage, cut into slices
- Ground beef, shaped into balls
- Lamb
- Shrimp
- Salmon, cut into chunks
- Bacon, cut into small pieces
- Sliced onions
- Sliced bell peppers
- Sliced jalapenos
- Sliced mushrooms
- Sliced cucumbers
- Cherry tomatoes
Summer Sliders with a Spicy Kick
Summer calls for firing up the grill for a fresh-cooked meal, and sliders are an ideal way to enjoy a downsized version of a warm weather favorite.
These Mexican Beef Sliders with Jalapeno Salsa and Avocado Cream are perfect for summer with their spicy kick of salsa and bright, cooling cream. Made with grass-fed beef from New Zealand, where the animals are allowed to roam and graze freely over lush green hills and pastures year-round, the mini burgers boast a lean, finely textured meat that tastes just as nature intended.
Find more tasty summer recipes at beefandlambnz.com.
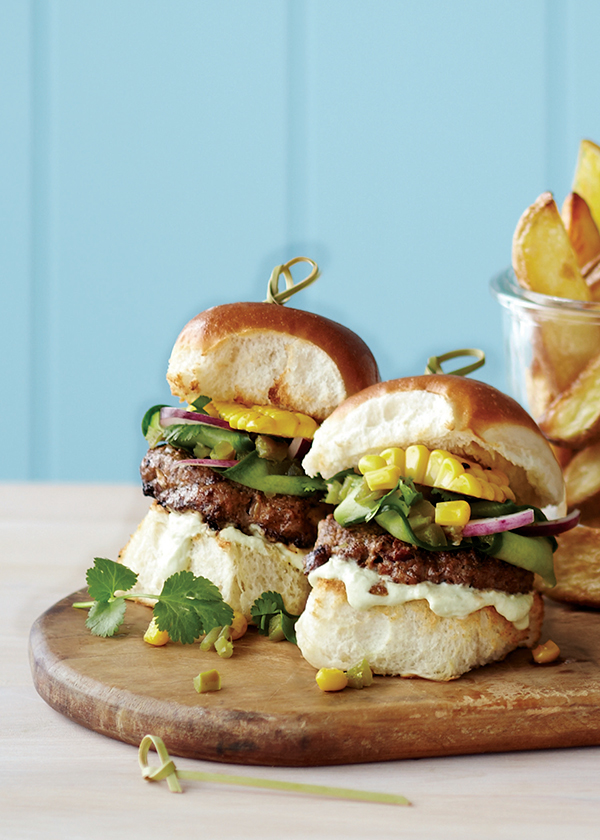
Mexican Beef Sliders with Jalapeno Salsa and Avocado Cream
Recipe courtesy of Beef + Lamb New Zealand
Prep time: 20 minutes
Cook time: 15 minutes
Servings: 4
Patties:
- 1 1/3 pounds lean New Zealand grass-fed ground beef
- 1 clove garlic, crushed
- 1 medium onion, grated or finely chopped
- 1 egg, lightly beaten
- 3/4 cup red kidney beans, rinsed and drained
- 2 tablespoons tomato paste
- 3 teaspoons dried oregano, chopped
- 2 teaspoons mild smoked paprika
- 2 teaspoons ground cumin
- 1 teaspoon ground coriander
- 1/2 cup Parmesan cheese, grated
- salt, to taste
- pepper, to taste
- olive oil
Jalapeno Salsa:
- 1 cup cucumber, thinly sliced into long ribbons
- 3/4 cup fresh cilantro leaves, chopped
- 1 red onion, finely sliced
- 1/2 cup pickled jalapenos, finely chopped
- salt, to taste
- pepper, to taste
- olive oil
- lime juice
Avocado Cream:
- 1 avocado, mashed
- 1/2 cup sour cream
- 1 lime, juice and zest only
- salt, to taste
- pepper, to taste
- 8-12 slider buns, halved
- 2-3 cobs sweet corn, cooked and sliced into shards
- 8-12 small bamboo skewers
- To make patties: In bowl, combine beef, garlic, onion, egg, kidney beans, tomato paste, oregano, paprika, cumin, coriander, Parmesan cheese, salt, to taste, and pepper, to taste. Shape into 8-12 small patties. Cover and refrigerate 15 minutes.
- Heat grill or frying pan to medium heat.
- Brush patties with oil on both sides. Cook 2-3 minutes on each side, turning once to brown both sides evenly, until cooked through.
- To make Jalapeno Salsa: In bowl, combine cucumber, cilantro, onion and jalapenos; season with salt and pepper, to taste. Drizzle with olive oil and lime juice.
- To make Avocado Cream: In bowl, combine avocado, sour cream, lime juice and lime zest; season with salt and pepper, to taste.
- Spread Avocado Cream on bottom buns and place patties on top. Top patties with Jalapeno Salsa, corn and top buns. Press down gently and poke in skewers to secure sliders.
A Sweet Summer Treat
Sweet flavors and warm weather go hand-in-hand, and many summer occasions and get-togethers call for dessert. Take advantage of warm weather favorites like strawberries and raspberries with these Strawberry Cream Cheese Tartlets.
Made using the best berries nature can provide, these bite-size tartlets feature a graham cracker crust base and an indulgent cream cheese filling flavored with sliced strawberries, honey and lemon topped with Well•Pict’s sweet, juicy strawberries and raspberries, which come fresh in clamshell packaging made from 70% recycled water bottles.
Find more sweet recipes that can bring a smile to your loved ones’ faces at wellpict.com/recipe.

Strawberry Cream Cheese Tartlets
Makes: 24 tartlets (4 ounces each)
- 1/2 cup water
- 2 tablespoons lemon juice
- 3 tablespoons lemon zest
- 2 tablespoons gelatin
- 4 cups Well•Pict Strawberries, sliced, divided
- 1/3 cup honey
- 2 packages (8 ounces each) cream cheese
- 1/2 cup sour cream
- 1 cup ice cubes
- 2 cups graham cracker crumbs
- 1/2 cup melted butter
- 1 cup Well•Pict Strawberries, rinsed, for garnish
- 1 cup Well•Pict Raspberries, rinsed, for garnish
- In blender, mix water, lemon juice, lemon zest and gelatin until frothy.
- Add 2 cups strawberries and honey; blend until smooth. Pour into bowl and chill mix 15 minutes.
- In blender, mix cream cheese, sour cream and ice cubes while incorporating strawberry mixture. Mix in remaining strawberries.
- In blender or food processor, mix graham crackers and melted butter to crumb consistency. Lightly grease two medium muffin pans and pack graham cracker mixture at bottom of each opening. Pour strawberry mixture over graham cracker mixture and chill until set. Gently pull tartlets from muffin tins and place on serving tray. Garnish with strawberries and raspberries.
Roasted and Ready to Serve
Summer meals centered around grilled fare call for a complementary pairing that completes the classic profile of warm weather food. Using a versatile vegetable like potatoes allows you to think up different methods of cooking for a new flavor each time.
While you’re focused on the main dish being grilled, these Roasted Potatoes can bake away indoors for a simple side that requires little attention.
Find more health resources at usda.gov.
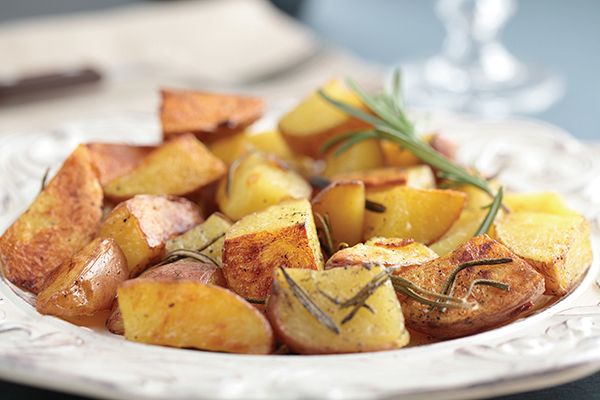
Roasted Potatoes
Recipe courtesy of “A Harvest of Recipes with USDA Foods”
Servings: 6
- 1 pound potatoes, chopped into 1-inch cubes
- 1/2 cup onion, chopped into 1-inch cubes
- 1/2 cup green pepper, chopped into 1-inch cubes
- 1 teaspoon garlic, finely chopped
- 1 teaspoon vegetable oil
- 1/4 teaspoon salt
- 1/4 teaspoon pepper
- 1 tablespoon parsley, finely chopped
- 1/2 teaspoon paprika
- Preheat oven to 350° F.
- In medium bowl, mix potatoes, onions, green peppers and garlic.
- Add vegetable oil, salt, pepper, parsley and paprika. Mix well.
- Cover bowl and refrigerate 15 minutes.
- Spread potato mixture evenly on cookie sheet. Bake about 35 minutes.
Photos courtesy of Getty Images (Kebabs and Roasted Potatoes)
Source: New Zealand Wagyu Beef
Well•Pict Berries

Breaking Bread
(Family Features) As families spend more time at home, Americans are finding comfort in a surprising source: bread. In fact, a 20-year trend of declining grain food consumption has been reversed.
A national study by the Grain Food Foundation suggests that the turnaround is more than a one-time sales blip due to pantry loading. In reality, consumers count bread among their top comfort foods. The study revealed one-third of Americans named pasta and bread as foods that are comforting during a stressful time.
In addition to the comforting flavor, this trend provides valuable nutritional benefits. As a part of many healthy eating plans, bread and pasta are nutritionist approved and provide nutrients needed for healthy aging such as B vitamins, magnesium, selenium, iron, folate and fiber.
“For years, we’ve been telling consumers that grain foods are the foods we love that love us back,” said Christine Cochran, executive director of the Grain Foods Foundation. “The stress has given us permission to enjoy bread and pasta again, but unlike most comfort foods, consumers recognize that grains have nutritional value.”
The highest-ranking comfort foods were ice cream; baked goods like cakes, cookies and pastries; salty snacks; candy; and fast food. However, when asked to identify comfort foods with nutritional advantages, consumers identified bread and pasta as the top two.
Beyond identifying comfort foods and their nutritional value, consumers also expressed worry that bread is in short supply right now.
“We can all rest assured that there is enough supply of grain food products in this country,” Cochran said. “Shoppers may be experiencing some sporadic unavailability of certain high-demand items. However, manufacturers are working closely with retailers to make sure that out-of-stocks are short lived. Consumers will be able to buy their favorite grain-food products and eat them, too.”
To learn more about the role of grain foods in a healthful diet, visit GrainFoodsFoundation.org.
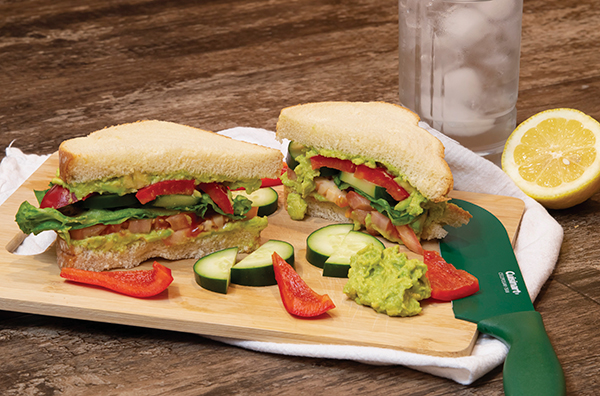
Avocado Veggie Sandwich
Recipe courtesy of the Grain Foods Foundation
Prep time: 10 minutes
Servings: 2
- 1/2 ripe avocado, peeled
- 1 tablespoon fresh lemon juice
- 1/8 teaspoon salt
- 4 slices bread
- 4 slices tomato
- 8 slices cucumber
- 12 slices sweet bell pepper
- 2 tablespoons red wine vinegar
- 2 lettuce leaves
- In small bowl, combine avocado, lemon juice and salt. Spread mixture evenly over two bread slices.
- Place tomatoes, cucumber and peppers on covered surface. Drizzle with vinegar.
- Layer lettuce, tomato, cucumbers and peppers evenly between slices of bread, creating two sandwiches.
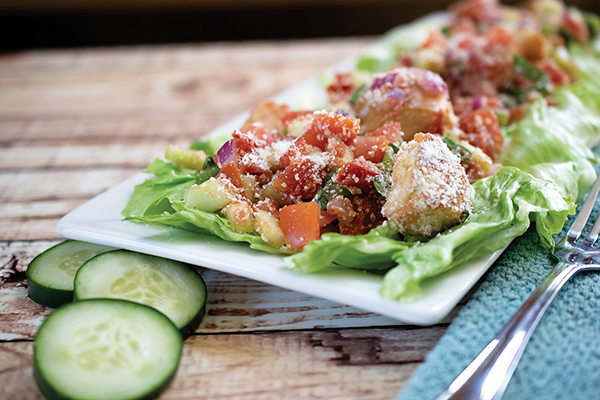
Panzanella Bagel Salad
Recipe courtesy of Sylvia Melendez-Klinger, MS, RD, on behalf of the Grain Foods Foundation
Prep time: 5 minutes
Servings: 6
- 2 medium Roma tomatoes, seeded and diced
- 1 1/4 cups canned diced tomatoes, undrained
- 1/4 cup green bell pepper, diced
- 1/4 cup cucumber, peeled, seeded and diced
- 2 tablespoons red onion, diced
- 2 tablespoons Parmesan cheese, grated, plus additional (optional)
- 1 tablespoon balsamic vinegar
- 2 tablespoons fresh basil, chopped
- 2 bagels (4 ounces each) cut into 2-inch pieces, toasted
- assorted greens (optional)
In medium bowl, mix tomatoes, canned tomatoes with juice, green pepper, cucumber, onion, cheese, vinegar and basil.
Add toasted bagel pieces; toss gently. Marinate, covered, in refrigerator 1 hour. Serve within 1 hour after marinating. Sprinkle with additional cheese and serve on bed of assorted greens, if desired.
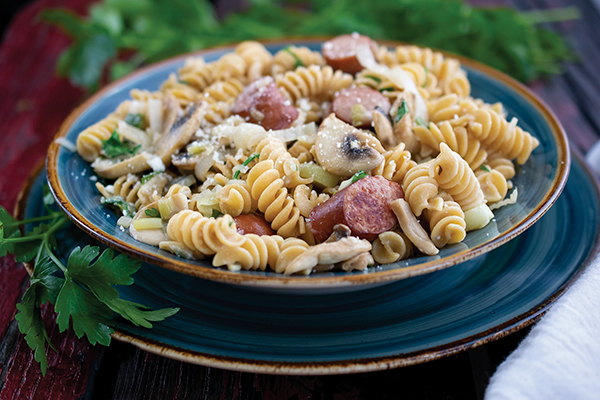
Rotini with Sausage and Mushrooms
Recipe courtesy of Sylvia Melendez-Klinger, MS, RD, on behalf of the Grain Foods Foundation
Prep time: 18 minutes
Servings: 8
- 1 box (13 1/4 ounces) whole-grain rotini
- 1 tablespoon olive or vegetable oil
- 1 pound chicken sausage, sliced
- 1 cup leeks, thinly sliced
- 1 cup green onions, thinly sliced
- 2 cups mushrooms, sliced
- 1 cup chicken stock
- 1/4 cup parsley chopped
- 6 leaves from tarragon sprigs, chopped
- 1 cup Romano cheese grated
- Parmesan-Romano cheese (optional)
- Prepare rotini according to package directions. Drain and transfer to large bowl.
- In large skillet, heat oil over medium heat. Cook sausage 2-3 minutes, or until well browned. Add leeks, onions and mushrooms; cook until tender. Add chicken stock and simmer 3-5 minutes, or until hot. Fold sausage mixture into warm pasta. Add parsley, tarragon and Romano cheese; toss again. Top with Parmesan-Romano cheese, if desired.
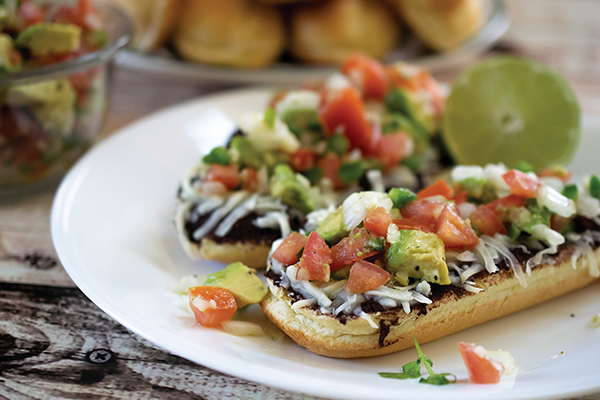
Cheesy Black Bean Toast with Pico de Gallo
Recipe courtesy of Sylvia Melendez-Klinger, MS, RD, on behalf of the Grain Foods Foundation
Prep time: 15 minutes
Servings: 4
- 6 Roma tomatoes, diced
- 1⁄2 medium onion, finely chopped
- 1 clove garlic, finely minced
- 2 serrano or jalapeno peppers, finely chopped
- 3 tablespoons fresh cilantro, chopped
- 1 lime, juice only
- 1⁄8 teaspoon oregano, finely crushed
- 1⁄8 teaspoon salt (optional)
- 1⁄8 teaspoon pepper
- 1⁄2 Hass avocado, diced
- 4 bolillos (6 inches) or large Kaiser rolls, sliced in half lengthwise
- 1 can (16 ounces) seasoned low-fat refried black beans
- 2 cups shredded Chihuahua or mozzarella cheese
- Heat oven to 350 F.
- In medium mixing bowl, combine tomatoes; onion; garlic; peppers; cilantro; lime juice; oregano; salt, if desired; pepper; and avocado; set aside.
- On medium platter, split rolls. With medium spatula, spread refried beans onto each bread half; sprinkle cheese among bread.
- Bake 5-8 minutes, or until cheese is melted and hot.
Source: Grain Foods Foundation

Perfect Pantry Pastas
(Family Features) Constantly seeking out recipe-specific ingredients that may only be used once or twice can be a burden. Instead, keep your home stocked with necessities to simplify dinner prep with dishes made using common household staples.
One perfect example: pastas. These recipes for Minestrone Pasta Saute with Ricotta, Creamy One-Pot Spaghetti and Pasta in a Pinch include easily recognizable seasonings and canned goods for simple dinner solutions. Plus, they all include dairy, an irreplaceable part of a balanced diet as a source of essential nutrients.
Another way to scale back on unnecessary grocery purchases is to give yourself permission to modify. Many recipes can be tweaked for personal preferences, such as using black beans rather than kidney beans or adjusting the amount of a spice used based on your family’s tastes.
Stock your pantry and refrigerator with versatile ingredients like these:
- Canned tomatoes
- Canned beans
- Quick-cook rice
- Small whole-grain pasta
- Stock, like vegetable, chicken or beef
- Fluid milk
- Shredded cheese
- Plain Greek yogurt
For more ideas to simplify family meals, visit milkmeansmore.org.

Minestrone Pasta Saute with Ricotta
Recipe courtesy of Lori Yates of “Foxes Love Lemons” on behalf of Milk Means More
Prep time: 15 minutes
Cook time: 15 minutes
Servings: 4
- 8 ounces ditalini pasta
- 1 1/2 tablespoons extra-virgin olive oil
- 3 carrots, finely diced
- 3 cloves garlic, minced
- 1/2 medium onion, chopped
- 1/2 bunch kale, thinly sliced
- 1/2 pound green beans, trimmed and halved
- 1/4 cup dry white wine
- 1/2 pound lean ground beef (optional)
- 1 can (15 ounces) kidney beans, rinsed and drained
- 1 jar (24 ounces) marinara sauce
- 1/2 teaspoon kosher salt
- 1/4 teaspoon ground black pepper
- 1 cup Ricotta cheese
- 1/4 cup grated Parmesan cheese
- In large pot of boiling salted water, cook pasta according to package instructions. Reserve 1/4 cup pasta cooking water then drain pasta.
- In large skillet over medium-high heat, heat oil. Add carrots, garlic and onion; cook 3 minutes, or until vegetables start to soften, stirring occasionally. Add kale and green beans; cook 3 minutes, or until green beans are tender-crisp, stirring occasionally.
- Add wine to skillet; cook 2 minutes, or until most liquid has evaporated. Transfer vegetables to medium bowl. If including meat, return skillet to medium-high heat. Add ground beef; cook 6-8 minutes, or until meat is cooked through, breaking up with side of spoon. Spoon off excess fat.
- Reduce heat to medium-low. Add kidney beans, marinara sauce, salt, pepper, pasta, reserved pasta cooking water and cooked vegetable mixture to skillet with beef, if using. Cook 2 minutes, or until warmed through, stirring occasionally. Divide pasta between four pasta bowls or plates and top with Ricotta and Parmesan cheeses.
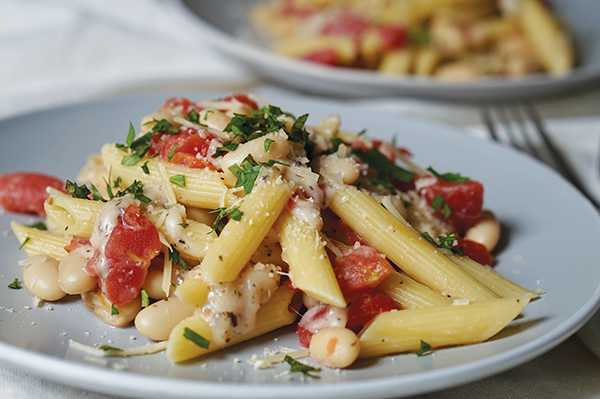
Pasta in a Pinch
Recipe courtesy of Jenn Fillenworth, MS, RDN, of “Jenny With the Good Eats” on behalf of Milk Means More
Prep time: 5 minutes
Cook time: 15 minutes
Servings: 6
- 8 ounces uncooked penne pasta
- 2 1/2 cups water
- 1/4 teaspoon salt
- 1/4 teaspoon black pepper
- 1/2 teaspoon dried basil
- 1/2 teaspoon garlic powder
- 1/2 cup milk
- 2 cups mozzarella cheese, grated
- 1 can (15 ounces) cannellini beans, rinsed and drained
- 1 can (14 1/2 ounces) diced tomatoes, drained
- 1/4 cup Parmesan cheese
- freshly chopped herbs, for garnish (optional)
- In large microwavable bowl, place uncooked penne pasta and pour water over top to cover. With food-safe plastic wrap, cover bowl, leaving small section to vent as it cooks. Cook 3 minutes longer than package directs, approximately 13 minutes.
- Once pasta has cooked, drain into colander then place back in bowl. Add salt, pepper, basil, garlic powder and milk; stir to combine. Begin to stir in cheese a little at a time. Microwave 1 minute. Remove from microwave and stir again.
- Add cannellini beans and diced tomatoes; stir. Microwave 1 minute. Remove from microwave and stir. Assess if ingredients are hot and cheese is melted. If not, microwave 1-2 minutes.
- Top with Parmesan cheese and garnish with fresh herbs, if desired.
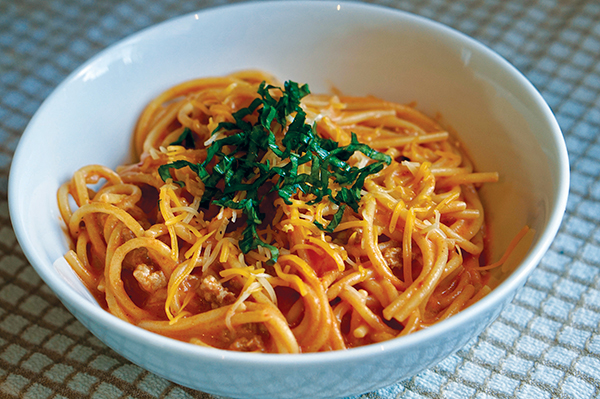
Creamy One-Pot Spaghetti
Recipe courtesy of Marcia Stanley, MS, RDN, on behalf of Milk Means More
Prep time: 20 minutes
Cook time: 10 minutes
Servings: 8
- 1 tablespoon vegetable oil
- 1 pound lean ground turkey or lean ground beef
- 1/2 cup chopped onion
- 2 1/2 cups reduced-sodium chicken broth or reduced-sodium beef broth
- 2 cups marinara sauce
- 1/2 teaspoon crushed fennel seeds
- 1/8 teaspoon ground cayenne pepper
- 8 ounces spaghetti noodles, broken into 3-4-inch pieces
- 1 package (8 ounces) reduced-fat cream cheese, cubed
- 1 1/3 cups shredded cheddar cheese, divided
- chopped fresh basil or parsley (optional)
- Using saute function of pressure cooker, heat oil until hot. Add meat and onion. Cook, uncovered, about 5 minutes, or until meat is browned, stirring to break up. Press cancel.
- Stir broth, marinara sauce, fennel seeds and cayenne pepper into meat. Stir in spaghetti, making sure noodle pieces are covered by liquid. Secure lid and set pressure release to sealing function. Select high pressure and cook 5 minutes. Press cancel.
- Allow pressure to release naturally 2 minutes. Move pressure release to venting function to release remaining steam. Remove lid.
- Stir spaghetti mixture. Stir in cream cheese and 1 cup cheddar cheese until melted. Ladle into bowls to serve. Sprinkle with remaining cheddar cheese. Garnish with chopped fresh basil or parsley, if desired.

Nutritious Eating at Home
(Family Features) If spending additional time in the comfort of your home has you rethinking the family menu and looking for new ways to enjoy nutritional meals, rest assured you can make better-for-you food choices without losing mouthwatering taste.
Easy, efficient at-home recipes like Thai Coconut Lime Freezer Chicken, Burrito Beef and Cauli Mac and Cheese can all be made in less than an hour while reducing the intake of carbs and unnecessary sugars. All are part of a balanced Atkins low-carb lifestyle, a long-term, healthy eating approach focused on high-fiber carbohydrates, optimal protein and healthy fats.
The eating approach, which is a more flexible version of the popular ketogenic diet, offers a balanced mix of foods containing fiber-rich and nutrient-dense carbohydrates while focusing on reduced levels of refined carbohydrates, added sugars and the “hidden sugar effect” – when carbohydrates convert to sugar when digested. You don’t see the sugar, but your body does.
Introducing your family to smarter food choices can also support your immunity. According to research published in “The American Journal of Clinical Nutrition,” simply substituting whole grains for refined grains has a modest effect on gut microbiota and immunity. Refined grains have had most of the fiber milled out of them, leaving a refined carbohydrate that impacts your body the way sugar would. Opt for whole grains to get the fiber you need, along with protein and healthy fats.
Visit atkins.com for more nutritious recipes
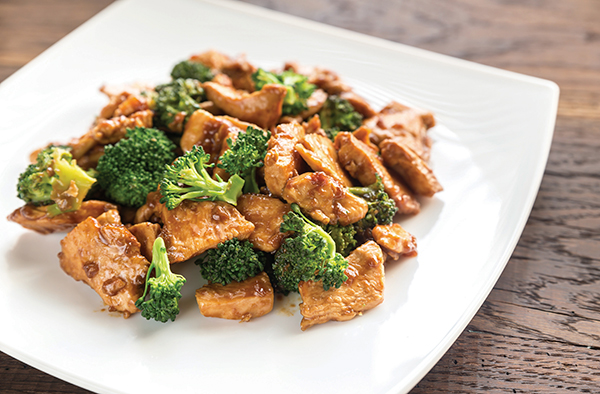
Thai Coconut Lime Freezer Chicken
Prep time: 8 minutes
Cook time: 22 minutes
Servings: 4
- 1 3/4 cups coconut milk
- 2 tablespoons basil
- 1 tablespoon xylitol (sugar substitute)
- 1 ounce cilantro
- 1 ounce fresh lime juice
- 1/2 teaspoon salt
- 1/2 teaspoon garlic
- 1 teaspoon lime zest (optional)
- 20 ounces boneless, cooked chicken breast
- 20 ounces broccoli flower clusters
- In bowl, mix coconut milk, basil, xylitol, cilantro, lime juice, salt and garlic. For more citrus flavor, add lime zest, if desired.
- Add chicken, broccoli and sauce to 1-gallon zip-top freezer bag. Squeeze out any air and seal bag. Freeze bag flat up to 1 month.
- To cook: Thaw in refrigerator overnight. Heat oven to 350° F.
- Place in glass 8-by-8-inch pan and bake 20-25 minutes.
Burrito Beef
Prep time: 15 minutes
Cook time: 8 hours
Servings: 6
- 2 pounds beef arm chuck roast
- 4 tablespoons green taco sauce
- 1 teaspoon minced garlic
- 2 large scallions or spring onions, chopped
- 1 jalapeno pepper, diced
- 2 teaspoons chili powder
- 1/2 teaspoon cumin
- 1/2 teaspoon salt
- Trim fat from beef. In slow cooker on low heat, cook beef, taco sauce, garlic, onions, jalapeno, chili powder, cumin and salt 8 hours, or until beef is tender.
- Using two forks, remove beef and shred. Mix beef with 1/2 cup cooking juices before serving.
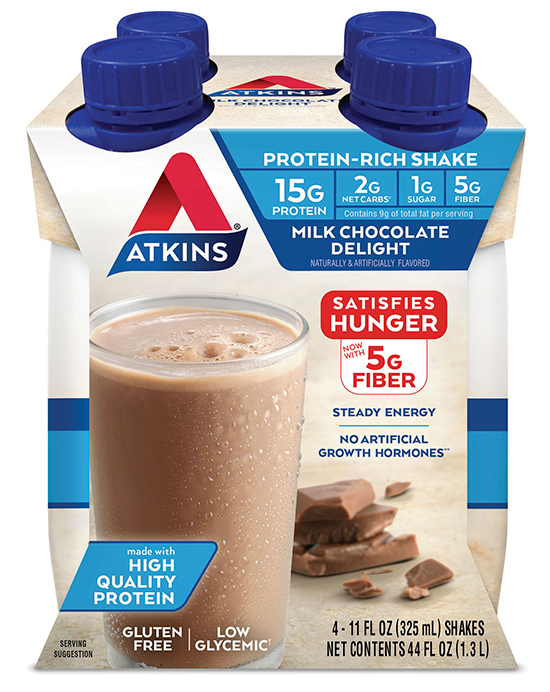
- A Low-Sugar Swap to Satisfy Cravings
- While spending more time at home than normal, those snack cravings can be hard to shake. Rather than relying on easy-to-grab eats from the pantry or freezer, focus on more nutritious choices that don’t sacrifice flavor.
- Turn to a creamy solution to satisfy your hunger such as the Atkins Milk Chocolate Delight Shake, a filling option for chocolate lovers. The drinks are packed with 15 grams of protein, 5 grams of fiber, 20% of the daily recommended amount of vitamin D and 1 gram of sugar to keep you going throughout the day.
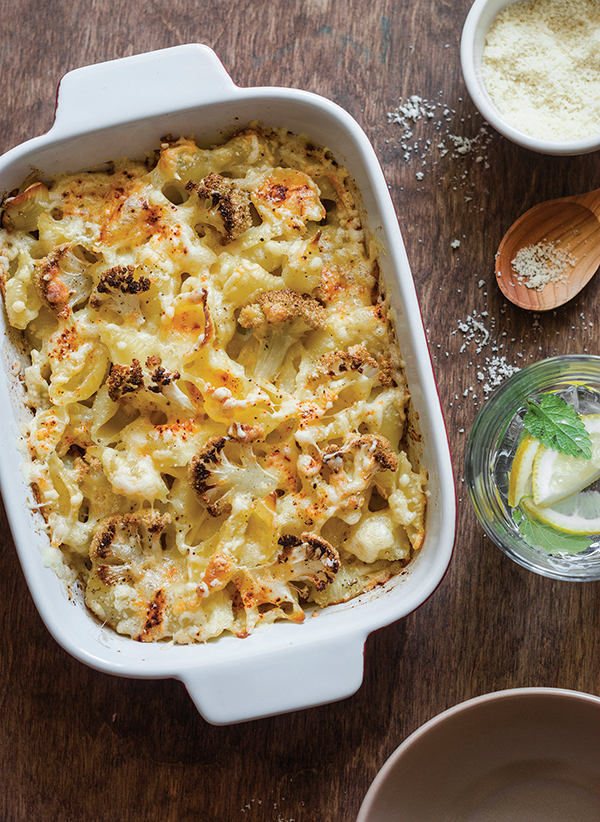
Cauli Mac and Cheese
Prep time: 10 minutes
Cook time: 40 minutes
Servings: 6
- Nonstick cooking spray
- 1 teaspoon salt, divided
- 1 head large (6-7-inch diameter) cauliflower
- 1 cup heavy cream
- 2 ounces cream cheese
- 1 1/2 teaspoons ground mustard
- 1 1/2 cups shredded cheddar cheese, divided
- 1 clove garlic, minced
- 1/4 teaspoon white pepper
- 1/4 teaspoon pepper sauce
- Heat oven to 375° F and prepare 9-by-9-inch baking dish with nonstick cooking spray. Heat large pot of water to boiling and add 1/2 teaspoon salt.
- Remove stem and leaves from cauliflower. Cut into small pieces and place in boiling water; cook until crisp-tender; about 5 minutes. Drain well then pat between paper towels to remove moisture.
- In medium saucepan over medium heat, bring cream to simmer. Whisk cream cheese and powdered mustard into simmering cream until smooth. Add 1 cup cheddar cheese, garlic, remaining salt, white pepper and pepper sauce, whisking until cheese melts; about 1-2 minutes. Remove from heat and stir in cauliflower.
- Pour into baking dish and top with remaining cheese. Bake 15 minutes until browned and bubbly.
Photos courtesy of Getty Images (Thai Coconut Lime Freezer Chicken, Burrito Beef and Cauli Mac and Cheese)
Source: Atkins