
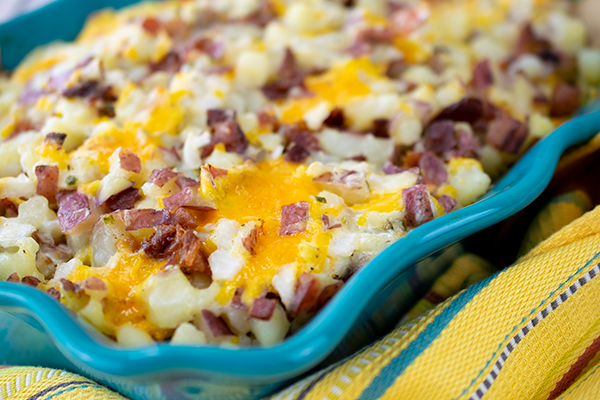
Cheesy Baked Potato Casserole
(Culinary.net) ’Tis the season for comfort foods, and this recipe with crumbled bacon and cubed potatoes smothered in melted cheddar cheese is sure to satisfy.
Find more meal ideas at Culinary.net.
Watch video to see how to make this recipe!
Cheesy Baked Potato Casserole
- 5 pounds red potatoes, cubed
- 1 pound bacon, cooked and crumbled
- 1 pound cheddar cheese, cubed
- 16 ounces shredded cheddar cheese
- 1 yellow onion, chopped
- 1 cup mayonnaise
- 8 ounces sour cream
- 1 tablespoon minced chives
- 1 teaspoon salt
- 1/2 teaspoon pepper
- Heat oven to 325° F.
- In large bowl, combine potatoes and bacon.
- In separate large bowl, combine cheese, onion, mayonnaise, sour cream, chives, salt and pepper. Add to potato and bacon mixture until combined.
- Pour into 9-by-13-inch baking dish. Bake 50-60 minutes until browned and bubbly.

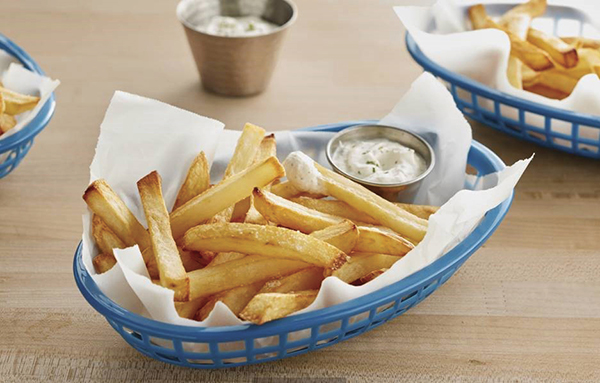
How to Bring a Restaurant Favorite Home
(Family Features) Ever wonder about the secret to making your favorite restaurant’s ranch dressing? Look no further – the secret could be Hidden Valley® Ranch Seasoning Mix. In fact, more than half of all restaurants that use a ranch seasoning mix use Hidden Valley Ranch signature buttermilk seasoning mix to provide a distinctive house-made taste. Those who enjoy freshly made ranch at their favorite eateries can recreate this great flavor in the comfort of their homes.
Some people say “a restaurant is only as good as its ranch,” and we couldn’t agree more. Restaurant ranch is popular for a reason: the cool and creamy ranch texture made with fresh ingredients has a delicious homemade taste that pairs perfectly with dishes from wings to fries to pizza to chicken tenders to veggies and almost everything in-between.
With Hidden Valley Ranch Buttermilk Seasoning Mix, you can recreate the restaurant-style ranch dressing you love in just a few minutes whenever the craving strikes. Just combine the dressing mix with 1 cup of mayonnaise and 1 cup of buttermilk and chill for 30 minutes for an easy way to amp up some of your favorite foods, just like you would when eating out.
Throughout the month of October, you can visit hiddenvalley.com/restaurant-ranch for the opportunity to vote for your favorite restaurant ranch and be entered for a chance to win the grand prize of $5,000 and a year’s supply of ranch as well as more recipes and information.*
Restaurant-Style Ranch Dressing
- 1 cup buttermilk
- 1 cup mayonnaise
- 1 package (0.4 ounces) Hidden Valley Ranch Restaurant-Style Dressing & Seasoning Mix
- 1/2 cup sour cream (optional)
- In bowl, combine buttermilk, mayonnaise and seasoning mix; mix well. Add sour cream, if desired, for thicker dressing.
- Cover and refrigerate 30 minutes to thicken.
- Stir before serving.
Note: Dressing stays fresh 3-4 weeks.
*No purchase necessary. US, 18+ excl. NY & FL. Ends 11:59 p.m. PT 10/31/19. Void in NY & FL & where prohibited. Official Rules @ http://hiddnval.ly/bFkhbo
Source: Hidden Valley Ranch

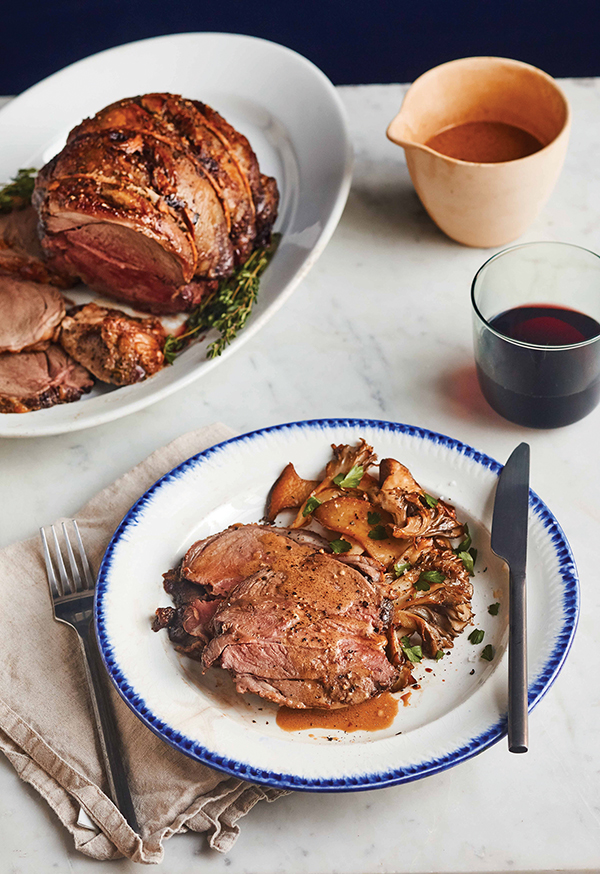
A Flavorful Fall Meal for the Entire Family
(Family Features) When fall comes around, it brings many iconic flavors, festive traditions and family meals, along with cravings for warm, hearty dishes. For your next gathering of loved ones, whether it’s a special occasion, sporting event or simply spending quality time together, serve a classic comfort food perfect for a small crowd.
While a roast leg of lamb may be considered time-intensive or best-suited for special occasions, it can be a surprisingly stress-free dish to prepare at home. A simple way to update familiar dishes, grass-fed lamb, available at your local Whole Foods Market, is easy to cook; prepare it the same way you would grass-fed beef.
This grass-fed leg of lamb recipe, for example, requires little fuss and the oven does the work for you. Infused with garlic and thyme, topped with a creamy meat sauce and garnished with a side of seasonal produce, you can delight your family and friends with this tender and delicious meal. Plus, New Zealand grass-fed lamb is a lean, finely textured and flavorful protein, well-suited for a variety of dishes.
For more information, cooking tips and recipes, visit beefandlambnz.com.
Grass-Fed Leg of Lamb
Prep time: 10 minutes
Cook time: 2 hours, 45 minutes
Servings: 8
Lamb:
- 4 1/2-5 1/2 pounds Atkins Ranch grass-fed leg of lamb, at room temperature
- 1 3/4 ounces butter, softened
- 3 cloves garlic, crushed
- 1 teaspoon roughly chopped thyme leaves
- salt, to taste
- ground black pepper, to taste
- 1-2 handfuls thyme sprigs
- 1 onion, sliced
- 1/2 cup olive oil
Meat Sauce:
- 1 cup beef stock
- 3/4 cup creme fraiche or sour cream
- lemon zest, finely grated
- 1 tablespoon wine vinegar
- 1 bay leaf
- salt, to taste
- sauteed mushrooms (optional)
- sauteed green beans (optional)
- steamed carrots and snap peas (optional)
- Heat oven to 320° F.
- To prepare lamb: Using sharp knife, make 4-5 shallow slits in lamb. In bowl, mix butter, garlic and chopped thyme. Coat butter mixture in slits and sprinkle lamb with salt and pepper, to taste.
- Place thyme sprigs and sliced onion in base of roasting tin and place lamb on top. Drizzle olive oil over lamb. Roast 2 hours, 45 minutes.
- To make meat sauce: Remove lamb from oven 30 minutes before end of cooking time. Place lamb on board then tip juices into saucepan. Place lamb back in roasting tin and return to oven.
- Skim fat off roasting juices. Add beef stock to remaining juices and bring to boil.
- Reduce heat and add creme fraiche or sour cream, lemon zest, vinegar and bay leaf. Simmer until sauce reduces some. Season with salt, to taste, to counteract acidity.
- Remove lamb from oven and rest covered loosely with foil and tea towel 10 minutes before carving.
- Strain sauce into bowl or gravy boat and serve hot with lamb and sauteed mushrooms, green beans or steamed carrots and snap peas, if desired.
Source: Beef + Lamb New Zealand

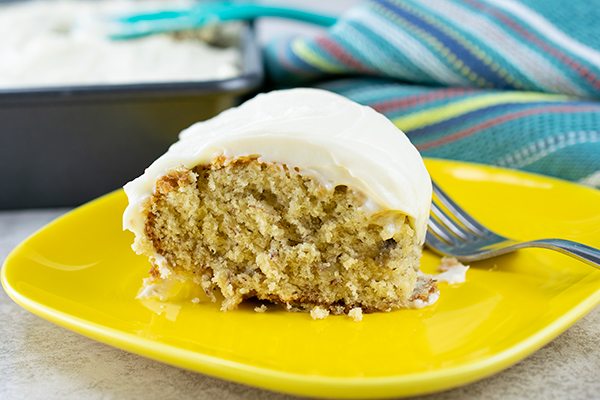
Frosted Banana Cake
(Culinary.net) If you need a recipe idea for your ripened bananas, try this Frosted Banana Cake recipe. A moist but not overly sweet cake bursting with banana flavor paired with a cream cheese frosting may be your new favorite.
Find more dessert recipes at Culinary.net.
Watch video to see how to make this recipe!
Frosted Banana Cake
- 2 medium ripe bananas
- 1/2 cup butter, softened
- 1 1/2 cups sugar
- 2 eggs
- 1 cup sour cream
- 1/4 teaspoon vanilla extract
- 2 cups flour
- 1 teaspoon baking soda
- 1/4 teaspoon salt
Frosting:
- 1 package (8 ounces) cream cheese, softened
- 1/2 cup butter, softened
- 2 teaspoons vanilla extract
- 3 cups powdered sugar
- Heat oven to 350° F.
- Peel, slice and mash ripened bananas; set aside.
- In large bowl, beat butter and sugar until fluffy. Add eggs, sour cream and vanilla; blend well. Gradually add in flour. Stir in bananas. Add baking soda and salt; mix well.
- Pour batter into baking pan. Bake 20-25 minutes, or until toothpick inserted into center of cake comes out clean. Let cool.
- To make frosting: In large bowl, beat cream cheese, butter and vanilla extract until fluffy. Gradually add powdered sugar. Mix until well combined.
- Frost cake. Store in refrigerator until ready to serve.

Chocolate Caramel Pie
When it comes to dessert, it’s hard to beat chocolate as the main ingredient for dishes of all kinds. Add a twist to your next treat with the sweet taste of caramel in this Chocolate Caramel Pie.
Find more dessert recipes at Culinary.net.
Watch video to see how to make this recipe!
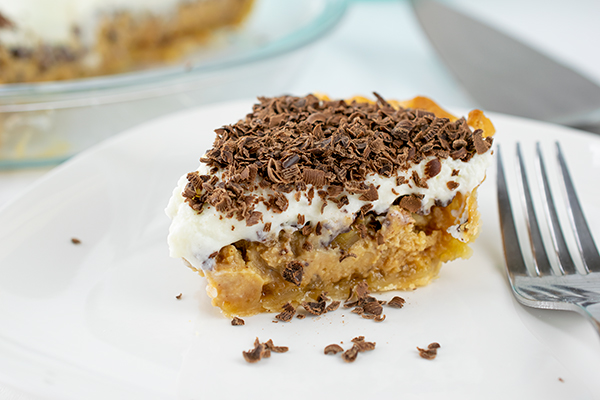
Chocolate Caramel Pie
- 1 package (15 ounces) pie crust
Filling:
- 24 caramels, unwrapped
- 1/3 cup water
- 2/3 cup brown sugar
- 2/3 cup sour cream
- 1 teaspoon vanilla extract
- 2 eggs, beaten
- 1/2 cup walnuts, chopped
- 1/3 cup grated sweet baking chocolate, divided
Topping:
- 1 cup white chocolate chip morsels
- 1/4 cup milk
- 1 cup whipping cream
- 2 tablespoons grated sweet baking chocolate
- Heat oven to 450° F. Prepare pie crust in 9-inch glass pie dish. Bake 8-9 minutes, or until lightly brown.
- To make filling: In medium bowl, combine caramels and water. Melt in microwave, stirring frequently. Stir in brown sugar, sour cream, vanilla extract, eggs and walnuts.
- Reduce oven to 350° F. Pour filling into cooled pie shell. Return to oven. Bake 30-40 minutes, or until edges of filling are set.
- Cool 15 minutes. Sprinkle 3/4 cup grated chocolate over pie. Refrigerate 2 hours.
- To make topping: In small glass bowl, combine white chocolate morsels and milk. Melt in microwave, stirring frequently. Set aside.
- In small bowl, beat whipping cream until peaks form. Fold in melted white chocolate mixture. Spread over cooled filling. Sprinkle with remaining grated chocolate.
- Refrigerate until ready to serve.

Delicious Recipes for Stronger Bones
(Family Features) If an ounce of prevention is worth a pound of cure, it's good to know that a convenient pantry product can help fight osteoporosis – by the spoonful. Over 44 million American women and men aged 50 and older have osteoporosis or low bone mass. About half of American children under 5 years of age don't get enough calcium in their diets. And once children reach their teen years, more than 85% of girls and 60% of boys don't get their recommended daily allowance of calcium.
Since low lifetime calcium intake is one of the risk factors for osteoporosis, it makes sense to start building stronger bones in childhood, then continue through life. One easy and delicious way to automatically increase your family's calcium intake is to sprinkle nonfat dry milk into your recipes. Sprinkle nonfat dry milk into your favorite meatloaf mixture to help keep it moist.
Add it to breads, muffins and cakes for better texture and browning. Fortified with vitamins A and D, with D aiding calcium absorption, the "magic crystals" can also enrich smoothies, egg dishes, dips, puddings, mashed potatoes, soups and sauces.
For more calcium-boosting recipes and information, visit VeryBestBaking.com.
By the Spoonful
Look how easy it is to boost your calcium intake. Get the most calcium by adding 1 tablespoon of nonfat dry milk to many of the foods you eat every day. Make it a habit to get more calcium this wholesome and natural way.
1 tablespoon of ... |
Amount |
|
Nonfat dry milk approximately |
= 55mg |
|
Fat-free evaporated milk approximately |
= 45mg |
|
Fat-free plain yogurt approximately |
= 30mg |
|
Refrigerated fat-free milk approximately |
= 20mg |

Creamy Garlic Dip
Servings: 10
- 1 cup reduced-fat sour cream
1/2 cup dry Nestlé Carnation Instant Nonfat Dry Milk
2 tablespoons sliced green onions
1 tablespoon cider vinegar
1 clove garlic, finely chopped
1/2 teaspoon salt
1/4 teaspoon ground black pepper
- In small bowl, combine sour cream, dry milk, green onions, vinegar, garlic, salt and pepper; stir until smooth. Serve with assorted cut-up vegetables.
Nutritional information per serving: 70 calories; 5 g protein; 3 g fat (25 calories from fat); 7 g carbohydrates; 10 mg cholesterol; 0 g fiber; 190 mg sodium; 15% daily value calcium.

Creamy Fruit Smoothie
Servings: 4
- 3 cups fresh, frozen (unsweetened) or canned fruit, drained
- 1 1/3 cups (3.2 ounce envelope) dry Nestlé Carnation Nonfat Dry Milk
- 1/2 cup water
- 1/2 cup ice cubes
- 2 tablespoons granulated sugar (optional)
- 1 teaspoon vanilla extract
- Place fruit, dry milk, water, ice, sugar and vanilla extract in blender; cover. Blend until smooth.
Note: For a tropical drink, try a mixture of mango, papaya and pineapple to make up 3 cups fruit. Follow directions above.
Nutritional information per serving: 150 calories; 9 g protein; 0.5 g fat (5 calories from fat); 28 g carbohydrates; 5 mg cholesterol; 2 g fiber; 125 mg sodium; 30% daily value calcium.

Zesty Potato Salad
Servings: 8
- 1/4 cup dry Nestlé Carnation Instant Nonfat Dry Milk
- 1/4 cup water
- 1/4 cup Dijon-style mustard
- 1/2 teaspoon salt
- 1/4 teaspoon freshly ground black pepper
- 2 pounds (about 6 large) red-skinned potatoes, cut into 1-inch cubes, cooked, drained and cooled
- 2 cups green beans, cut into 1-inch pieces, blanched (optional)
- 1 cup chopped red bell pepper
- 1/4 cup sliced green onions
- lettuce leaves (optional)
- In small bowl, combine dry milk, water, mustard, salt and pepper until well mixed. In large bowl, combine potatoes; green beans, if desired; bell pepper and onions; add milk dressing and toss well to coat. Serve immediately or refrigerate. Serve over lettuce leaves.
Nutritional information per serving: 160 calories; 8 g protein; 1.5 g fat (15 calories from fat); 30 g carbohydrates; 5 mg cholesterol; 4 g fiber; 330 mg sodium; 20% daily value calcium.

Banana Nut Bread
Servings: 2 loaves
- 4 cups all-purpose flour
- 1 1/3 cups (3.2-ounce envelope) dry Nestlé Carnation Nonfat Dry Milk
- 4 teaspoons baking powder
- 1 teaspoon ground cinnamon
- 4 large eggs
- 3 1/2 cups (about 7 medium) mashed very ripe bananas
- 2 cups granulated sugar
- 1 cup vegetable oil
- 1 cup chopped walnuts
- Heat oven to 350° F. Grease two 9-by-5-inch loaf pans.
- In medium bowl, combine flour, dry milk, baking powder and cinnamon. In large mixer bowl, beat eggs, bananas, sugar and vegetable oil on medium speed until well blended. Gradually beat in flour mixture; stir in nuts. Spoon into prepared loaf pans.
- Bake 60-65 minutes, or until wooden pick inserted in center comes out clean. Cool in pans on wire racks 10 minutes; remove to wire racks to cool completely.
Nutritional information per serving: 310 calories; 6 g protein; 14 g fat (120 calories from fat); 43 g carbohydrates; 35 mg cholesterol; 2 g fiber; 115 mg sodium; 10% daily value calcium.
Confetti Frittata
Servings: 4
- Nonstick cooking spray
- 2 cartons (8 ounces each) egg substitute
- 1 1/3 cups (3.2-ounce envelope) dry Nestlé Carnation Nonfat Dry Milk
- 2 cups (8 ounces) shredded reduced-fat cheddar cheese
- 2 cups (about 6 ounces) sliced fresh mushrooms
- 1/2 cup finely chopped red bell pepper
- 2 medium green onions, sliced
- 1/2 teaspoon salt
- 1/2 teaspoon ground black pepper
- Heat oven to 400° F. Spray 10-inch ovenproof skillet with nonstick cooking spray.
- In medium bowl, combine egg substitute and dry milk; mix thoroughly. Stir in cheese, mushrooms, bell pepper, green onions, salt and black pepper. Pour mixture in prepared skillet.
- Bake 30-35 minutes, or until set in center. Cool on wire rack 5 minutes then cut into wedges and serve.
Nutritional information per serving: 300 calories; 38 g protein; 8 g fat (70 calories from fat); 17 g carbohydrates; 15 mg cholesterol; 1 g fiber; 980 mg sodium; 60% daily value calcium.
Photos courtesy of Getty Images
Source: VeryBestBaking.com

A Fiesta of Flavor!
(Family Features) This Cinco de Mayo, gather the whole family together and enjoy a true Mexican fiesta like Mama Ortega would have thrown over 100 years ago. With mariachi music, dancing, piñatas and traditional homemade Mexican meals, Mama's fiestas were always a favorite with family, friends and especially her 13 children!
The flavors and smells of Mama's homemade meals still taste great today, but are easier to create - and more fun to eat! Her legendary meals inspired today's convenient and great tasting Ortega Mexican products. Achieve authentic fiesta flavors by using crisp and crunchy Ortega taco shells made with whole kernel corn, topped with slow simmered Ortega Taco Sauce and authentic fire-roasted green chiles. Ortega's zesty Mexican seasonings and fresh-tasting salsas are perfect for adding flavor to your favorite snack, casserole, dip or soup!
So, gather the family together and enjoy a fiesta of flavors with Ortega. For other great recipe ideas or to learn more about Ortega's line of products, visit www.ortega.com.

Taco Rice and Beans
Prep time: 5 minutes
Start to finish: 15 minutes
Serves 4
- 2 tablespoons olive oil
- 1 medium onion, diced
- 1 package (1.25 ounces) Ortega Taco Seasoning Mix
- 1 cup water
- 1 can (15 ounces) black beans, drained
- 2 cups cooked rice
- 1/4 cup Ortega Thick & Chunky Salsa
- In skillet, heat oil over medium heat. Add onion; cook 3 minutes. Add taco seasoning mix and water. Stir until combined and slightly thickened. Add beans, rice and salsa; stir. Cook 5 minutes more or until contents are heated through.
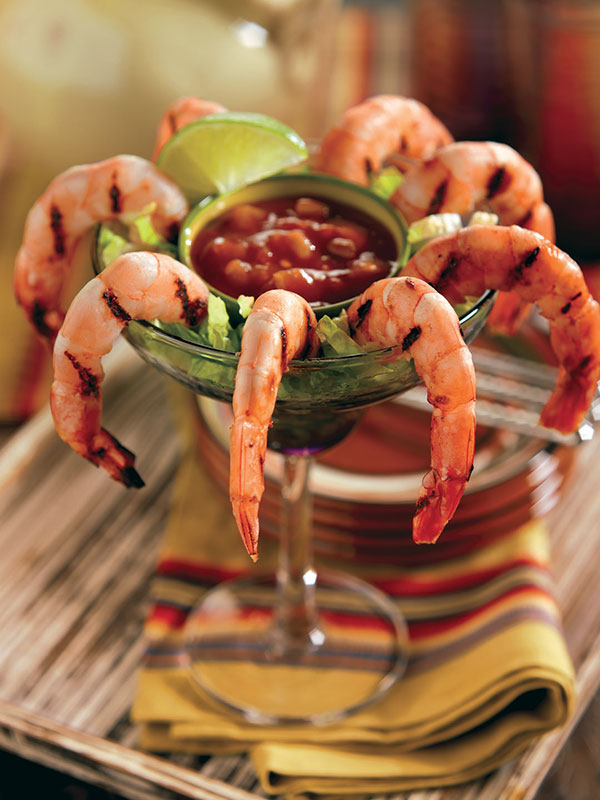
Grilled Margarita Shrimp
Prep time: 40 minutes
Start to finish: 50 minutes
Serves 6
- 1 cup margarita mix
- 1 cup Ortega Taco Sauce, divided
- 2 pounds raw shrimp (21 to 30), peeled and deveined
- 3 tablespoons Ortega Diced Green Chiles
- In large bowl, pour margarita mix and 1/2 cup taco sauce over shrimp and toss well. Marinate in refrigerator 30 minutes or up to 2 hours.
- Preheat grill until sizzling hot, about 15 minutes. Grill shrimp 4 minutes on each side or until pink.
- Combine remaining 1/2 cup taco sauce with green chiles to use as dipping sauce.
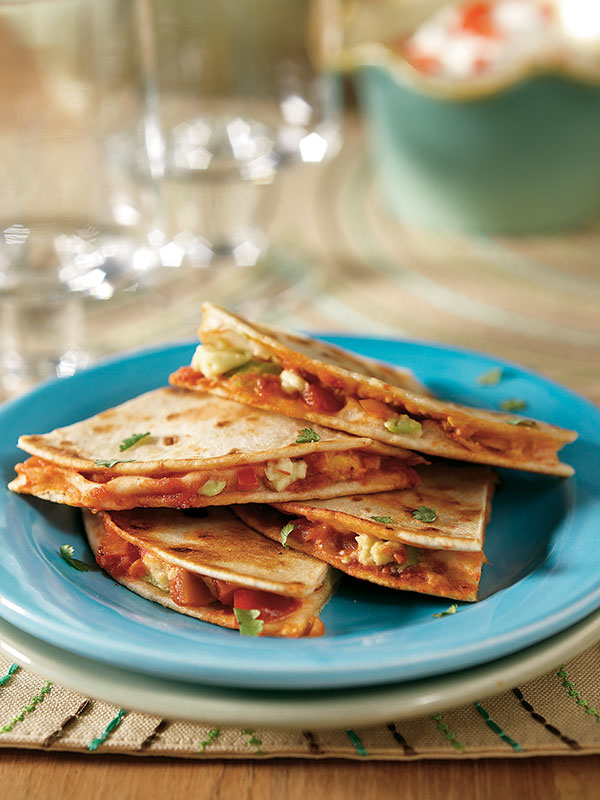
Ham and Cheese Quesadillas
Prep time: 10 minutes
Start to finish: 20 minutes
Serves 5
- 1/2 pound cooked ham, diced
- 3/4 cup cream cheese, softened
- Zest of one lime
- 2 green onions, white and green parts, diced
- 1 Ortega Soft Taco Kit - includes 10 soft tortillas, 1 package (1.25 ounces) taco seasoning mix and 1 package (3 ounces) taco sauce
- Cooking spray
- 1 tomato, diced
- 1/4 cup cilantro, chopped
- 1/2 cup sour cream
- In mixing bowl, combine diced ham, cream cheese, lime zest, green onions and half of taco seasoning packet contained in soft taco kit. Heat large skillet on medium and spray with cooking spray.
- Spread about 1 teaspoon taco sauce onto a flour tortilla and then spread about 1/4 cup ham/cream cheese mixture on top.
- Place tortilla-side down onto hot skillet and top with another flour tortilla. Heat about 4 minutes, until bottom of tortilla is browned; spray top of the other tortilla and flip. Cook another 4 minutes and repeat with remaining quesadillas. Cook two at a time if skillet is large enough.
- Cut into wedges and top with tomato, cilantro and sour cream and serve.
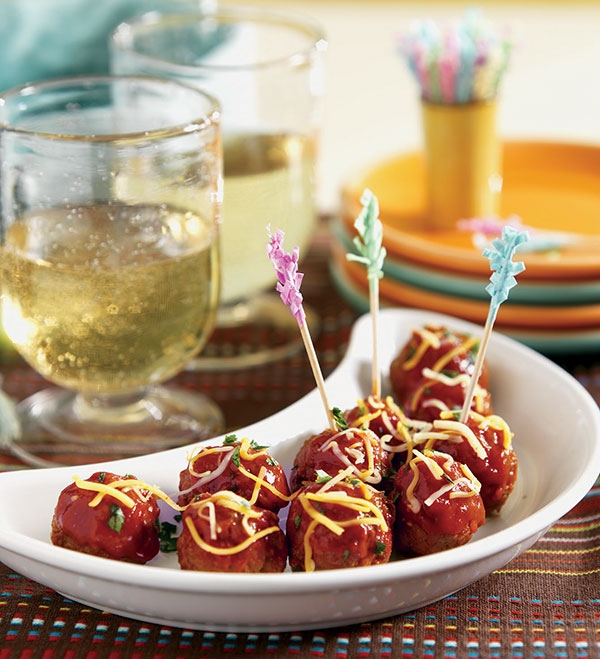
Mexican Meatballs
Prep time: 15 minutes
Start to finish: 30 minutes
Makes about 30 meatballs
- 3 Ortega Yellow Corn Taco Shells
- 1 pound (16 ounces) lean ground beef
- 1 teaspoon Ortega Chili Seasoning Mix
- 1 egg
- 2 teaspoons Ortega Diced Green Chiles
- 1 bottle (8 ounces) Ortega Taco Sauce
- 1/4 cup shredded cheddar cheese
- Cilantro, finely chopped (optional)
- Break taco shells into food processor and pulse several times to create about 1/2 cup taco shell crumbs. Place into large mixing bowl and add ground beef, seasoning mix, egg and green chiles. Mix thoroughly.
- Form mixture into 30 (1-inch) meatballs and drop into hot skillet. Cook until they begin to brown. Carefully turn over and continue browning. Add taco sauce. Coat meatballs with sauce and simmer over low heat, uncovered, 10 minutes.
- Sprinkle meatballs with cheese and garnish with cilantro, if desired. Serve with toothpicks.
Photos copyright (c) 2008 Publications International, Ltd. Used by permission.
Source: Ortega

How to Make Jalapeño Popper Cups
(Family Features) Savor each bite of light and flaky crust filled with a creamy mixture of jalapeños and bacon in these Jalapeño Popper Cups.
For more appetizer recipes, visit culinary.net.
Watch video to see how to make this delicious recipe!
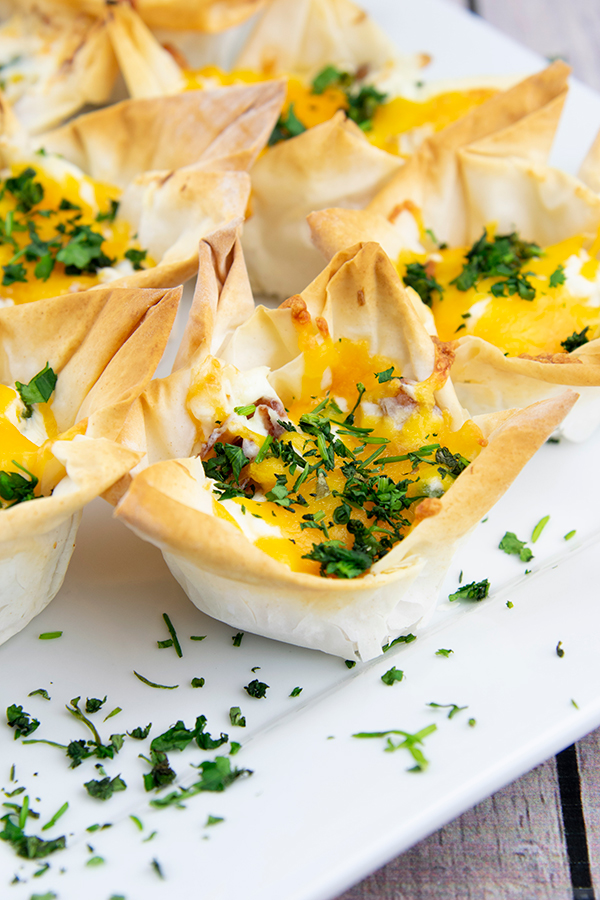
Jalapeño Popper Cups
- 8 strips bacon, chopped
- 4 medium jalapeño peppers, seeded and minced
- 2 teaspoons minced garlic
- 2 packages (8 ounces each) cream cheese
- 1/2 cup sour cream
- 1 cup shredded cheddar cheese, divided
- 1 package frozen phyllo dough sheets
- 2 tablespoons fresh cilantro, chopped
- Heat oven 375°F.
- In medium skillet over medium-high heat, cook bacon until crisp. Drain bacon; reserve 1 tablespoon grease.
- Add jalapeño peppers and minced garlic to bacon grease. Cook until peppers are tender.
- In large bowl, beat cream cheese and sour cream until smooth. Stir in bacon, jalapeño mix and 2/3 cup shredded cheese.
- Gently fold one pastry sheet in half. Fold in top corners to middle, forming point. Fold bottom corners to middle, forming point. Place phyllo dough in muffin pan cavity, forming cup.
- Fill phyllo cups with cream cheese mixture. Sprinkle remaining cheddar cheese over cups.
- Bake 7-8 minutes or until heated through. Remove from pan and sprinkle with cilantro.
Recipe adapted from Wilton.
Source: Culinary.net

Mother's Day Delights
(Family Features) The Mother's Day brunch is arranged, the cards and flowers are picked out - now it's time to make a show-stopping dessert that will truly make her day. And it's easier than you might think.
When looking for the perfect way to treat mom on Mother's Day, try a simple search on Bing.com. Bing makes it easy to find recipes by meals, convenience, or even ingredients to find just the right recipe - like cheesecake, pie or blackberry cobbler - to truly delight the special mom in your life.
Show your mom just how much she means to you by making her something special and giving her a Mother's Day she won't forget. Here are three delicious ideas.
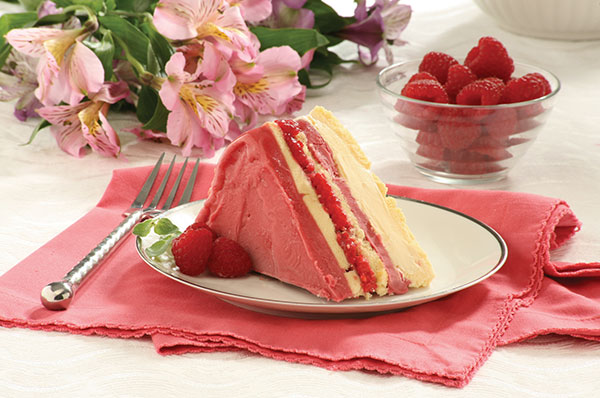
Frozen Raspberry Layer Cake
From Country Living
Prep Time: 20 minutes (not counting freezing times)
Total Freezing Time: 4 hours+
Servings: 8 to 10
- 2 10 3/4-ounce frozen pound cakes, crusts removed, sliced into 1/4-inch-thick slices
- 3 cups vanilla ice cream, slightly softened
- 4 cups raspberry sorbet, slightly softened
- 1 pint fresh raspberries, rinsed and picked over
- 3 tablespoons Chambord, or other raspberry-flavored liqueur
- Prepare the pan: Trace and cut out a 9-inch circle from parchment paper and fit it into the bottom of a 9-inch springform pan.
Cut out a 3- by 27-inch strip of parchment and fit around inside of pan. Tape to secure parchment paper and set aside. - Assemble the cake: Cover bottom of pan with a single layer of pound cake slices and spread ice cream evenly over cake. Freeze until ice cream hardens - about 25 minutes.
- Spread 2 cups sorbet over ice cream, followed by another layer of pound cake slices. Return cake to freezer for 10 minutes.
- Combine raspberries and Chambord together in small bowl. Remove cake pan from freezer and place berries evenly over cake.
- Top with a final layer of pound cake and remaining sorbet. Wrap tightly with plastic wrap and freeze until firm - at least 4 hours.
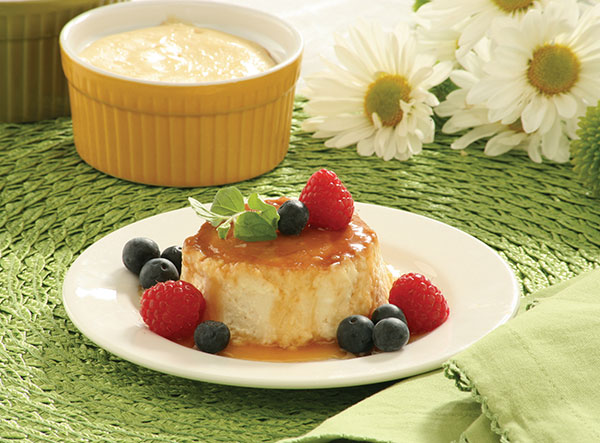
Upside-Down Honey Cheesecakes
From Bon Appétit
Prep Time: 25 minutes
Cook Time: 35 minutes
Chilling Time: 1 hour+
Servings: 12
- 1 cup sugar
- 1/3 cup honey
- 1/4 cup (1/2 stick) unsalted butter
- 1/3 cup water
- 3 8-ounce packages cream cheese, room temperature
- 2/3 cup (packed) golden brown sugar
- 1 cup sour cream
- 2 teaspoons fresh lemon juice
- 2 teaspoons vanilla extract
- 4 large eggs, room temperature
- Assorted fresh berries (for garnish)
- Preheat oven to 300°F. Butter twelve 3/4-cup ramekins or custard cups.
- Place 1 cup sugar, honey, and butter in heavy medium saucepan. Stir over medium heat until butter melts and mixture is blended.
Increase heat to medium-high and bring to boil. Whisk until mixture darkens slightly and candy thermometer registers 300°F, about 5 minutes. - Remove from heat; add 1/3 cup water (mixture will bubble vigorously); whisk to blend. Divide topping among ramekins (about 2 tablespoonfuls for each). Divide ramekins between 2 roasting pans and chill while preparing filling.
- Using on/off turns, blend cream cheese and brown sugar in processor, scraping bowl occasionally. Add sour cream, lemon juice, and vanilla; process until smooth. Add eggs 1 at a time, processing just to blend between additions. Divide filling among ramekins.
Add enough hot water to pans to come halfway up sides of ramekins. - Bake cheesecakes until set, about 35 minutes. Remove from roasting pans and chill until firm, about 1 hour. DO AHEAD: Can be made 2 days ahead. Cover and keep chilled.
- Run thin knife around sides of ramekins. Invert onto plates, scooping any remaining topping from ramekins over cheesecakes. Garnish with berries.

Strawberry Shortcake Cupcakes
From Redbook
Prep Time: 25 minutes
Cook Time: 24 minutes
Servings: 12
- 1 1/3 cups all-purpose flour
- 1/2 teaspoon baking powder
- 1/2 teaspoon baking soda
- 1/4 teaspoon salt
- 1/2 cup unsalted butter, softened
- 2/3 cup granulated sugar
- 2 large eggs
- 1 1/2 teaspoons vanilla extract
- 2/3 cup sour cream
Topping
- 1 quart strawberries, hulled, thickly sliced
- 1/3 cup granulated sugar
- 1 tablespoon lemon juice
- 1 1/2 cups cold heavy cream
- 3 tablespoons confectioners' sugar
- 1 tablespoon vanilla extract
- Heat oven to 350° F. Line 12 standard muffin cups with paper liners.
- In medium bowl, whisk flour, baking powder, baking soda, and salt. In large bowl with mixer on medium, beat butter and sugar until light and creamy. Beat in eggs, 1 at a time, then vanilla. With mixer on low, alternately beat in flour mixture and sour cream until combined. Continue to beat on medium until batter is thick and smooth.
- Spoon batter into a zip-top bag. Snip a 1/2-inch corner from bag and fill liners slightly less than two-thirds full. Bake 24 to 26 minutes, or until lightly golden and a pick inserted in the center of a cupcake comes out clean. Cool in pan on a wire rack 5 minutes; remove cupcakes from pan and cool completely.
- Toss strawberries several times in a bowl with sugar and lemon juice until very syrupy. In large bowl, beat cream, confectioners' sugar, and vanilla until soft peaks form.
- Use a skewer to poke several holes into top of each cupcake. Spoon some syrup from bowl over top, allowing it to absorb into cupcakes. Top with sliced berries and a dollop of cream. Arrange a few sliced berries in cream and drizzle with remaining strawberry syrup.
Source: Bing.com

Hop into Spring with Easter Desserts
(Family Features) From full-course brunches to simple sit-down dinners, Easter celebrations are a time to enjoy family, friends and the delicious tastes of spring.
However elaborate the festivities, a rich and creamy dessert is the perfect finale to any Easter gathering. Made from fresh milk and real cream, PHILADELPHIA Cream Cheese is the high-quality ingredient that makes sweets stand out.
These fresh dessert ideas all feature everyone's favorite indulgence - cheesecake - along with other lively flavors, such as coconut, lemon and blueberry. Desserts this delicious will have your guests hopping up for seconds. For these and other recipe ideas, visit www.creamcheese.com.
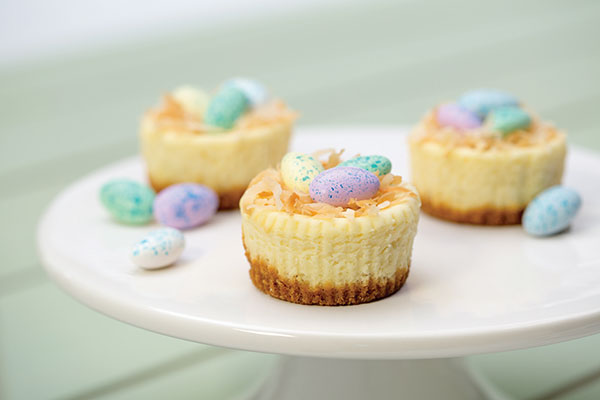
Easter Mini Cheesecakes
Prep time: 20 minutes
Total time: 3 hours, 20 minutes
Servings: 18
- 1 cup graham cracker crumbs
- 3/4 cup plus 2 tablespoons sugar, divided
- 3 tablespoons butter or margarine, melted
- 3 packages (8 ounces each) PHILADELPHIA Cream Cheese, softened
- 1 teaspoon vanilla
- 3 eggs
- 1 cup plus 2 tablespoons BAKER'S ANGEL FLAKE Coconut, toasted
- 54 speckled malted milk eggs (about 9 ounces)
- Heat oven to 325°F.
- Mix graham crumbs, 2 tablespoons sugar and butter; press onto bottoms of 18 paper-lined muffin cups.
- Beat cream cheese, vanilla and remaining sugar with mixer until blended. Add eggs, 1 at a time, mixing on low speed after each just until blended. Spoon over crusts.
- Bake 25-30 minutes or until centers are almost set. Cool completely. Refrigerate 2 hours.
- Top each cheesecake with 1 tablespoon coconut; shape to resemble bird's nest. Fill with malted milk eggs.
Note: To soften cream cheese, place completely unwrapped package of cream cheese in microwaveable bowl. Microwave on high 10 seconds or just until softened. Add 15 seconds for each additional package of cream cheese.
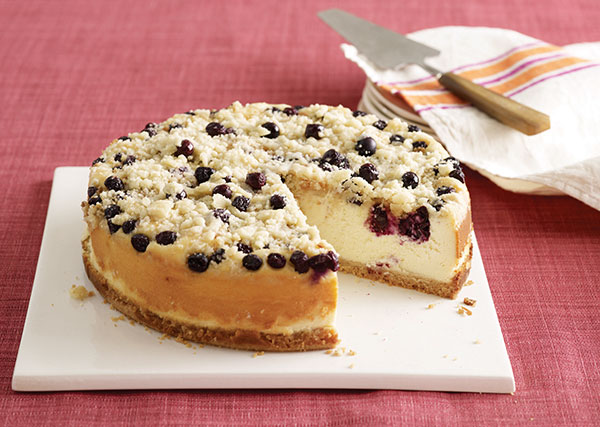
Blueberry Streusel Cheesecake
Prep time: 15 minutes
Total time: 6 hours, 45 minutes
Servings: 16
- 1 1/2 cups plus 3 tablespoons flour, divided
- 1 1/3 cups sugar, divided
- 1/2 teaspoon ground cinnamon
- 3/4 cup cold butter, cut up
- 4 packages (8 ounces each) PHILADELPHIA Cream Cheese, softened
- 1 tablespoon vanilla extract
- 1 cup BREAKSTONE'S or KNUDSEN Sour Cream
- 4 eggs
- 2 cups fresh blueberries
- Heat oven to 325°F.
- Mix 1 1/2 cups flour, 1/3 cup sugar and cinnamon in medium bowl. Cut in butter with pastry blender or 2 knives until mixture resembles coarse crumbs. Reserve 1/2 cup; press remaining onto bottom of 9-inch springform pan. Bake 25 minutes or until lightly browned.
- Beat cream cheese, remaining flour, remaining sugar and vanilla with mixer until well blended. Add sour cream; mix well. Add eggs, 1 at a time, beating on low speed after each just until blended. Pour over crust. Top with berries and reserved crumb mixture.
- Bake 1 hour 25 minutes to 1 hour 30 minutes or until center is almost set. Run knife around rim of pan to loosen cake; cool before removing rim. Refrigerate 4 hours.
Note: You can substitute cream cheese with Neufchatel cheese, or fresh blueberries with 1 (16-ounce) package frozen blueberries. Garnish with additional berries or cinnamon just before serving.
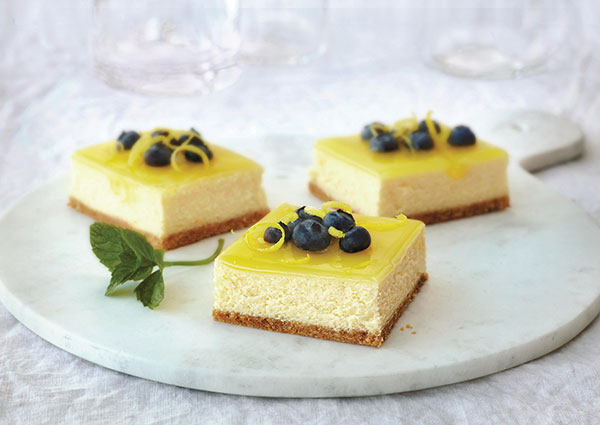
Double Lemon Cheesecake Bars
Prep time: 35 minutes
Total time: 7 hours, 15 minutes
Servings: 16
- 52 vanilla wafers, finely crushed (about 2 cups)
- 3 tablespoons butter or margarine, melted
- 4 eggs, divided
- 4 packages (8 ounces each) PHILADELPHIA Cream Cheese, softened
- 1 3/4 cups sugar, divided
- 3 tablespoons flour
- 1 tablespoon lemon zest
- 1/3 cup lemon juice (about 2 lemons), divided
- 1/2teaspoon vanilla
- 2 tablespoons cornstarch
- 1/2 cup water
- Heat oven to 325°F.
- Line 13-by-9-inch pan with parchment paper, with ends of paper extending over sides.
- Mix wafer crumbs and butter until blended; press onto bottom of prepared pan. Bake 10 minutes.
- Separate 1 egg; refrigerate yolk until ready to use. Beat cream cheese, 1 cup sugar, flour, lemon zest, 2 tablespoons lemon juice and vanilla in large bowl with mixer until blended. Add egg white and remaining 3 whole eggs, 1 at a time, mixing on low speed after each until just blended. Pour over crust.
- Bake 40 minutes or until center is almost set. Cool 1 hour. Refrigerate 4 hours.
- Mix cornstarch and remaining sugar in medium saucepan; gradually stir in water and remaining lemon juice until blended. Bring just to boil on medium heat, stirring constantly; cook and stir until clear and thickened. Lightly beat reserved egg yolk in small bowl with fork until blended; stir in 2 tablespoons of hot cornstarch mixture.
- Return to remaining cornstarch mixture in saucepan; stir until blended. Cook 1 minute or until thickened, stirring constantly. Cool slightly.
- Spoon lemon glaze over cheesecake. Refrigerate 1 hour or until firm. Use parchment handles to remove cheesecake from pan before cutting to serve.
Note: This lemon glaze can be prepared ahead of time. Cool, then refrigerate up to 8 hours before spooning over individual slices of cheesecake. Garnish with 1/2 cup blueberries, lemon peel and fresh mint leaves.
Recipes/photos courtesy of PHILADELPHIA Cream Cheese
Source: PHILADELPHIA Cream Cheese