
Grape Summer Gatherings: Easy recipes to enjoy at warm-weather celebrations
(Family Features) Celebrations abound throughout summer, and if you plan on hosting your nearest and dearest for events large and small, you’ll need a tasty, convenient ingredient to elevate your entertaining all summer long. When that one ingredient also serves as a healthy, refreshing snack on its own, it’s a win-win.
Delicious, healthy and versatile, Grapes from California can be that special ingredient and pleasing snack. In recipes, grapes deliver sweet-tart flavor and crisp, juicy texture to appetizers, main courses, drinks, desserts and beyond. These recipes show the myriad ways this bite-sized fruit can bring out the best in warm-weather fare: a tasty frozen treat, a chic cocktail and a flavorful Southwestern-inspired salad that each add a special touch to any gathering.
In fact, while grapes complement a wide array of flavors – including sweet, sour, salty, spicy and smoky – that make them easy to use in recipes and serve alongside other foods, they’re also an ideal snack to serve by themselves. Grapes are inherently cool and refreshing, easily shareable and satisfying to eat.
Take your summer entertaining to new heights with additional recipe inspiration at GrapesFromCalifornia.com.
6 Ways to Chill Out with Grapes
Taking get-togethers, parties and celebrations outdoors during the summer months means frozen treats are essential. Consider these creative ways to use frozen grapes in your summer entertaining:
- Freeze grapes as they are – on or off the stem – for 2 hours for a healthy frozen treat.
- Ice cubes – frozen grapes offer a visually appealing (and delicious) replacement for plain ice cubes to help keep guests’ drinks cool.
- Swalty Frozen Grapes – these cold, sweet and spicy grapes rolled in honey, lime juice and spicy chili-lime seasoning are fun to eat.
- Wine-marinated frozen grapes – soak grapes in wine overnight then freeze for a festive, boozy bite.
- Frozen Yogurt Dipped Grapes – dip skewered grapes in yogurt then freeze for a mini, sweet-tart treat.
- Grape Sorbet – fresh grapes blend and freeze beautifully for a lovely frozen dessert.

Chocolate-Dipped Frozen Grape and Yogurt Clusters
Yield: 7 mounds
- 1 cup black Grapes from California, halved
- 3/4 cup plain nonfat vanilla Greek yogurt
- 2 teaspoons pure vanilla extract
- 2 1/2 ounces bittersweet chocolate, chopped
- 1 teaspoon extra-virgin olive oil
- In medium bowl, combine grapes, yogurt and vanilla. Line 9-inch square metal baking pan with parchment paper then, using 1-ounce scoop, place mounds of grape-yogurt mixture on sheet. Freeze until set, about 3 hours, or overnight.
- Place chopped chocolate in small, wide microwaveable bowl. Microwave 1 minute on medium power. Stir and repeat. Stir then microwave 30 seconds, repeating as needed until melted and smooth.
- Stir in oil. Dip bottoms of frozen clusters in chocolate to coat and return to pan.
- Store frozen clusters in airtight container in freezer up to 1 week.
Nutritional information per serving: 100 calories; 3 g protein; 12 g carbohydrates; 4.5 g fat (41% calories from fat); 2.5 g saturated fat (23% calories from saturated fat); 0 mg cholesterol; 10 mg sodium; 2 g fiber.

Southwest Charred Corn Salad with Grapes
Yield: 4 servings (6 cups)
- 2 large ears yellow corn on the cob, shucked
- 1/2 English cucumber, peeled, halved lengthwise and thinly sliced crosswise
- 1 cup large green and red Grapes from California, halved
- 1 cup canned black beans, drained and rinsed
- 1/2 small red onion, thinly sliced
- 1 tablespoon fresh jalapeno, minced
- 2 tablespoons extra-virgin olive oil
- 4 teaspoons cider vinegar
- 3/4 teaspoon cumin powder
- 1/4 teaspoon fine sea salt
- 1 avocado, diced 1/2 inch
- 1 ounce cotija cheese, crumbled
- freshly ground black pepper, to taste
- 3 tablespoons fresh cilantro leaves
- Over open flame on stove, directly under broiler or on grill, char corn, turning with tongs as needed, until roasted all around, about 3 minutes. Set aside to cool.
- In medium mixing bowl, combine cucumber, grapes, black beans, onion, jalapeno, olive oil, vinegar, cumin and salt; toss well.
- Working with sharp knife in wide, shallow bowl or pie pan, cut corn from cobs. Stand ear of corn upright in bowl and cut from middle downward, rotating to cut down 4-5 times. Invert cob and repeat. Repeat with remaining cobs.
- Add corn, avocado and cheese to bowl with grape-black bean mixture. Sprinkle with pepper, to taste, and top with cilantro; toss well.
Nutritional information per serving: 200 calories; 5 g protein; 24 g carbohydrates; 11 g fat (50% calories from fat); 2 g saturated fat (9% calories from saturated fat); 0 mg cholesterol; 160 mg sodium; 4 g fiber.

Lemongrass Grape Cocktail
Yield: 1 drink
Lemongrass Simple Syrup:
- 1 cup sugar
- 1 cup water
- 3-4 stalks lemongrass, trimmed, halved, inner cores cut into 1-inch pieces, chopped
Cocktail:
- 1/2 cup cold Grapes from California
- 2 slices fresh ginger
- 1 cup ice
- 2 ounces vodka
- 1 1/2 ounces lemongrass simple syrup
- 1/2 ounce lime juice
- frozen Grapes from California, for garnish
- lemongrass stalk, trimmed, for garnish
- To make lemongrass simple syrup: In heavy, small saucepan, combine sugar and water. Bring to simmer over medium heat. Stir until sugar is dissolved; add lemongrass pieces and simmer 3-5 minutes. Remove from heat. When cool, cover and refrigerate up to 2 weeks.
- To make cocktail: In shaker, muddle cold grapes and ginger. Add ice, vodka, lemongrass simple syrup and lime juice; shake well. Pour into glass over ice and garnish with frozen grapes and lemongrass stalk.
Note: For mocktail, replace vodka with seltzer water.
Nutritional information per serving: 270 calories; 1 g protein; 37 g carbohydrates; 0 g fat; 0 mg cholesterol; 0 mg sodium; 1 g fiber.

Power Up Family Mealtimes
(Family Features) Between juggling work, family, friends and social activities, powering through busy day-to-day schedules requires a lot of energy. Building meals around recipes packed with a plant-based protein such as peanuts or peanut butter can help your family come together to refuel.
In fact, at 7 grams per serving, a nutrient-rich powerhouse like peanuts delivers the most protein of any nut and contains six essential vitamins – vitamin E, folate, riboflavin, thiamin, niacin and vitamin B6 – and seven essential minerals – phosphorus, iron, magnesium, potassium, zinc, copper and calcium.
As a versatile ingredient that can be enjoyed as a standalone snack or part of a variety of recipes from morning to night, peanuts can take center stage at the family table when it’s time to recharge at the end of long days. Start with an appetizer like Broccoli and Edamame Salad with Peanut Dressing, which can be on the table in 10 minutes, to hold over hunger ahead of a protein-packed main course like Chicken with Peanut Sauce in Lettuce Wraps. Finish off the evening meal with Peanut Butter Cottage Cheese Cheesecake as a better-for-you dessert.
Find more delicious ideas for keeping your family energized at gapeanuts.com.

Chicken with Peanut Sauce in Lettuce Wraps
Recipe courtesy of Parker’s Plate on behalf of the Georgia Peanut Commission
Prep time: 10 minutes
Cook time: 15 minutes
Servings: 4
- 2 pounds ground chicken
- 2 tablespoons sesame oil
- 3/4 cup diced shiitake mushrooms
- 1 small onion, diced
- 2 garlic cloves, grated
- 1 1/2 tablespoons fresh grated ginger
- 1/2 cup hoisin sauce
- 1/2 cup water chestnuts, diced
- 3 green onions (both white and green parts), chopped
- 2 garlic cloves, grated
- 1/4 cup cilantro, chopped, for garnish
- 1/4 cup crushed peanuts, for garnish
- iceberg or butter lettuce, for wraps
Peanut Sauce:
- 3 tablespoons creamy peanut butter
- 2 teaspoons brown sugar
- 1 tablespoon fresh lime juice
- 2 tablespoons chili garlic sauce
- 1 teaspoon fresh grated ginger
- 1 tablespoon soy sauce
- In pan, saute ground chicken in sesame oil until cooked through. Drain if mixture is watery.
- Add shiitake mushrooms and onion; saute until mushrooms have softened and appear caramel colored.
- Add garlic, ginger, hoisin, water chestnuts and green onions. Let chicken mixture simmer on low.
- To make peanut sauce: In saucepan over medium-low heat, mix peanut butter, brown sugar, lime juice, chili garlic sauce, ginger and soy sauce until smooth, warm and thinned slightly.
- Fold into chicken mixture. Stir until combined and simmer on low until peanut sauce is evenly distributed.
- Garnish with fresh cilantro and crushed peanuts. Serve in lettuce wraps.

Broccoli and Edamame Salad with Peanut Dressing
Recipe courtesy of Parker’s Plate on behalf of the Georgia Peanut Commission
Prep time: 10 minutes
Cook time 5 minutes
Servings: 4
Dressing:
- 1/2 fresh lime, juice only
- 1/4 cup toasted sesame seed oil
- 3 tablespoons honey
- 2 tablespoons tahini
- 3 tablespoons creamy peanut butter
- 1 teaspoon chili oil
- 1 garlic clove, grated
- 1 teaspoon fresh ginger, grated
- kosher salt, to taste
- 1 tablespoon hot water, plus additional for thinner consistency (optional)
Salad:
- 2 cups broccoli slaw
- 1 cup shelled edamame, cooked
- 1 1/2 cups chopped raw broccoli
- 1/2 cup English cucumber, quartered and chopped
- 1/4 cup fresh mint, chopped
- 1/4 cup fresh cilantro, chopped
- 1/4 cup salted peanuts, roughly chopped
- toasted sesame seeds, for garnish (optional)
- To make dressing: In bowl, whisk lime juice, toasted sesame seed oil, honey, tahini, peanut butter, chili oil, garlic, ginger and salt, to taste. Add hot water, adding additional, if necessary, until dressing reaches desired consistency. Set aside.
- To make salad: In large bowl, combine broccoli slaw, edamame, broccoli, cucumber, mint, cilantro and peanuts. Toss with dressing to combine and garnish with toasted sesame seeds, if desired.

Peanut Butter Cottage Cheese Cheesecake
Recipe courtesy of Parker’s Plate on behalf of the Georgia Peanut Commission
Prep time: 25 minutes
Cook time: 2 hours
Servings: 8 (1 slice each)
Crust:
- 2 cups pretzels
- 1 1/2 cups vanilla-flavored wafer-style cookies
- 1/2 cup peanuts
- 12 tablespoons unsalted butter
- nonstick cooking spray
Filling:
- 1/2 cup cottage cheese
- 1 cup heavy whipping cream
- 3 tablespoons sugar
- 3 tablespoons creamy peanut butter
- 1/2 cup roughly chopped dark chocolate
- 1/2 cup roughly chopped peanuts
- 1 pinch sea salt
- To make crust: In food processor, pulse pretzels, wafer-style cookies and peanuts until chopped but not powdery.
- In skillet, melt butter. Add pretzel mixture until combined with butter.
- Spray pie pan with nonstick cooking spray and spread mixture on bottom of pan and slightly up sides; press down until even.
- To make filling: In bowl using hand mixer, whip cottage cheese until lumps are smoother, 3-4 minutes.
- In separate bowl, use hand mixer to whip heavy cream and sugar until stiff peaks form.
- Add cottage cheese and peanut butter to heavy cream mixture; whip until combined, about 1 minute.
- Top pie with chopped chocolate and peanuts and freeze 2 hours. Remove from freezer 15 minutes before ready to serve.
- Before serving, sprinkle with sea salt.
Source:

Dish Up Protein-Packed Sweet Treats
(Family Features) In a world of packed schedules and boring food, it can feel like doing the healthy thing means giving up some of what makes you happy – like treats and flavors you love. Choosing health shouldn’t mean restricting yourself; everyone deserves a treat now and again.
Try incorporating better-for-you ingredients into your favorite indulgences. Look for convenient, ready-to-use products, like Premier Protein High Protein Shakes, to help infuse the nutrition you need with the joy you deserve. With 30 grams of protein, 160 calories and 1 gram of sugar, the shakes make it easy to take the first step and keep that momentum going, adding nutrient-dense protein to nearly any recipe.
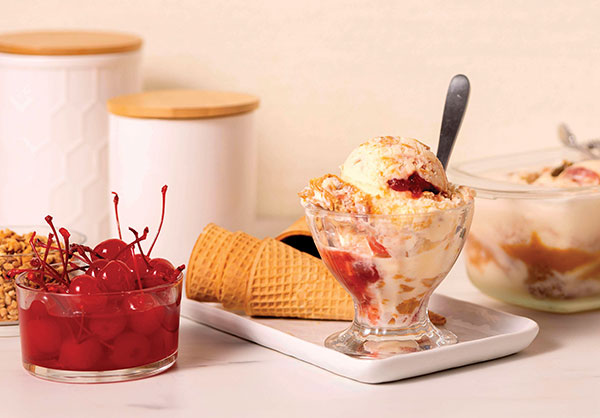
In addition to a smooth, creamy texture, each shake delivers 24 vitamins and minerals including vitamins C and E, which help support a healthy immune system as part of a healthy diet and lifestyle. With 11 flavors – including strawberries & cream and chocolate – there’s an impossibly indulgent option for everyone to make a healthy life a happy endeavor through recipes like Peanut Butter Jelly Ice Cream and Chocolate Ice Cream with “Caramel” Sauce.
Find more information and recipes at PremierProtein.com or on Instagram.
Peanut Butter Jelly Ice Cream
Servings: 12
- 1 cup whole milk
- 1/2 cup Premier Protein Strawberries & Cream Protein Shake
- 1/4 cup packed brown sugar
- 1/2 teaspoon salt
- 1 large egg, lightly beaten
- 2/3 cup creamy peanut butter
- 2 cups heavy whipping cream
- 2 teaspoons vanilla extract
- 1/2 cup sugar-free strawberry jelly
- In large, heavy saucepan, heat milk, protein shake, brown sugar and salt until bubbles form around sides of pan. Whisk small amount of hot mixture into egg. Return to pan, whisking constantly.
- Cook and stir over low heat until mixture thickens and coats back of spoon. Remove from heat; whisk in peanut butter. Quickly transfer to bowl; place in ice water and stir 2 minutes. Stir in cream and vanilla. Press wax paper onto surface of custard. Refrigerate several hours or overnight.
- Fill cylinder of ice cream freezer 2/3 full; freeze according to manufacturer's directions.
- When ice cream is frozen, spoon into freezer container, layering with jelly; freeze 2-4 hours before serving.
Nutritional information per serving: 271 calories; 23 g total fat; 11 g saturated fat; 0 g trans fat; 72 mg cholesterol; 205 mg sodium; 13 g total carbohydrates; 1 g dietary fiber; 8 g total sugars; 6 g protein.
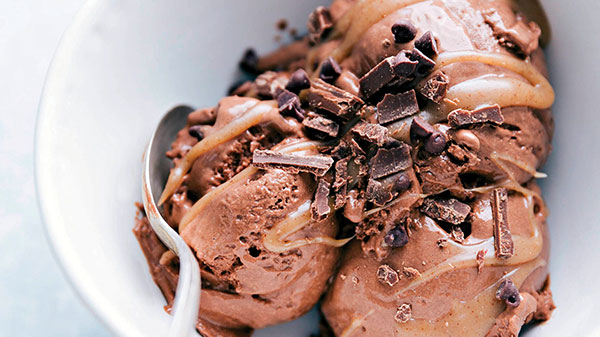
Chocolate Ice Cream with “Caramel” Sauce
Recipe courtesy of "Chelsea's Messy Apron"
Servings: 8
- 1 large sweet potato
- 1 bag (10 ounces) dark chocolate chips, plus additional for topping (optional)
- 2 teaspoons pure vanilla extract
- 1/2 teaspoon fine sea salt
- 1/4 cup coconut sugar
- 1 Premier Protein Chocolate Protein Shake
"Caramel" Sauce:
- 3 tablespoons coconut oil (measured when solid)
- 3 tablespoons real maple syrup
- 1 1/2 tablespoons almond butter
- 1/8 teaspoon fine sea salt
- 1/4 teaspoon pure vanilla extract
- Wash and scrub sweet potato. Pierce with fork several times. Place on microwave-safe plate and microwave 5 minutes; flip and microwave 5 minutes. Allow to cool.
- In microwave-safe bowl, microwave chocolate chips in 20-second increments, stirring between each increment until smooth and melted. Set aside.
- Remove sweet potato skin and thoroughly mash. Pack into 3/4 cup measuring cup. Place in large blender.
- Add melted chocolate to blender along with vanilla, sea salt, coconut sugar and chocolate protein shake.
- Place lid on blender and blend on high at least 1 minute, or until ingredients are smooth and incorporated.
- Transfer to ice cream maker and prepare according to manufacturer's directions then transfer to airtight container and freeze 2-3 hours.
- To make "caramel" sauce: In microwave-safe bowl, microwave coconut oil and syrup 30 seconds. Stir and microwave 30 seconds, or until melted and smooth. Stir in almond butter and whisk until smooth. Add sea salt and vanilla extract; whisk to combine.
- Set "caramel" sauce aside at room temperature about 30 minutes. Top ice cream with sauce and additional chocolate chips, if desired.
Nutritional information per serving: 346 calories; 18 g total fat; 11 g saturated fat; 5 mg cholesterol; 219 mg sodium; 40 g total carbohydrates; 4 g dietary fiber; 31 g total sugars; 7 g protein.
Source:

Celebrate Spring with Brunch Favorites
(Family Features) Few things go together quite like fresh spring air, warm sunshine and a menu made up of delicious brunch bites. Whether you’re hosting a crowd or simply gathering your loved ones around the family table for quality time together, a menu of morning favorites can appease appetites of all kinds.
From sweet to savory and back again, you can turn your mid-morning meal into a full-blown feast with a menu made up of pleasing dishes such as this French Toast Casserole, which can serve as a make-ahead twist on the breakfast classic; customizable Breakfast Burritos that pack a protein punch; and a bite-sized treat like Double Chocolate Chip Mini Muffins for a sweet finishing touch to any brunch occasion.
Find more recipes to inspire your next brunch menu at Culinary.net.
Warm Up with a Fresh Casserole
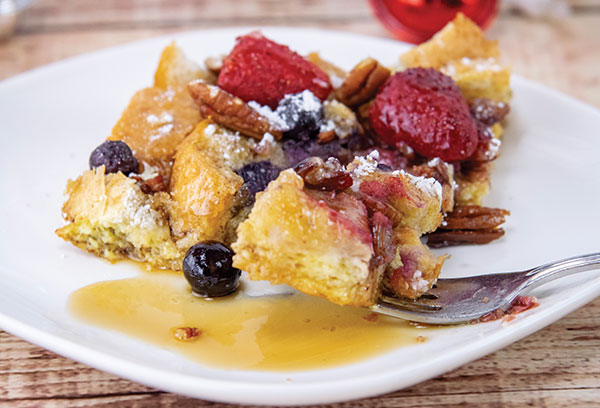
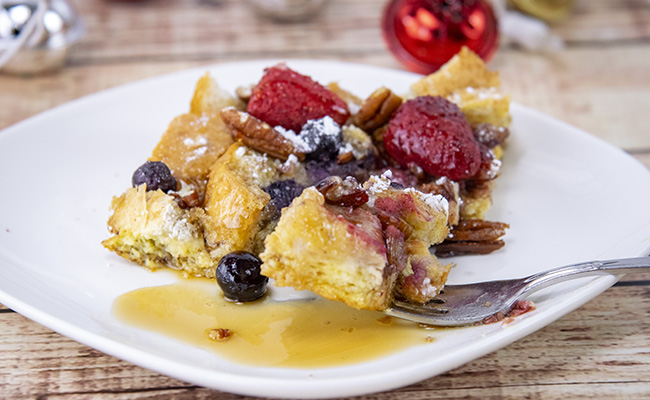
An exciting twist on a breakfast classic, it’s hard to beat this French Toast Casserole when putting together your brunch spread. Crisp on top while soft and moist in the middle, it comes fresh out of the oven with the aroma of maple syrup and pecans that will have the whole house eager for a bite. It’s easy enough to make fresh in the morning but can also be prepared the night before so all you have to do is add the topping and pop it in the oven.
French Toast Casserole
- 1 loaf French bread (about 1 1/2 pounds), cut into 1-inch cubes
- 5 large eggs
- 1 1/2 cups unsweetened milk
- 2 tablespoons brown sugar
- 2 teaspoons vanilla extract
- 1 teaspoon cinnamon
- 1/4 teaspoon nutmeg
- 1/4 teaspoon sea salt
- maple syrup, for serving
Topping:
- 2 tablespoons unsalted butter or coconut oil, melted
- 2 tablespoons brown sugar
- 1/2 cup chopped pecans
- 1 cup frozen strawberries
- 1 cup frozen blueberries
- confectioners' sugar, for dusting
- Grease 9-by-13-inch baking dish. Place bread cubes in baking dish. In large bowl, whisk eggs, milk, brown sugar, vanilla, cinnamon, nutmeg and salt. Pour mixture evenly over bread cubes.
- If making casserole ahead, cover baking dish and refrigerate overnight. If baking immediately, let stand 30 minutes at room temperature to allow bread to soak up egg mixture.
- Preheat oven to 350 F.
- To make topping: Drizzle casserole with melted butter and sprinkle with brown sugar and pecans. Top with strawberries and blueberries.
- Cover and bake 35 minutes then uncover and bake 10-20 minutes, or until topping is browned and egg mixture has mostly set.
- Remove from oven, cover loosely with foil and let stand 10 minutes. Dust with confectioners' sugar. Serve with maple syrup.
Brunch with a Powerful Punch
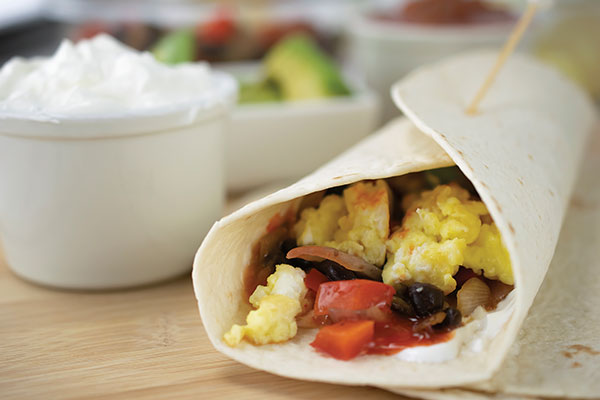
When you’re craving something hearty and rich, switch up your brunch habits with wholesome and filling Breakfast Burritos. With protein to keep you full, veggies for a touch of added nutrition and hot sauce to pack a powerful punch of flavor in every bite, this hearty recipe will keep you full and bursting with energy until your next meal. Plus, they’re easy to make in a matter of minutes and totally customizable to accommodate every palate.
Breakfast Burritos
Servings: 4
- 2 teaspoons canola oil
- 1 small red onion, diced
- 1 red bell pepper, seeded and diced
- 1 can black beans, drained and rinsed
- 1/4 teaspoon red pepper flakes
- salt, to taste
- pepper, to taste
- 4 eggs
- 4 egg whites
- 1/2 cup shredded pepper jack cheese
- nonstick cooking spray
- 4 flour tortillas
- 1/4 cup sour cream
- 1/4 cup salsa
- 1 large tomato, seeded and diced
- 1 avocado, sliced
- hot sauce (optional)
- In large skillet, heat canola oil over medium heat. Add red onion and red bell pepper; cook 8 minutes. Add black beans and red pepper flakes; cook 3 minutes. Season with salt and pepper, to taste. Transfer to dish.
- In medium bowl, whisk eggs and egg whites. Stir in cheese until combined. Heat large skillet over low heat, add egg mixture and scramble 3 minutes, or until cooked through.
- Spread sour cream over tortilla. Spread salsa over sour cream. Spoon 1/4 bean mixture over salsa. Spoon 1/4 scrambled eggs over bean mixture. Top with diced tomatoes and avocado. Drizzle with hot sauce, if desired. Roll-up burrito. Repeat three times with remaining ingredients and serve.
Bite-Sized Chocolate Delights
Flavorful French toast, filling breakfast burritos and favorite fruits make a feast to look forward to, but no brunch spread is complete without a chocolatey bite to cap off the meal. In fact, make it a double.
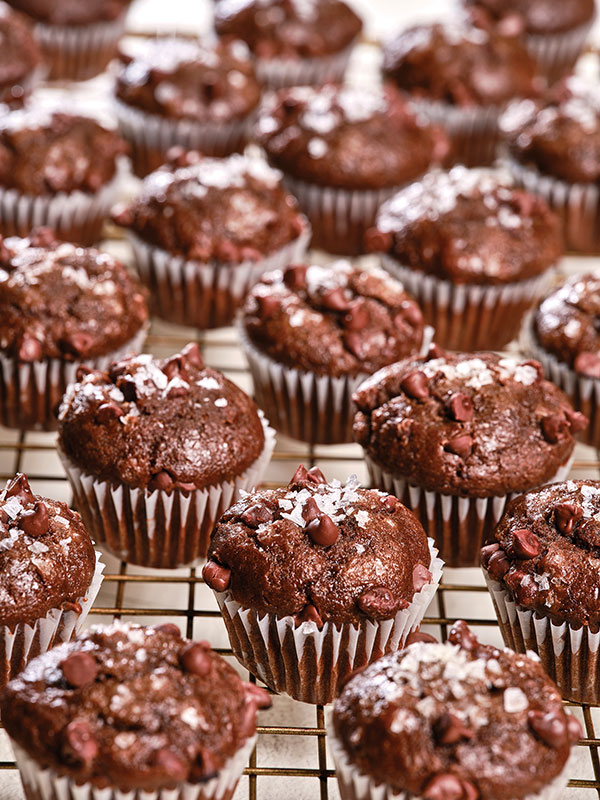
These Double Chocolate Chip Mini Muffins offer a combination of two kinds of rich chocolate complemented by the caramel notes of C&H Light Brown Sugar for an irresistible dessert in bite-sized form. Tiny, tasty treats are a perfect way to send guests off with one sweet final bite.
Visit chsugar.com to find more delectable dessert recipes.
Double Chocolate Chip Mini Muffins
Muffin Batter:
- 2 cups all-purpose flour
- 1/2 cup unsweetened cocoa powder
- 1 teaspoon baking soda
- 1/2 teaspoon salt
- 1 package (10 ounces) mini semi-sweet chocolate chips
- 2 large eggs
- 1/2 cup C&H Light Brown Sugar, packed
- 1/2 cup C&H Granulated Sugar
- 3/4 cup sour cream
- 1/2 cup vegetable oil
- 1/2 cup whole milk
- 1/2 teaspoon instant espresso (optional)
- 2 teaspoons vanilla extract
- 2 tablespoons flaked sea salt (optional)
- Preheat oven to 350 F. Line mini muffin pan with mini cupcake liners.
- In large mixing bowl, use whisk to combine flour, cocoa powder, baking soda and salt. Add chocolate chips and stir to ensure chocolate chips are coated in flour mixture.
- In separate large mixing bowl, use wire whisk to whisk eggs and sugars until ingredients are combined and sugars are dissolved. Add sour cream, oil and milk. Whisk again to combine. If using espresso powder, add to vanilla then add to wet ingredients. Whisk vanilla espresso mixture into other liquid ingredients.
- Pour liquid ingredients on top of dry ingredients. Using rubber spatula, mix until just combined, being careful to not overmix. Batter should be thick and shiny.
- Using tablespoon or two spoons, spoon muffin batter into liners. Batter should be filled almost to top of each liner. Top each muffin with flaked sea salt before baking, if desired.
- Bake muffins on center rack 6 minutes. Rotate pan and bake 6 minutes, or until toothpick inserted in muffin comes out clean. Once muffins finish baking, place muffin pan on cooling rack to cool completely.

Indulge Taste Buds with Better-for-You Snacks
(Family Features) The foundation of healthy eating may include nutritious breakfasts, lunches and dinners, but just as important are the snacks in-between meals. Regardless of when or where you snack, encourage better-for-you eating habits with nutritious nibbles to power through your day.
According to an online survey conducted among 1,000 Americans ages 18 and older across the U.S. by Wakefield Research on behalf of the American Pecan Promotion Board, Americans love snacks, and reach for them an average of three times a day.
However, where and when those snacks are eaten can vary from on the move to on the couch, from sunrise to after bedtime. Nearly a third (30%) of respondents are munching on snacks while in bed, calling it their favorite snacking spot. However, only 35% of their snack choices are considered healthy.
Fueling busy days can be easy with an option like pecans. According to the survey, 66% of snackers enjoy pecans on their own with 58% eating them as part of a trail mix. If you’re among the 50% who reach for a snack in the late afternoon, you can turn to nutritious, satisfying solutions to indulge afternoon cravings without the guilt. With pleasing crunch, comforting creaminess and a satisfying chew, pecans are the “no sacrifice” nut that can punch up your routine with both delicious taste and plant-based nutrition.
Just a handful of pecans – about 19 halves – provides a good source of fiber, thiamin and zinc and an excellent source of copper and manganese, a mineral that’s essential for metabolism and bone health. They also provide a mix of protein and good fats – 18 grams of unsaturated fat, including oleic acid, and only 2 grams of unsaturated fat – to help keep you full and energized throughout the day.
As an added bonus, their versatility and easy-to-pair profile makes them a perfect ingredient in recipes you can prepare in a cinch. For bite-sized treats that are packed with flavor and perfect for snack time, these Pecan Chickpea Cookie Dough Bites swap out flour and sugar in favor of blended pecans, chickpeas, vanilla extract, cinnamon and sea salt with dark chocolate chips folded in for a sweet finishing touch.
Or you can simply toss warm pecans with olive oil and sea salt in this Roasted Pecans recipe for a grab-and-go snack that can be prepared in advance without worrying about spoiling. Another benefit of pecans: They can be stored in the refrigerator for up to 9 months or frozen up to 2 years, giving them a longer shelf life than many pantry favorites. Plus, they can be thawed and refrozen without losing flavor or texture.
To find more surprisingly delicious nutritional facts or recipe inspiration, visit EatPecans.com.
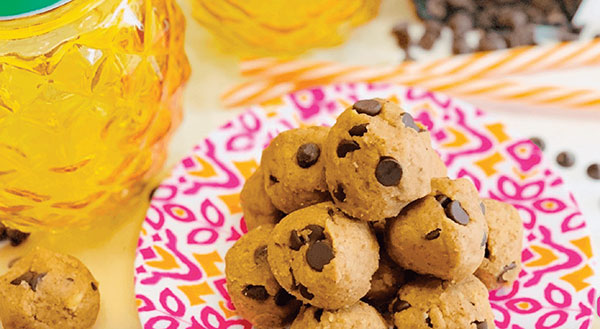
Pecan Chickpea Cookie Dough Bites
Recipe courtesy of Dawn Jackson Blatner, RDN, on behalf of the American Pecan Promotion Board
Prep time: 10 minutes
Servings: 24
- 1 cup raw pecan pieces
- 1 can (15 ounces) chickpeas, rinsed and drained
- 1 tablespoon vanilla extract
- 1/2 teaspoon cinnamon
- 1/2 teaspoon sea salt
- 1/2 cup dark chocolate chips
- In blender or food processor, blend pecan pieces, chickpeas, vanilla extract, cinnamon and sea salt 3-5 minutes, scraping down sides occasionally, until smooth and creamy.
- Fold in dark chocolate chips.
- Form into 24 cookie dough balls. Eat as-is; no baking required.
Note: Store leftovers in airtight container in refrigerator 5 days or freeze up to 3 months.
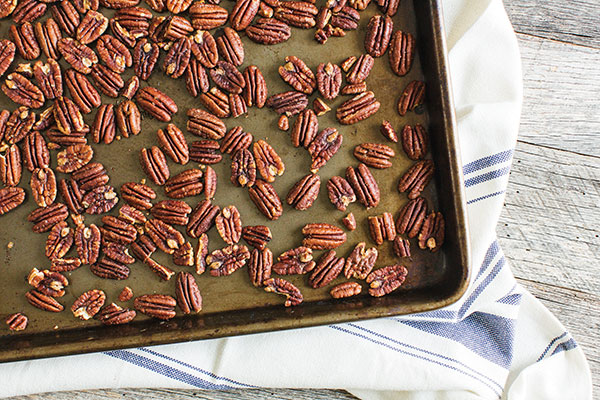
Roasted Pecans
Recipe courtesy of the American Pecan Promotion Board
Prep time: 40 minutes
Cook time: 35 minutes
Servings: 8
- 2 1/4 cups raw pecan halves
- 2 teaspoons olive oil or pecan oil
- 1 teaspoon flaky sea salt
- Preheat oven to 300 F.
- Place pecans on baking sheet and bake 15 minutes.
- In heat-proof bowl, toss warm pecans with olive oil and sea salt, crushing larger salt grains with fingers while sprinkling.
- Return pecans to baking sheet in single layer and bake 20 minutes, or until slightly browned and dry. Remove from oven and cool on baking sheet.
Note: Store pecans in airtight container in refrigerator up to 9 months or freeze up to 2 years. Pecans can be thawed and frozen repeatedly without loss of flavor or texture.
Source: American Pecan Promotion Board

5 Steps to Start Each Day Strong
(Family Features) How you begin each day affects more than whether you make it to work on time. In fact, those early morning hours are often the foundation for your entire day.
Set yourself up for success with these tips to help you maximize your mornings. Whether you’re an early bird or a night owl, starting the day the right way can help you power through your to-do list.
Wake Up On Time
Set your alarm for a reasonable hour that gives you ample time to get ready for the day ahead. If you have a commute or children or pets who need attention, be sure to factor in time for unexpected events like traffic jams or accidents. Avoid setting your alarm early and hitting snooze repeatedly; the quality of sleep you’ll add is poor and you’ll likely end up feeling more tired than if you’d just risen with the alarm.
Get Your Body Moving
Even a light workout is a great way to rev up for a new day. Prioritizing your health to start the morning can put you in a healthier mindset. Completing a workout before the day is even fully underway gives you something to be proud of, which helps boost your mental well-being. What’s more, an early workout gets your blood pumping, which supports stronger cognition and produces more energy.
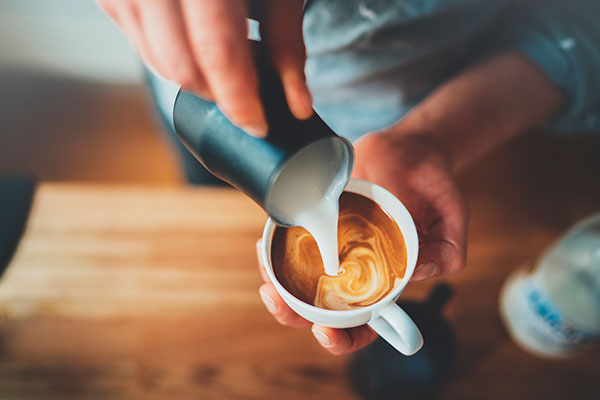
Treat Yourself
It’s never too early to give yourself a little TLC, and a delicious coffee-based drink is a great way to perk up your morning with a tasty treat. The best indulgent coffee beverages start with quality coffee. Consider options from Eight O’Clock Coffee, which has selected and roasted high-quality, 100% Arabica coffee for more than 100 years. The rich, smooth flavor means you can drink it black, but it’s also the perfect base for a decadent latte with maple and vanilla or a classic iced caramel macchiato.
Establish a Self-Care Routine
While you’re still working toward being fully awake, a routine that lets you dive into daily preparations on autopilot can be helpful. Making time to take care of yourself can give you greater confidence to tackle the day, so find a pattern that fits and run with it. Aside from basic hygiene, take time to moisturize your skin and apply sunscreen. Also build in time to focus on your mental health, whether you make some notes in a gratitude journal or meditate to manage stress.
Eat a Healthy Breakfast
Countless studies support the benefits of eating a nutritious breakfast. It’s good for your metabolism and digestive health. It also gives your body the fuel it needs to help you push through the day. You’re likely to think faster and be a more effective problem-solver when your body has proper nourishment. Eating early in the day also affects your mood; you’re less likely to be irritable if you’re not hungry.
Find more inspiration to perk up your mornings at eightoclock.com.
Maple Vanilla Latte
- 1 1/2 cups milk, divided
- 1/2 cup strong-brewed Eight O'Clock French Vanilla Coffee
- 1 tablespoon maple syrup
- 1/4 teaspoon vanilla extract
- ground cinnamon, to taste
- In microwave, heat 1 cup milk.
- Pour coffee into mug and, using milk frother, top with warm milk.
- Stir in maple syrup, vanilla extract and cinnamon, to taste.
- Using milk frother, foam remaining milk then add to mug.
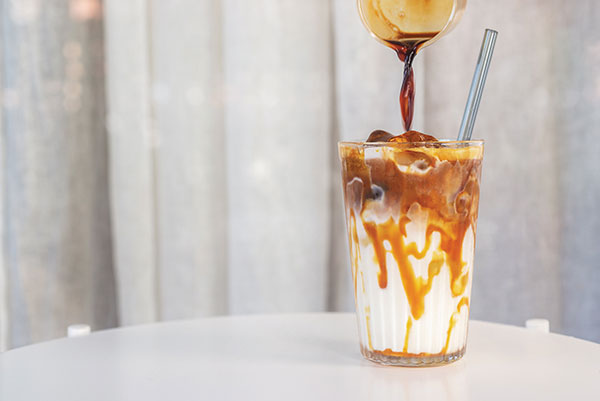
Salted Caramel Macchiato Iced Coffee
- 1/2 cup Eight O'Clock Caramel Macchiato Coffee, chilled
- 1 cup milk
- 1/2 cup ice
- squeezable caramel sauce
- 1 pinch sea salt
- Stir together chilled coffee and milk.
- Pour over ice into glass.
- Drizzle caramel sauce on top and sprinkle with sea salt.
Photos courtesy of Shutterstock
Source:

French Toast Casserole
(Culinary.net) On a cool, crisp morning, it’s hard to beat an exciting twist on a breakfast classic.
This French Toast Casserole is crisp on top while soft and moist in the middle, coming fresh out of the oven with the aroma of maple syrup and pecans that will have the whole house eager for a bite. It’s easy enough to make fresh in the morning- but can also be prepared the night before so all you have to do is add the topping and pop it in the oven.
Find more fresh breakfast recipes to start your day at Culinary.net.
Watch video to see how to make this recipe!
French Toast Casserole
- 1 loaf French bread (about 1 1/2 pounds), cut into 1-inch cubes
- 5 large eggs
- 1 1/2 cups unsweetened milk
- 2 tablespoons brown sugar
- 2 teaspoons vanilla extract
- 1 teaspoon cinnamon
- 1/4 teaspoon nutmeg
- 1/4 teaspoon sea salt
- maple syrup, for serving
Topping:
- 2 tablespoons unsalted butter or coconut oil, melted
- 2 tablespoons brown sugar
- 1/2 cup chopped pecans
- 1 cup frozen strawberries
- 1 cup frozen blueberries
- confectioners’ sugar, for dusting
- Grease 9-by-13-inch baking dish. Place bread cubes in baking dish. In large bowl, whisk eggs, milk, brown sugar, vanilla, cinnamon, nutmeg and salt. Pour mixture evenly over bread cubes.
- If making casserole ahead, cover baking dish and refrigerate overnight. If baking immediately, let stand 30 minutes at room temperature to allow bread to soak up egg mixture.
- Preheat oven to 350 F.
- To make topping: Drizzle casserole with melted butter and sprinkle with brown sugar and pecans. Top with strawberries and blueberries.
- Cover and bake 35 minutes then uncover and bake 10-20 minutes, or until topping is browned and egg mixture has mostly set.
- Remove from oven, cover loosely with foil and let stand 10 minutes. Dust with confectioners’ sugar. Serve with maple syrup.
Source: Culinary.Net

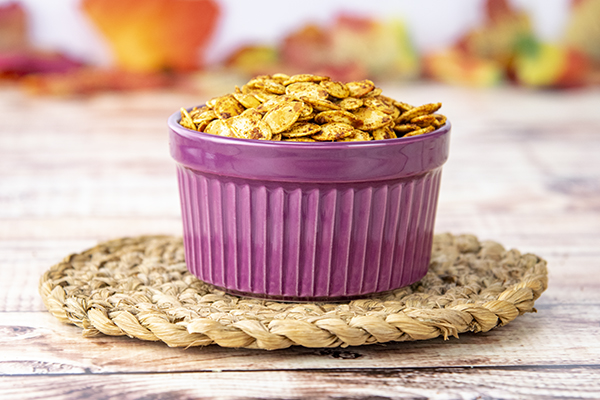
Roasted Pumpkin Seeds
(Culinary.net) Don’t throw out your seeds after this year’s pumpkin carving. This healthy snack is easy to make at home and a fun project to get the kids involved.
Plus, this versatile Roasted Pumpkin Seeds recipe can be modified with any of your favorite seasonings or spices.
Visit Culinary.net to find more quick, simple snacks.
Watch video to see how to make this recipe!
Roasted Pumpkin Seeds
- Water
- 1 1/2 cups raw pumpkin seeds
- 2 teaspoons sea salt, plus additional for seasoning (optional)
- 2 teaspoons salted butter, melted
- 1 teaspoon garlic powder
- 1 teaspoon paprika
- In pot over high heat, bring water to boil. Add pumpkin seeds and 2 teaspoons salt; boil 15 minutes. Drain water and spread seeds evenly on paper towels to dry.
- Preheat oven to 350 F. Line baking sheet with foil or parchment paper.
- In medium bowl, toss seeds and butter until coated well. Sprinkle with garlic powder, paprika and additional salt, if desired. Spread seeds evenly on baking sheet.
- Bake 25-30 minutes, or until golden brown and lightly toasted. Stir every 10 minutes.
Source: Culinary.net

Bring On Dessert with Better-for-You Sweets
(Family Features) If healthier eating holds a prominent spot on your list of goals, you may feel it’s necessary to eliminate some of your sweetest favorites. However, committing to a nutritionally friendly way of life doesn’t have to leave desserts by the wayside.
Instead, rethinking nighttime treats with better-for-you ingredients like California Prunes as a quick substitution can make healthier eating easy. As a versatile ingredient that can replace added sugar, fats and eggs in all kinds of recipes, prunes can also add nutrients important for bone and gut health.
Plus, the copper in prunes inhibits bone breakdown, while boron plays a role in calcium metabolism and polyphenols can help decrease bone breakdown through their antioxidant power. As a fruit that’s high in vitamin K, which helps improve calcium balance and promotes bone mineralization, prunes are also a “good gut food,” meaning a single serving (roughly 4-6 prunes) can help support a healthy microbiome.
They’re easy to use in recipes that can become favorites in your household such as these Chocolate Energy Balls. Enjoyed as an easy, on-the-go snack, they’re a perfect way to refuel for an adventure, recharge after a workout or to simply savor as a healthy snack.
Chocolate lovers rejoice: This rich, delicious, gluten-free, grain-free Chocolate Covered Prune Fudge Cake is naturally sweetened using prunes instead of added sugar. If brownies are more your style, prunes can also take the place of eggs in these Vegan Brownies for a family-friendly treat that won’t wreck your eating plan.
To find more better-for-you desserts, visit californiaprunes.org.
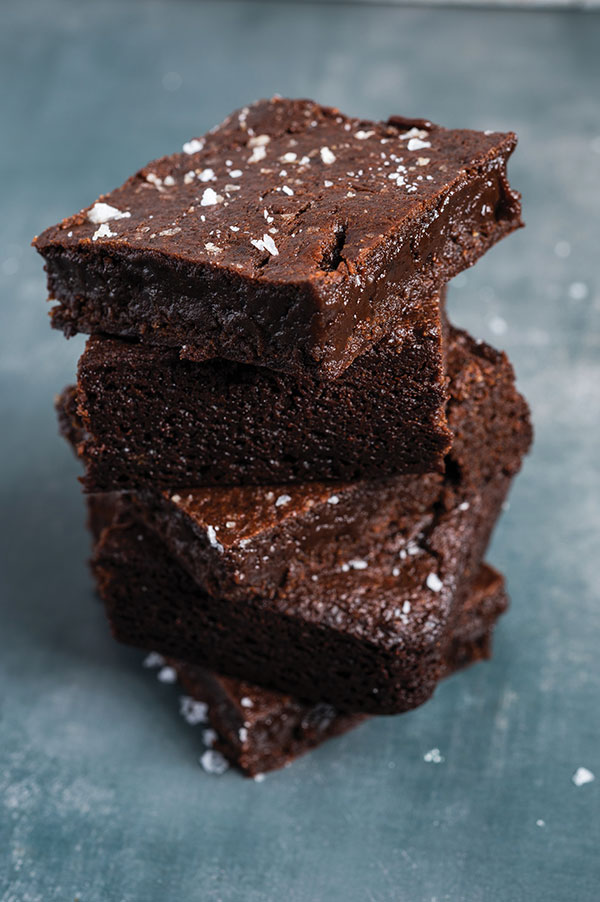
Vegan Brownies
Prep time: 10 minutes
Cook time: 25 minutes
Servings: 9
Prune Puree:
- 16 ounces pitted California prunes
- 1/2 cup hot water
Brownies:
- nonstick cooking spray
- 6 ounces unsweetened chocolate
- 1/2 cup California extra-virgin olive oil
- 2 cups light brown sugar
- 10 ounces California prune puree
- 1 1/2 cups all-purpose flour
- 1 tablespoon baking powder
- 1/4 cup cocoa powder
- 2 teaspoons vanilla extract
- flaky sea salt, for garnish
- To make prune puree: In blender, combine prunes and water. Pulse to combine then blend until smooth, pourable consistency forms, scraping sides, if necessary.
- Store puree in airtight container in fridge up to 4 weeks.
- To make brownies: Preheat oven to 350 F. Line 9-by-9-inch baking pan with parchment paper then lightly grease with nonstick cooking spray.
- Using double boiler, melt chocolate and olive oil. Whisk in sugar and prune puree; mix until dissolved.
- Into large bowl, sift flour, baking powder and cocoa powder. Gently fold in chocolate and prune mixture then add vanilla.
- Spread batter in prepared pan, sprinkle with flaky sea salt and bake 20-25 minutes, or until top starts to look dry and brownies are just beginning to pull away from sides of pan.
- Cool in pan. Remove then cut brownies into 3-inch squares.
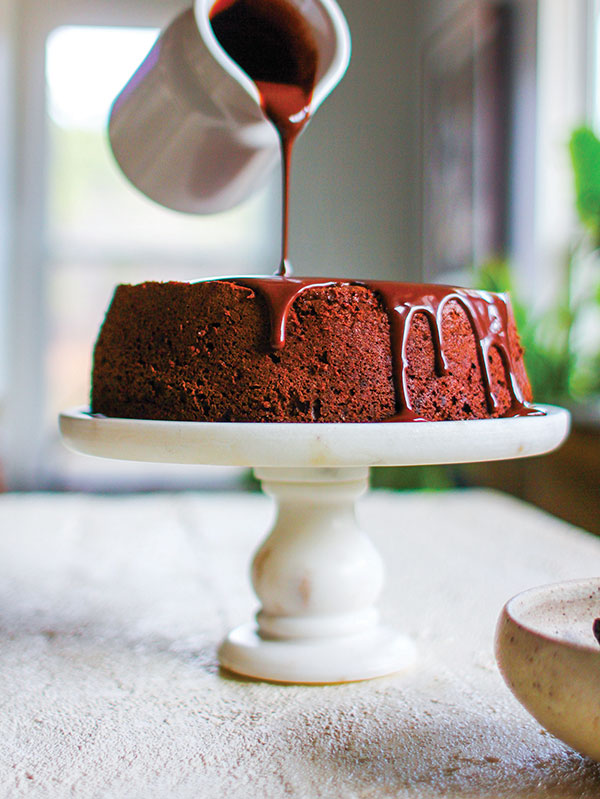
Chocolate Covered Prune Fudge Cake
Prep time: 15 minutes
Cook time: 55 minutes
Yield: 1 cake (8 inches)
Cake:
- Coconut oil spray
- 14 tablespoons butter, chopped
- 2 teaspoons vanilla extract
- 3/4 cup cocoa powder
- 10 soft, pitted prunes, chopped small
- 1/3 cup maple syrup
- 6 eggs
- 1/2 cup coconut sugar
- 1 cup almond meal
Ganache:
- 1 cup full-fat coconut milk
- 1 1/3 cups dark chocolate morsels
- To make cake: Preheat oven to 300 F. Lightly spray bottom and sides of 8-inch springform pan with coconut oil spray. Place round piece of parchment paper in bottom of pan and lightly spray with coconut oil spray.
- In small saucepan over low heat, place butter and vanilla. Use sieve to sift cocoa into saucepan. Stir with spatula until completely smooth. Remove from heat and set aside.
- In bowl of food processor fitted with "S" blade, place prunes and syrup. Top with cooled butter mixture then process until smooth. Transfer to large mixing bowl, scraping all chocolate mixture from food processor with spatula.
- In bowl of stand mixer fitted with whisk attachment, whip eggs and coconut sugar on high speed 7 minutes, or until tripled in volume.
- Add one-third of egg mixture to bowl with chocolate mixture. Using spatula, gently fold together until completely combined. Add almond meal and remaining egg mixture to bowl and gently fold to combine.
- Pour batter into prepared pan and bake 55 minutes, or until set. Once cooked through, transfer cake to cooling rack and cool completely in pan.
- To make ganache: In top of double boiler, melt coconut milk and dark chocolate until completely smooth. Pour prepared ganache over cake. Serve immediately for molten fudge effect or allow to completely set.
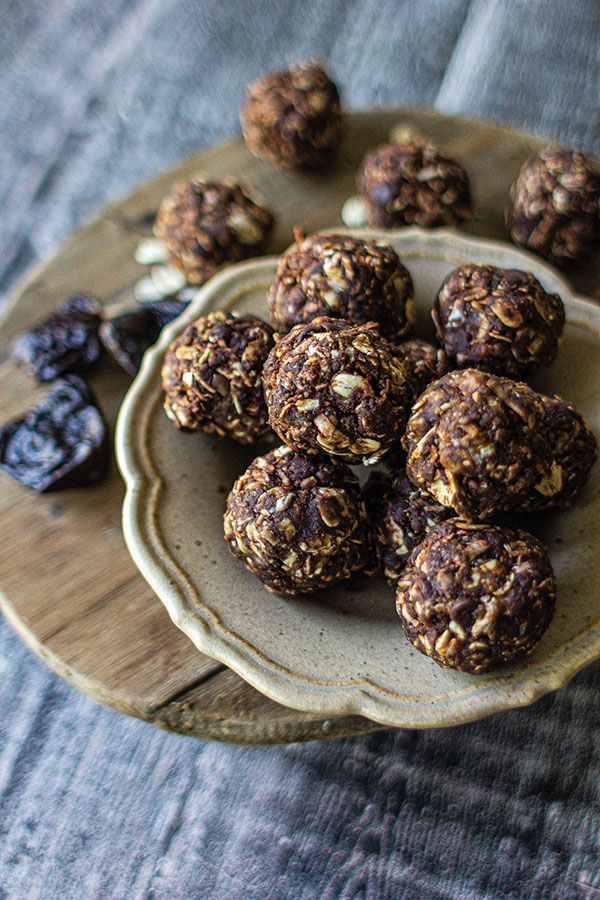
Chocolate Energy Balls
Recipe courtesy of Meg van der Kruik on behalf of California Prunes
Prep time: 10 minutes
Cook time: 30 minutes
Yield: 24 pieces
Prune Puree:
- 16 ounces pitted California prunes
- 1/2 cup hot water
Energy Balls:
- 1 cup old-fashioned or gluten-free oats
- 2/3 cup toasted, unsweetened shredded coconut
- 1/2 cup creamy natural nut butter (peanut or almond)
- 1/2 cup pecan meal
- 1/2 cup prune puree
- 1/4 cup unsweetened cocoa powder
- 1 teaspoon vanilla extract
- To make prune puree: In blender, combine prunes and water. Pulse to combine then blend until smooth, pourable consistency forms, scraping sides, if necessary.
- Store puree in airtight container in fridge up to 4 weeks.
- To make energy balls: In mixing bowl, stir oats, coconut, nut butter, pecan meal, prune puree, cocoa powder and vanilla until completely combined.
- Cover and chill in refrigerator 30 minutes. Once chilled, use small cookie scoop or measuring spoon to measure equal-sized amounts of mixture then form into balls by applying gentle pressure to dough using palms. Do not roll as balls will break apart.
- Store covered in airtight container in refrigerator up to 1 week.
Source:

Go for Grapes as a Smart Choice for Health and Wellness
(Family Features) The importance of health and wellness is top of mind for many people. There are many contributing factors to wellness such as diet, physical activity, social engagement and genetics. All are important, but a first step to wellness is choosing healthy foods to fuel the body every day, ideally foods that support health in multiple ways.
Consider grapes from California: they are convenient, healthy, hydrating and provide energy to help support healthy and active lifestyles. Eating grapes is also linked to beneficial impacts on the health of specific body parts and systems, including the heart, brain, skin and colon.
Most of grapes’ health benefits are attributed to the presence of natural plant compounds known as polyphenols, which help promote antioxidant activity and influence biological processes that support overall health. Grapes of all colors – red, green and black – are natural sources of polyphenols.
Fresh California grapes are refreshing by the handful, but they also lend a tasty burst of flavor to a wide range of recipes you can enjoy any time of day. This Heart Smart Smoothie is a deliciously healthy way to start the day; pairing grapes with nuts and seeds in No-Bake Energy Bites delivers a hearty snack to enjoy midday, after school or following a workout; and Quinoa, Cauliflower and Grape Salad is perfect at any mealtime for a powerful combo of both taste and health.
Grapes and a Healthy Brain
Research suggests regularly eating grapes as part of a healthy diet and lifestyle may contribute to improved health outcomes, including brain health.
In a study of people with early memory decline published in “Experimental Gerontology,” subjects were either fed whole grape powder equivalent to just 2 1/4 cups of grapes per day or a placebo powder. The results showed consuming grapes preserved healthy metabolic activity in regions of the brain associated with early Alzheimer’s disease, where metabolic decline takes hold.
Subjects who didn’t consume grapes exhibited significant metabolic decline in these critical regions. Additionally, those consuming the grape-enriched diet showed beneficial changes in regional brain metabolism that correlated to improvements in attention and working memory performance.
Find more nutritious recipes at GrapesFromCalifornia.com .
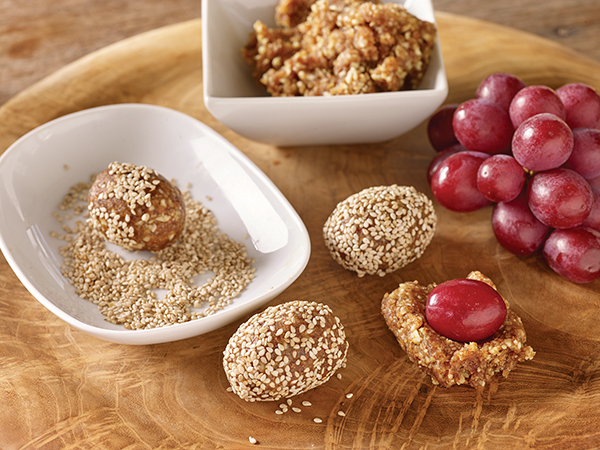
No-Bake Energy Bites
Prep time: 20 minutes
Yield: 8 energy bites
- 1/3 cup raw almonds
- 1/3 cup walnuts
- 1/2 cup pitted dates
- 1 1/2 teaspoons fresh orange juice or lemon juice
- 1 pinch sea salt
- 8 seedless California grapes
- 1/3 cup chia or hemp seeds
- In bowl of food processor, pulse almonds and walnuts 5-6 times to coarsely chop. Add dates and process until mixture is finely chopped. Add juice and process until just combined; transfer mixture to small plate.
- Dry grapes. Pack 1 tablespoon date mixture around each grape, completely covering to seal. Repeat with remaining grapes and date mixture.
- Roll balls in seeds to coat. Store in covered container in refrigerator up to three days.
Nutritional information per energy bite: 120 calories; 3 g protein; 12 g carbohydrates; 7 g fat (53% calories from fat); 0.5 g saturated fat (4% calories from saturated fat); 0 mg cholesterol; 20 mg sodium; 3 g fiber.
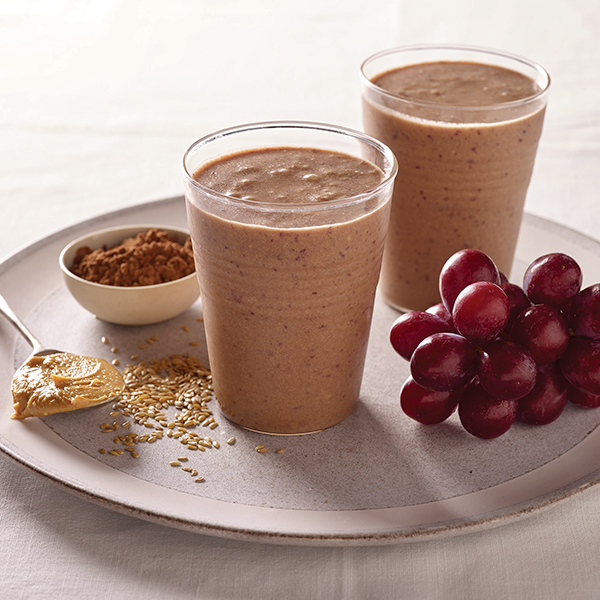
Heart Smart Grape and Peanut Butter Smoothie
Prep time: 5 minutes
Servings: 1
- 1 cup red California grapes, chilled
- 2/3 cup unsweetened almond milk, chilled
- 1/2 cup ice cubes
- 1/2 small banana
- 1 tablespoon peanut butter
- 1 tablespoon ground flax seed
- 2 teaspoons cacao powder
- In blender on high speed, blend grapes, almond milk, ice, banana, peanut butter, flax seed and cacao powder until smooth.
Nutritional information per serving: 350 calories; 8 g protein; 53 g carbohydrates; 14 g fat (36% calories from fat); 2.5 g saturated fat (6% calories from saturated fat); 0 mg cholesterol; 220 mg sodium; 7 g fiber.
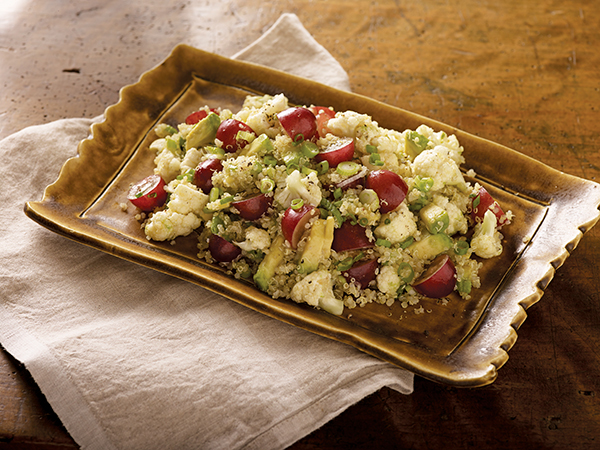
Quinoa, Cauliflower and Grape Salad
Prep time: 15 minutes
Cook time: 15 minutes
Servings: 8
- 1 cup white quinoa
- 1 small head cauliflower, trimmed and cut into small florets
- 1 1/4 cups red California grapes, halved
- 3 scallions, trimmed and thinly sliced
- 2 ripe avocados, diced 1/3 inch
Dressing:
- 2 tablespoons white wine vinegar
- 1 tablespoon lime juice
- 1 tablespoon honey
- 1/2 teaspoon ground cumin
- 1/2 teaspoon dried oregano, crumbled
- 1/2 teaspoon fine sea salt
- 1/4 cup extra-virgin olive oil
- freshly ground black pepper, to taste
- Cook quinoa according to package directions and drain on two layers of paper towels. Transfer to mixing bowl. Add cauliflower, grapes, scallions and avocado pieces.
- To make dressing: In small bowl, whisk vinegar, lime juice, honey, cumin, oregano and salt until blended. Gradually whisk in oil. Drizzle dressing over quinoa mixture and toss gently. Season with pepper, to taste.
Nutritional information per serving: 260 calories; 5 g protein; 27 g carbo hydrates; 16 g fat (55% calories from fat); 2 g saturated fat (7% calories from saturated fat); 0 mg cholesterol; 170 mg sodium; 6 g fiber.