
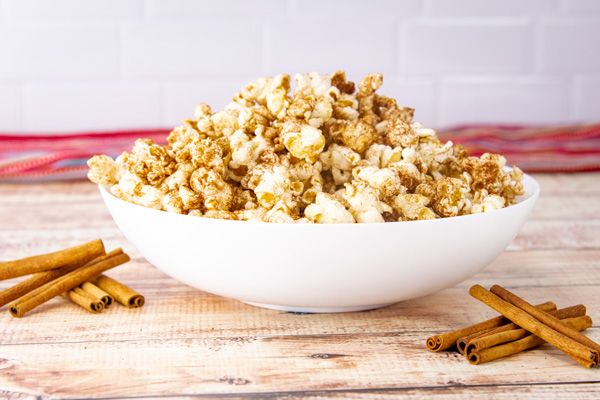
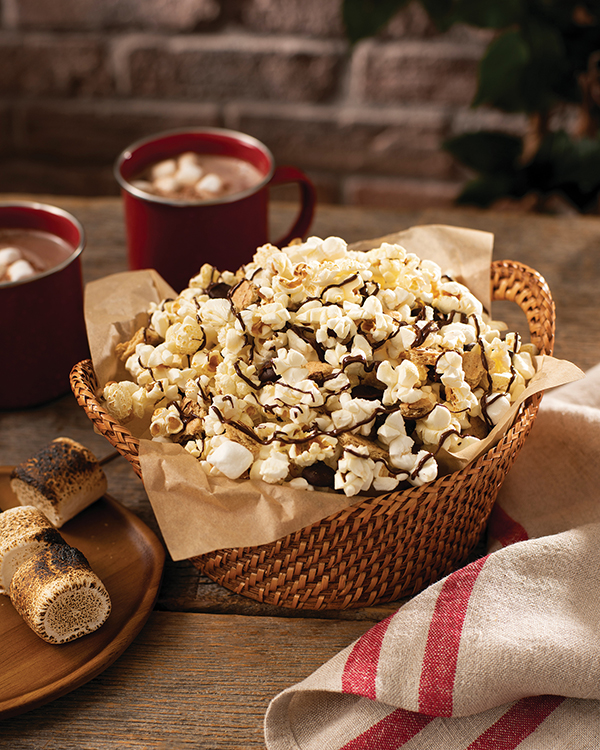
Cinnamon Chocolate Popcorn
(Family Features) Cozying up to the fireplace or snuggling deeper into a favorite blanket or throw are sure ways to warm yourself on cold days. For an extra touch of coziness, adding a favorite snack to the occasion can help you relax and release the stresses of the day.
Consider a versatile ingredient like popcorn that can help enhance wintertime treats as one of America’s most beloved foods. The seed-to-snack simplicity of popcorn makes it easy to enjoy by the handful on its own or as part of a tasty recipe served by the fire.
This Cinnamon Chocolate Popcorn takes just minutes to prepare and combines two delicious flavors in one easy treat. Quick and delightful, it’s sure to become a family favorite, particularly during the cooler months when chilly forecasts call for comforting snacks.
To find more winter desserts and pop-able snacks, visit popcorn.org.
Watch video to see how to make this recipe!
Cinnamon Chocolate Popcorn
Yield: 3 quarts
- 3 quarts popped popcorn
- butter-flavored nonstick cooking spray
- 9 tablespoons powdered cocoa mix (cocoa sweetened with sugar or sugar substitute)
- 3 teaspoons cinnamon
- Place popcorn in large bowl and lightly spray with nonstick cooking spray.
- Sprinkle cocoa mix and cinnamon on popcorn. Toss to coat evenly. Serve immediately.
Source: Popcorn Board

Sweet and Savory Ways to Shake Up Holiday Celebrations
(Family Features) ’Tis the season for sweet and savory favorites – from the mouthwatering desserts you crave each year to starters and snacks that hold over hungry guests. Elevate your holiday entertaining with the right combination of appetizers, main courses, sides, sweets and beyond that start with the same seasonal staple: pecans.
As a versatile nut that can be used throughout the holidays, pecans have you covered so you can cook and enjoy a myriad of dishes, add festive flair to decor, or provide a nutritious snack in the midst of season-long indulgences. This year, pick up an extra bag of pecans to create nutritious, delicious dishes to enjoy on-the-go or serve to guests.
To help celebrate the holiday season, the American Pecan Promotion Board introduced a digital Pe-Calendar to highlight the many ways pecans can be enjoyed in and beyond a traditional pie. From Dec. 7-18, the interactive calendar will unveil tasty recipes for pecan fans to enjoy, along with fun games that can enter you in to win exciting prizes each day. From delicious Baked Brie with Pecans and Cranberry Orange Chutney to nutritious Pecan Snack Mix with Cranberries and Chocolate, along with prizes, the calendar provides an ultimate way to shell-ebrate with the must-have holiday nut.
To sign up for daily email reminders to open a new door for chances to win nutty prizes, or to find additional holiday recipes, visit EatPecans.com.
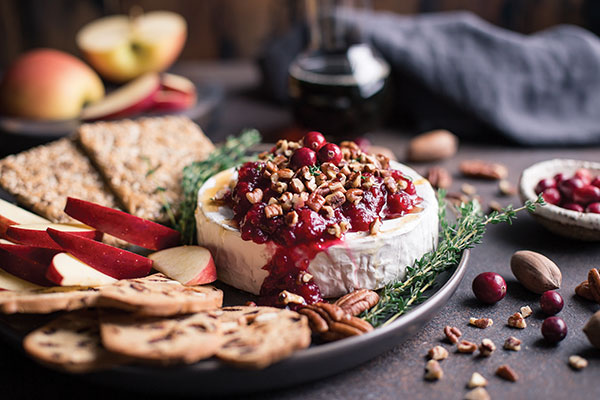
Baked Brie with Pecans and Cranberry Orange Chutney
Recipe courtesy of the American Pecan Promotion Board
Cook time: 24 minutes
Servings: 8
- 1 bag (12 ounces) fresh cranberries
- 1/2 cup maple syrup, plus 1 teaspoon for garnish, divided
- 1/2 cup water
- 1 orange, zest and juice only
- 1 teaspoon freshly chopped thyme, plus additional for garnish, divided
- 1 teaspoon freshly chopped rosemary
- 1 tablespoon bourbon (optional)
- 1 round brie (13.4 ounces)
- 1/2 cup roasted pecan pieces
- crackers
- toasted bread
- apple slices
- Preheat oven to 350 F. Line baking sheet with parchment paper or silicone baking mat.
- In medium saucepan over medium-high heat, bring cranberries (reserving some for garnish), 1/2 cup maple syrup and water to boil. Reduce heat to medium-low and cook, stirring occasionally, until cranberries pop and mixture thickens, 8-10 minutes.
- Remove cranberry mixture from heat and stir in orange zest, orange juice, 1 teaspoon thyme, rosemary and bourbon, if desired.
- Place brie on parchment-lined baking sheet. Bake 5-7 minutes, or until inside of cheese softens while outside remains intact.
- Transfer brie to serving platter and top with chutney and toasted pecans. Drizzle remaining maple syrup over brie and garnish with remaining fresh thyme and reserved cranberries. Serve with crackers, toasted bread and apple slices.
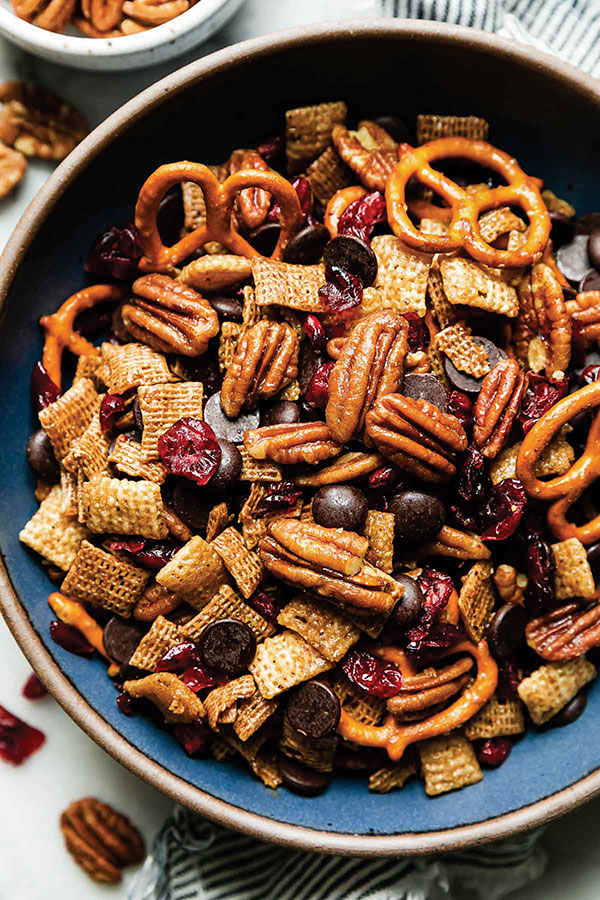
Pecan Snack Mix with Cranberries and Chocolate
Recipe courtesy of Jess Larson and the American Pecan Promotion Board
Prep time: 10 minutes
Cook time: 5 minutes, plus 10 minutes cooling time
- 1 cup pecan halves
- 1 cup rice squares cereal (wheat or cinnamon)
- 1/2 cup pretzels
- 2 tablespoons unsalted butter
- 1 tablespoon brown sugar
- 1 1/2 tablespoons pure maple syrup
- 1/2 teaspoon kosher salt
- 1/4 teaspoon ground nutmeg
- 1/2 cup dried cranberries
- 1/2 cup dark chocolate chips
- In large, microwave-safe bowl, add pecans, rice squares cereal and pretzels. In small, microwave-safe bowl, add butter, brown sugar, maple syrup, salt and nutmeg. Microwave butter mixture 1-2 minutes until melted then pour over dry mix. Toss well to combine.
- Microwave snack mix in 45-second intervals, about 4-5 intervals total, until mix is fragrant, golden and toasty.
- Cool mix completely then stir in cranberries and dark chocolate chips.
American Pecan Promotion Board

Celebrate the Season with Pop-able Fall Flavors
(Family Features) As part of the season of change with leaves crunching underfoot and a crispness in the air, remember to pause to celebrate a food known for its change, crunching and crispness – popcorn.
In honor of National Popcorn Poppin’ Month, a time when farmers head to the fields to harvest crops, gather with loved ones to celebrate this humble yet extraordinary snack. Whether it’s prepped on the stove, in the microwave or purchased ready-to-eat, Americans consume around 14 billion quarts each year of the wholesome whole grain, according to the Popcorn Board.
With each kernel, popcorn’s tantalizing aroma fills the air, setting off a journey of sensory bliss, as the sound of popping echoes in ears and the taste of buttery goodness dances on tongues. Whether enjoyed at the movies, during a cozy night in or at festive gatherings, popcorn brings people together, creating moments of shared joy and laughter. Catering to every palate, popcorn’s versatility knows few boundaries, as it can be dressed up with caramel, chocolate or even savory seasonings.
Join the celebration this fall with a fitting recipe like Old Fashioned Bourbon Maple Popcorn with Pecans. Accented with warming flavors of bourbon, orange and bitters, this maple-glazed treat offers a fun, cocktail-inspired snack perfect for sharing.
Discover more snacks that celebrate fall flavors at Popcorn.org.
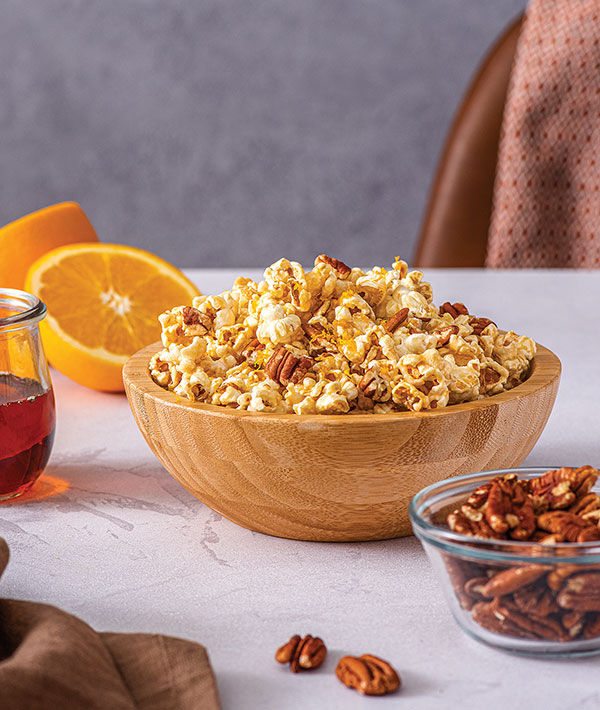
Old Fashioned Bourbon Maple Popcorn with Pecans
Servings: 4-6
- 8 cups popped popcorn
- 1/2 cup chopped toasted pecans
- 1/3 cup maple syrup
- 1 tablespoon bourbon
- 2 tablespoons butter
- 1 tablespoon orange zest
- 1 dash bitters
- Place popcorn and pecans in large bowl.
- In small saucepan over medium-high heat, combine maple syrup, bourbon and butter; bring to boil. Cook, swirling pan, 3-5 minutes, or until mixture thickens to corn syrup consistency. Stir in orange zest and bitters.
- Drizzle maple syrup mixture over popcorn; toss to evenly coat. Cool completely and serve.
Tips: Substitute bourbon with rye or whiskey. For "mocktail" popcorn, substitute with non-alcoholic bourbon or whiskey.
Source:

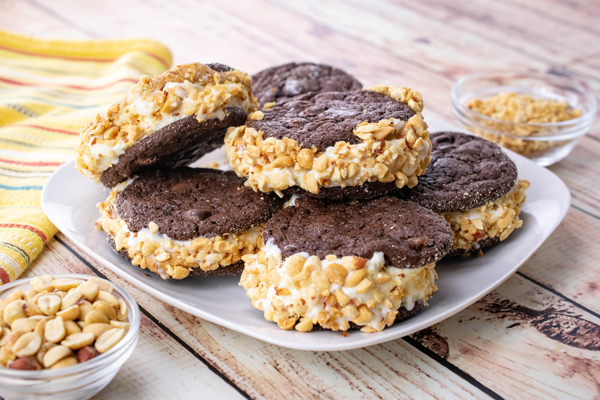
Peanut Butter Ice Cream Sandwiches
(Family Features) When the sun is shining and you need to beat the heat, cool down with a little shade and a nutty, frozen treat. This kid-favorite is a childhood classic you can customize with favorite toppings, too.
Made with the protein power of peanuts, these Peanut Butter Ice Cream Sandwiches are easy to prepare on hot days that call for a cold dessert. Just bake chocolate chip cookies, spread them with peanut butter, add a scoop of ice cream and roll in chopped peanuts, chocolate chips or toasted coconut for a sweet bite of perfection.
With approximately 4,000 active peanut farmers, it’s likely your peanuts – often referred to as “nutrition in a nutshell” – came from Georgia, which produces 52% of the country’s supply.
Visit GAPeanuts.com for more delicious dessert ideas.
Watch video to see how to make this recipe!
Peanut Butter Ice Cream Sandwiches
Recipe courtesy of Peanut Butter Lovers and the Georgia Peanut Commission
Yield: 12
- 24 fresh baked chocolate chip cookies (about 3 inches in diameter), cooled
- 1 1/2 cups creamy or crunchy peanut butter
- 1 1/2 quarts vanilla ice cream, slightly softened
- chopped peanuts, for topping (optional)
- mini chocolate chips, for topping (optional)
- toasted coconut, for topping (optional)
- On 12 cookies, top sides down, spread layer of peanut butter. Add one scoop of ice cream to each. Create sandwiches by topping with remaining cookies.
- Roll edges of ice cream in chopped peanuts, mini chocolate chips or toasted coconut, if desired. Place on baking sheet in freezer and freeze until firm.
- Serve slightly frozen.
Source: Georgia Peanut Commission

Ghostly Graveyard Cake
(Family Features) For a frighteningly fun time in the kitchen this Halloween, gather your family around the cauldron to create a sweet, spooky dessert. Tricks and treats may provide thrills, but a homemade concoction can be the star of your hauntingly happy evening.
This Ghostly Graveyard Cake takes imagination and creativity from everyone with tombstones, skulls and spooky icing daring all to try a bite. With looks this chilling, it’s a perfect treat to enjoy while watching everyone’s favorite scary movie.
Find more deliciously devious desserts at Culinary.net.
Watch video to see how to make this recipe!

Ghostly Graveyard Cake
- 1 box chocolate cake mix
- 10 chocolate creme cookies
- 1 cup black melting chips
- 1 cup red melting chips
- 1 cup heavy whipping cream
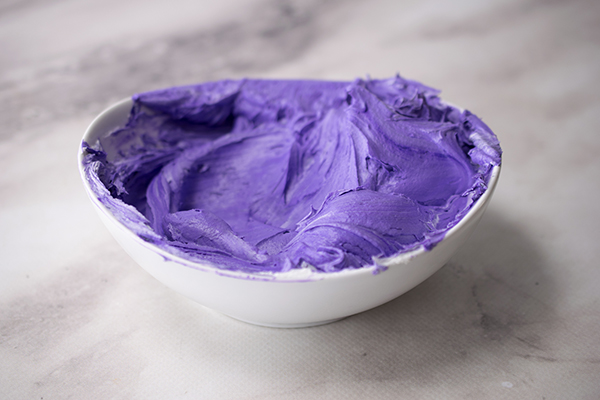
- 3 cans buttercream icing
- 1 purple food coloring
- 1 black food coloring
- skull sprinkles
- tombstones and bones candies
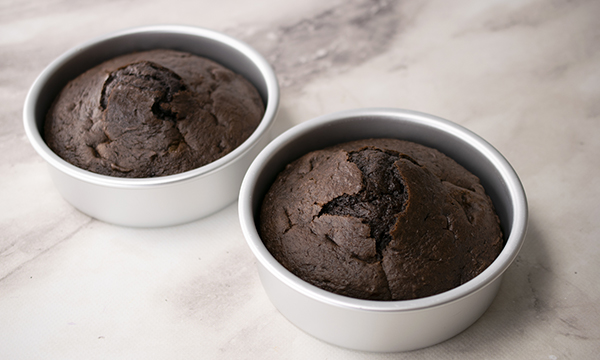
1. Prepare cake mix according to package instructions in three 6-inch baking pans. Once baked, allow to completely cool outside of pans.
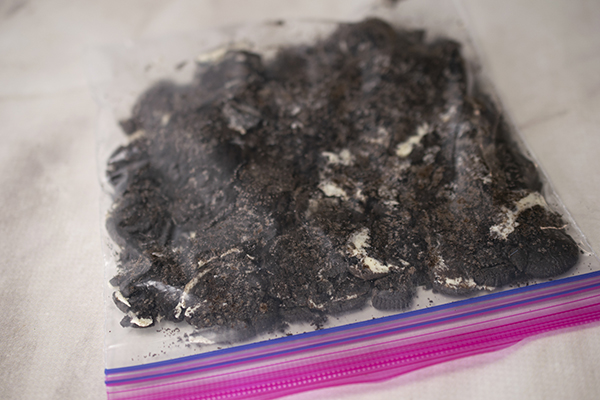
2. In zip-top bag, using rolling pin, crush chocolate creme cookies; set aside.
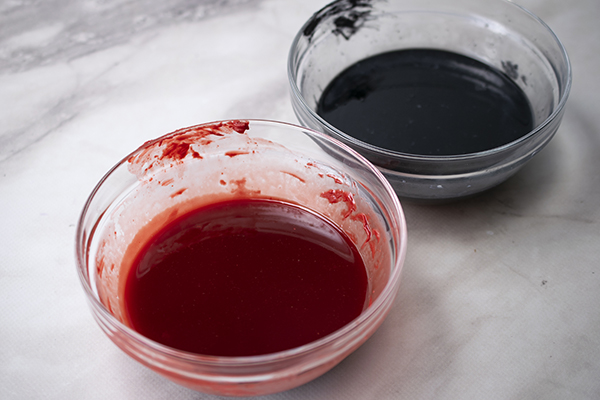
3. In separate small bowls, add black melting chips and red melting chips.
4. In microwave, heat heavy whipping cream 1 1/2 minutes. Pour half the mixture into one bowl of chips and other half into other bowl of chips. Stir until chips are completely melted; set aside.
5. After cakes cool, on cake board, add small amount of buttercream icing so cake sticks. Using bread knife, level cakes.
6. Place one cake on cake board and add thin layer of icing on top. Place second layer of cake on top and add thin layer of icing on top. Place final layer of cake on top and add thin layer of icing on top. Add thin layer of icing to entire cake. Freeze 15 minutes.
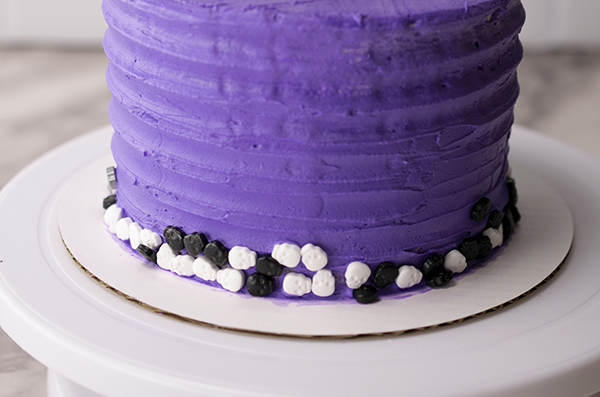
7. In small bowl, mix two parts purple food coloring to one part black food coloring. Ice cake with deep purple icing. Using grooved scraper, scrape along sides of cake. Using angled spatula, smooth top of cake.
8. Add skull sprinkles around edges of cake. Using piping bag with small opening at tip, drip black drip mixture around top edges of cake. Repeat using red drip mixture.
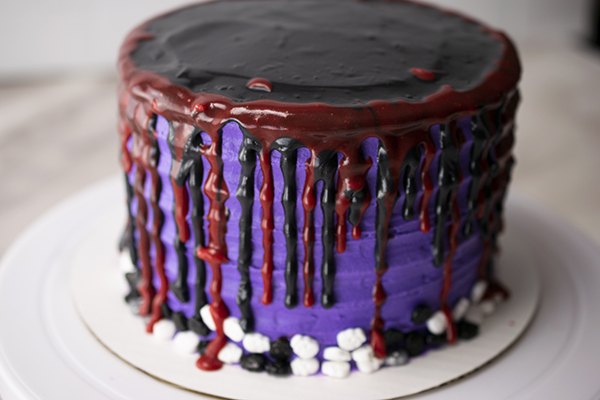
9. Add chocolate creme cookie crumbs to top of cake. Add tombstones and bone sprinkles to top of cake.


Pop Up Cooking Creativity
(Family Features) As an important life skill, learning to cook and becoming familiar with kitchen basics can be an exciting adventure for kids from toddlers to teens. Using a delicious childhood favorite like popcorn as the key ingredient at the center of your lessons can spur interest and enthusiasm.
Along with understanding measurements and safety, teaching your children how to make simple recipes also offers opportunities to bond and make memories that can last a lifetime. Popcorn is a snack food associated with good times and it’s versatile enough to encourage creativity.
While it’s important to start with easy techniques that introduce future chefs to the culinary world, it’s also helpful to ensure they’ll enjoy eating their first creations so they’ll be eager for more time in the kitchen.
As a whole grain that’s 100% unprocessed with no additional additives, hidden ingredients or GMOs, air-popped popcorn has only 30 calories per cup and offers a whole grain that provides energy-producing complex carbohydrates. Because whole grains are important sources of nutrients such as zinc, magnesium, B vitamins and fiber, you can instill the values of nutritious snacking all while having some fun.
These simple yet delicious recipes and tips can help you get your kids involved in the kitchen.
Encourage Creativity
Making learning fun is an important introduction to the world of cooking. Starting with a versatile base ingredient like popcorn that’s naturally low in fat and calories, encourage your child to get creative with a recipe like Pop-a-rific Popcorn Balls. With simple variations like adding food coloring or mixing in candies, nuts or dried fruit, it’s a colorful way for little ones to build confidence in their skills.
Measure Ingredients
A key component to recipes of all difficulty levels, teaching measurements from teaspoons and tablespoons to cups, ounces and more is valuable knowledge. Start with the basics like these Simple Popcorn S’mores that call for popcorn and graham crackers to be measured out in cups so your child can focus on one unit of measurement. Then, if little ones are helping, have an adult melt the chocolate and drizzle for a family-favorite snack.
Get Messy
Learning how to create and explore is often productive (and fun) when children can get their hands dirty. Sweet ’n’ Salty Popcorn Pretzel Sticks are a perfect canvas for letting kiddos work directly with the ingredients as they can roll pretzels in peanut butter, add sprinkles to their heart’s content and press popcorn into their newfound favorite treat.
Find more kid-friendly recipes to get the whole family involved in the kitchen at popcorn.org.

DIY Popcorn Bar
Whether you're entertaining guests, hosting a houseful of kids or simply enjoying a weekend at home, a DIY popcorn bar provides a tasty and joyful way for children and adults alike to create their own version of an afternoon snack. Just set out a few ingredients and watch the fun unfold.
- Small popcorn bags, bowls or cups
- Scoops or spoons
- Popped popcorn
- Peanuts (remember to ask fellow parents if their children may have an allergy)
- Candies
- Raisins
- Chocolate chips
- Seasonings
- Shredded cheese
- Shredded coconut
- Melted butter
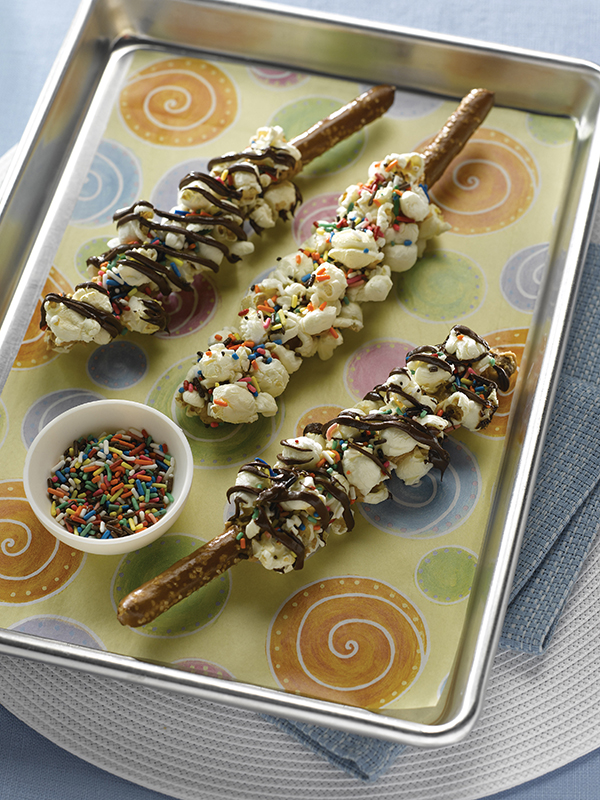
Sweet 'n' Salty Popcorn Pretzel Sticks
Servings: 6
- 6 tablespoons peanut butter
- 6 large pretzel rods
- 3 cups popped popcorn
- sugar sprinkles
- 3/4 cup mini chocolate chips (optional)
- Spread 1 tablespoon peanut butter over one pretzel, leaving 2-inch "handle" without peanut butter. Repeat with remaining peanut butter and pretzels.
- Press and roll popcorn onto peanut butter to coat each pretzel. Sprinkle with sugar sprinkles.
- To make optional chocolate drizzle: Place chocolate chips in small resealable plastic bag and seal bag. Microwave 30 seconds, or until chocolate is melted.
- Clip small corner from bag and squeeze to drizzle chocolate over popcorn.
- Sprinkle with additional sugar sprinkles. Allow chocolate to harden before serving.
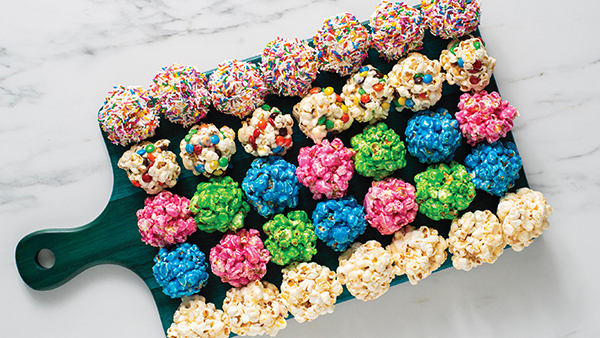
Pop-a-rific Popcorn Balls
Yield: 14 balls
- 3 quarts popped popcorn, unsalted
- 1 package (1 pound) marshmallows
- 1/4 cup butter or margarine
- Place popped popcorn in large bowl.
- In large saucepan over low heat, cook marshmallows and butter or margarine until melted and smooth. Pour over popcorn, tossing gently to mix well. Cool 5 minutes.
- Butter hands well and form into 2 1/2-inch balls.
- Variations: To color popcorn balls, add 3-4 drops of food coloring to smooth marshmallow mixture. Mix well to distribute color evenly then pour over popcorn as instructed.
- Mix in candies, nuts or dried fruit after mixing popcorn and melted marshmallows. Stir to distribute then form into balls.
- Place nonpareils in shallow bowl or plate. Roll popcorn balls in nonpareils after forming.
Simple Popcorn S'mores
Yield: 10 cups
- 10 cups freshly popped popcorn
- 1 package (10 1/2 ounces) miniature marshmallows
- 2 cups graham crackers, broken into small pieces
- 1/2 cup milk chocolate, melted
- On baking sheet, combine popcorn, marshmallows and graham crackers.
- Drizzle with melted chocolate and cool.
Source: Popcorn Board

Sweet and Spicy Nachos
(Family Features) When looking to guide your family toward healthier snacks, success can be as simple as rethinking the ingredients you choose to use, including your favorite produce, such as grapes.
Fresh California grapes, for example, make for an ideal snack because they are tasty, healthy, hydrating and refreshing, but grapes can also be used to make dishes that are satisfying and delicious like these Sweet and Spicy Nachos. Grapes of all colors - red, green and black - are a natural source of beneficial antioxidants and other polyphenols. Plus, they are naturally fat-free, cholesterol-free and contain virtually no sodium.
Find more better-for-you snack ideas at GrapesFromCalifornia.com.
Watch video to see how to make this recipe!
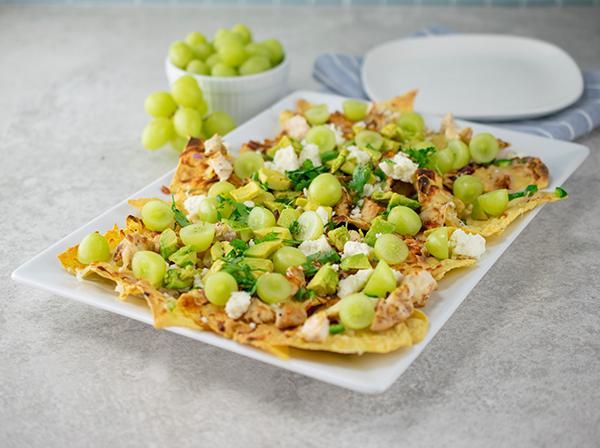
Sweet and Spicy Nachos
Recipe courtesy of the California Table Grape Commission
Servings: 2
Chipotle Barbecue Sauce:
- 1 tablespoon canned chipotle pepper in adobo sauce
- 2 tablespoons barbecue sauce
- 2 tablespoons freshly squeezed lime juice
- 1 teaspoon honey
- 3 ounces baked tortilla chips (about 28 chips)
- 1/2 jalapeno, seeded, stemmed and finely minced (optional)
- 2 tablespoons finely diced red onion
- 4 ounces grilled chicken, diced (about 3/4 cup)
- 1/4 cup shredded Monterey Jack cheese
- 1/4 cup queso Cotija Mexican cheese, crumbled
- 1/2 avocado, halved, pitted, peeled and diced
- 1 cup halved California grapes
- 3 tablespoons chopped cilantro
- Heat oven to broil.
- In food processor or blender, puree chipotle pepper, barbecue sauce, lime juice and honey until smooth.
- Line baking sheet with aluminum foil and arrange tortilla chips in single layer.
- Sprinkle chips with jalapeno, if desired; onion; chicken; and Monterey Jack cheese. Drizzle with Chipotle Barbecue Sauce.
- Place tray in oven about 6 inches below element; broil 1-2 minutes until cheese is melted. Remove from oven, sprinkle with Cotija Mexican cheese, avocado, grapes and cilantro.
Source: California Grapes

Cherry Coffee Cake
Add some sweetness to your breakfast routine with this delicious and easy-to-make Cherry Coffee Cake.
Find more breakfast recipes at Culinary.net.
Watch video to see how to make this recipe!
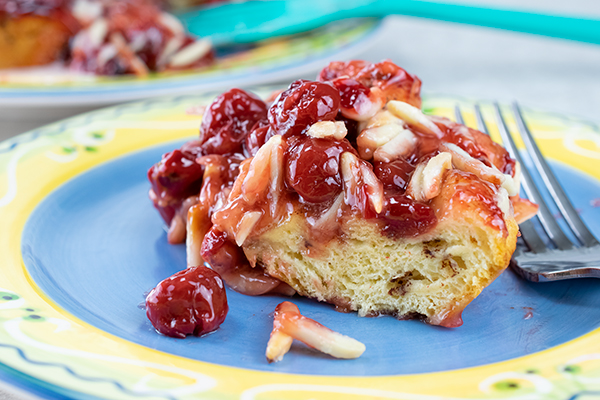
Cherry Coffee Cake
- Nonstick cooking spray
- 1 can (12.4 ounces) refrigerated cinnamon rolls with icing
- 1 1/2 cups (21-ounce can) cherry pie filling
- 1/2 cup slivered almonds or pecans (optional)
- Heat oven to 375° F.
- Spray 9-inch round cake pan with nonstick cooking spray.
- Separate cinnamon roll dough into eight rolls; cut each roll into quarters.
- Place dough rounded-side down in pan.
- Spoon pie filling over rolls. Sprinkle almond slivers or pecans over cherry filling, if desired.
- Bake 25-35 minutes, or until golden brown.
- Invert onto plate or cutting board. Invert again onto serving plate.
- Remove lid from icing. Microwave 3-10 seconds. Stir icing and drizzle over warm coffee cake.
- Serve warm.
Source: Culinary.net

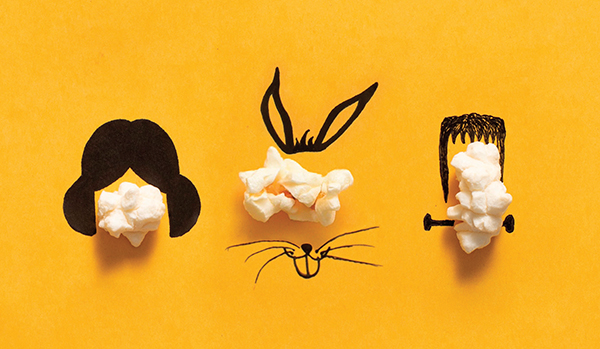
Make Your Movie Night Pop
(Family Features) Invite your friends and neighbors over, spread out some comfy seating and dim the lights. Whether it’s a kids’ birthday party, an adult gathering or nearly anything in-between, hosting a movie night in the comfort of your own home – or on a projector in the yard – can be the perfect escape. Of course, tasty snacks only add to the fun.
Light and airy popcorn is a movie watching staple, and one you can feel good about eating. At only 30 calories per cup, whole-grain, freshly popped popcorn is naturally low in fat and calories, non-GMO, gluten-free, contains no artificial additives or preservatives and is sugar-free.
Enjoyed a handful at a time or as part of creative, flavorful snack recipes – like Popcorn Pepperoni Pizza Dippers, Sweet and Salty Popcorn Party Mix, Maple Bacon Popcorn Mix and Truffle Popcorn – popcorn offers plenty of versatility to fit nearly any theme.
Get more great popcorn recipes at popcorn.org
Watch video to see how to make this recipe!
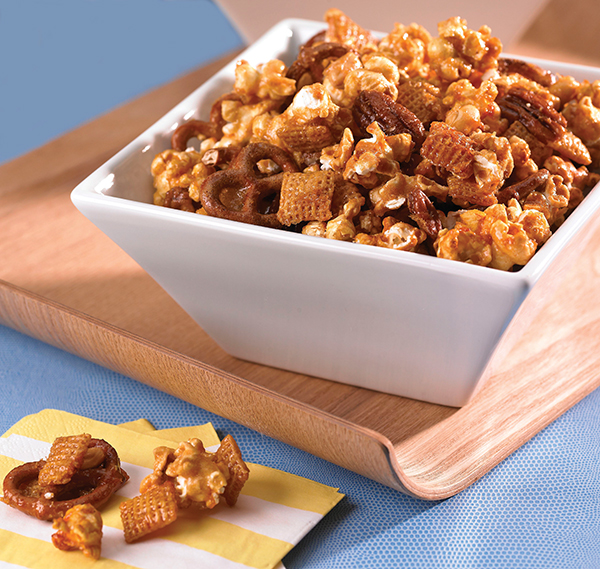
Sweet and Salty Popcorn Party Mix
Yield: 14 cups
- 10 cups popped popcorn
- 2 cups miniature pretzel twists
- 1 cup pecans
- 1 cup peanuts
- 2 cups rice, wheat or corn cereal squares
- 1/2 cup butter (1 stick)
- 1/2 cup packed brown sugar
- 1/4 cup corn syrup
- 1/2 teaspoon baking soda
- Heat oven to 300° F.
- In large bowl, combine popcorn, pretzels, pecans, peanuts and cereal squares; set aside.
- In medium saucepan over medium heat, heat butter, brown sugar and corn syrup. Stir mixture until it begins to boil. Boil 3 minutes without stirring. Remove from heat and stir in baking soda. Note: Mixture will foam.
- Pour syrup over popcorn mixture and stir until evenly coated. Pour mixture onto large, rimmed baking sheet or roasting pan. Bake 30 minutes, stirring twice during baking. Stir mixture several times as it cools. Store in airtight container.
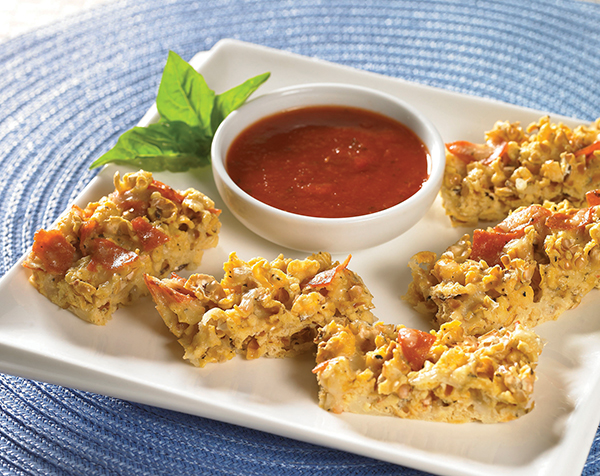
Popcorn Pepperoni Pizza Dippers
Yield: 16 squares
- Nonstick cooking spray
- 2 eggs
- 1/2 cup tomato and basil reduced-fat cooking cream
- 1 tablespoon grated parmesan cheese
- 1/8 teaspoon coarse ground black pepper
- 10 cups popped popcorn
- 1 cup shredded mozzarella cheese
- 1/3 cup thinly sliced pepperoni, coarsely chopped
- marinara sauce, for dipping
- Heat oven to 350° F. Spray 8-inch square baking pan with nonstick cooking spray.
- In large bowl, whisk eggs, cooking cream, parmesan cheese and black pepper. Stir in popcorn, mozzarella cheese and pepperoni.
- Spread mixture in prepared pan, patting down with spatula or spoon.
- Bake about 15 minutes until set and lightly browned. Let sit 5 minutes. Cut into 16 bars. Serve warm with marinara sauce.
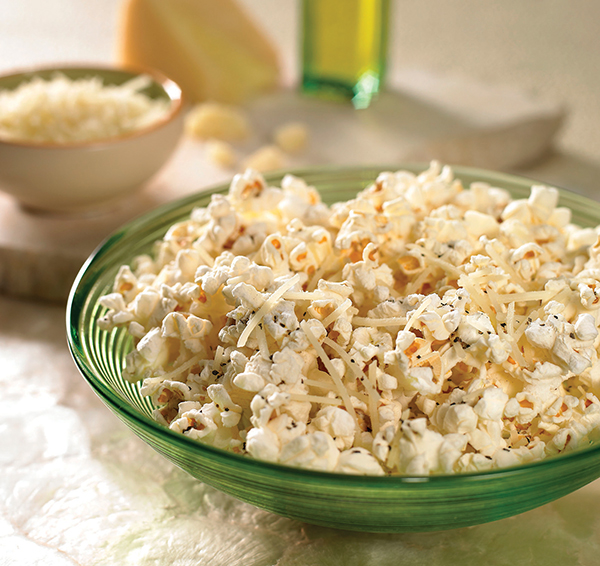
Truffle Popcorn
Yield: 10 cups
- 1 1/2 tablespoons olive oil
- 1 tablespoon, plus 2 teaspoons, white truffle oil, divided
- 1/2 cup popcorn kernels
- 1 tablespoon butter
- 3 tablespoons shredded parmesan cheese
- 1/2 teaspoon sea salt
- freshly ground black pepper
- In large, heavy-bottomed pot with lid, combine olive oil and 1 tablespoon truffle oil. Add about three popcorn kernels.
- Heat over medium-high heat until one kernel pops. Add remaining popcorn kernels; cover.
- Once corn begins to pop, shake pot constantly over heat.
- When popping slows, remove pot from heat and transfer popcorn to large serving bowl.
- Melt butter and mix in remaining truffle oil. Pour mixture over popcorn; toss.
- Sprinkle parmesan cheese, salt and pepper over popcorn; toss to distribute evenly.
- Serve immediately or store in airtight container.
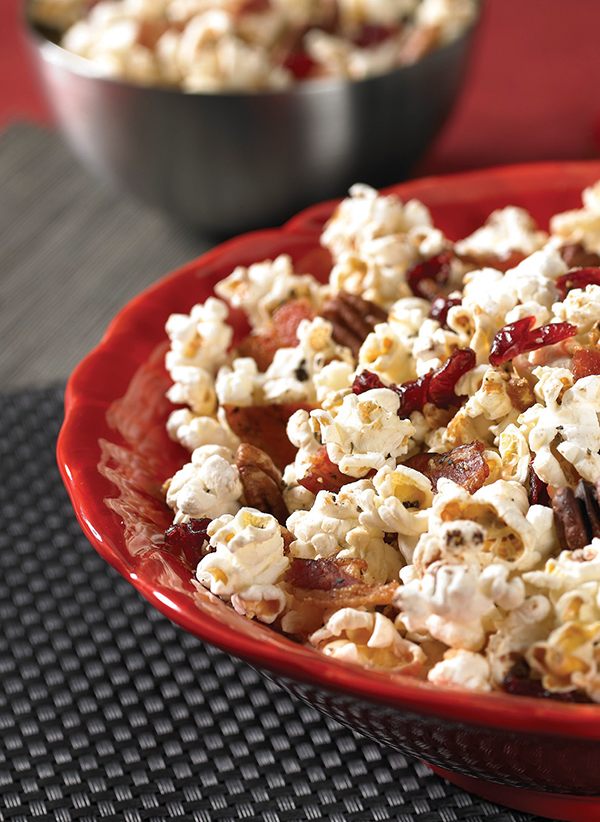
Maple Bacon Popcorn Mix
Yield: 2 quarts
- 6 slices thick-cut bacon
- 1/4 cup pure maple syrup
- 8 cups popped popcorn
- 2/3 cup pecan halves, coarsely chopped
- 2/3 cup dried cranberries
- 2 tablespoons butter or margarine
- 1/4 teaspoon coarse ground black pepper
- 1/4 teaspoon maple extract
- Heat oven to 400° F. Line jellyroll pan with foil. Place wire rack in pan. Arrange bacon in single layer on rack. Bake 15 minutes until ends of bacon start to curl.
- Remove and reserve 2 tablespoons bacon drippings. Brush bacon with 2 tablespoons maple syrup; bake 15 minutes until browned. Cool then coarsely chop bacon.
- In large bowl, combine popcorn, pecans and cranberries.
- Combine butter, black pepper, maple extract, remaining maple syrup and reserved bacon drippings. Cook over low heat until butter is melted. Drizzle over popcorn mixture and mix thoroughly.
- Spread popcorn mixture in jellyroll or roasting pan.
- Bake 5 minutes. Toss in bacon pieces. Serve warm.
Source: Popcorn Board

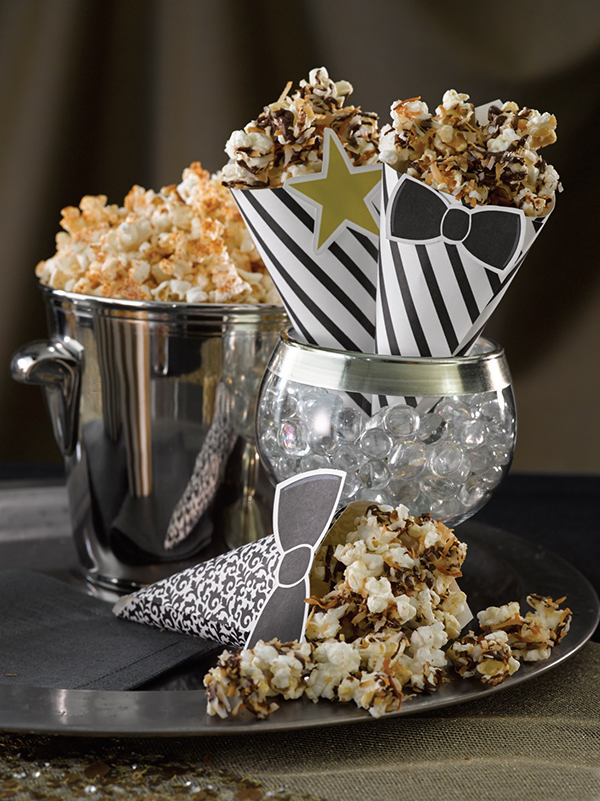
Perfect Pops for Every Occasion
(Family Features) No matter what kind of events you have on your social calendar, you can pop up delicious treats that are sure to be a hit.
Whether hosting a get-together for the guys and tuning into the game or having a night in with the girls, freshly popped popcorn, which is naturally low in fat and calories, non-GMO and gluten free, can help you please every palate.
Sweet, spicy, salty or served in more non-traditional ways, the possibilities are endless, and perfect for everything from date night to a family movie night or even a sleepover or kids’ party. And since it’s healthy and whole grain, popcorn is a satisfying snack suitable for every occasion that you can feel good about serving.
Find more versatile, nutritious recipes for your next event at popcorn.org.
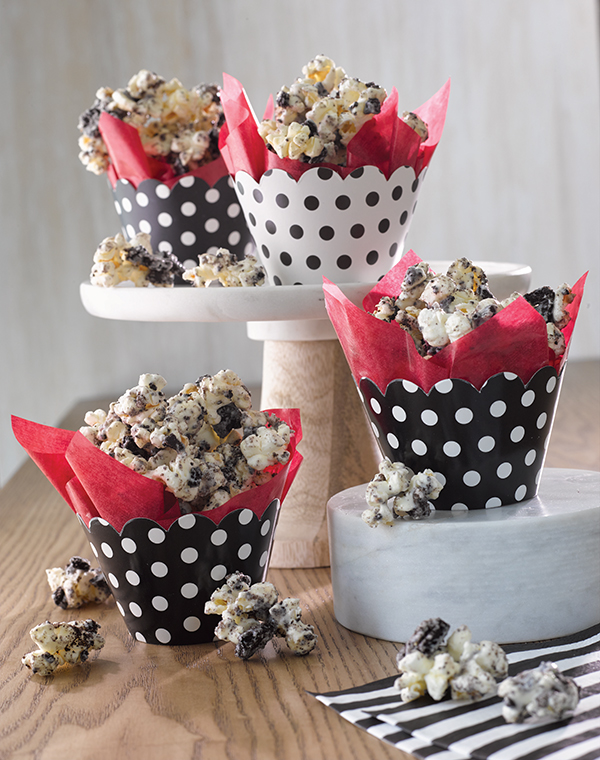
Cookies ’N Cream Popcorn
- 12 cups popped popcorn
- 1 package (11 ounces) white chocolate chips
- 2 teaspoons coconut oil
- 15 Oreo cookies, coarsely chopped
- Place popcorn in large bowl; set aside.
- In medium saucepan on low heat, melt chocolate chips and coconut oil; stir until blended.
- Pour melted chocolate over popcorn, stirring until well-coated. Stir in chopped Oreos.
- Spread mixture on baking sheet and chill until chocolate has set. Break into pieces to serve.
Serves
12 cups
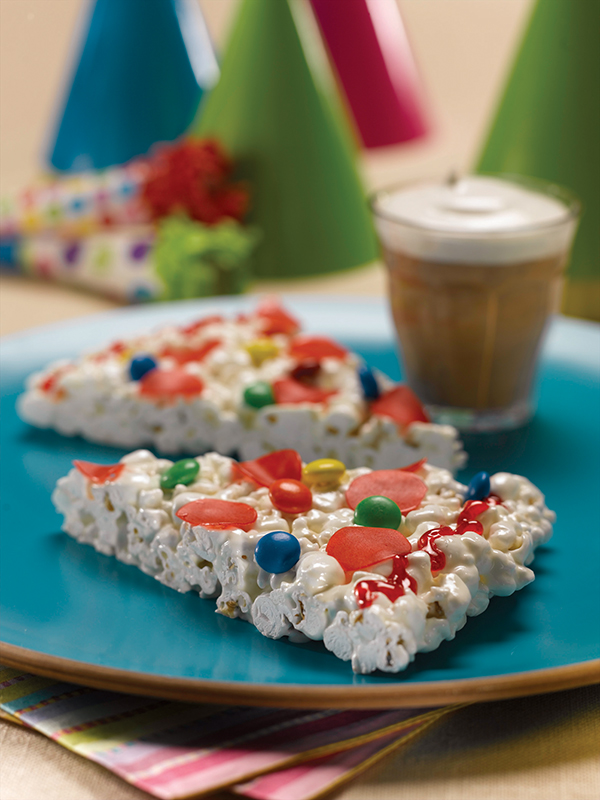
Popcorn Party Pizza
- 3 tablespoons butter
- 1 bag (10.5 ounces) mini marshmallows
- 2 quarts popped popcorn
- 1 tube (.68 ounces) red piping gel
- 1 package red raspberry fruit roll-ups
- green jelly beans
- coconut
- candy-coated chocolate pieces
- Spray 12-inch pizza pan with cooking spray; set aside.
- In large saucepan over medium heat, heat butter.
- Stir in marshmallows until melted.
- Stir in popcorn until well coated.
- Spread mixture evenly onto prepared pizza pan.
- Drizzle red piping gel over “pizza” to make “sauce.”
- Cut small circles (about 1 1/4 inches in diameter) from fruit roll-up and place on pizza for “pepperoni” slices.
- Decorate as desired with jelly beans, coconut and candies. Allow to cool completely before cutting into wedges to serve.
Serves
8 slices
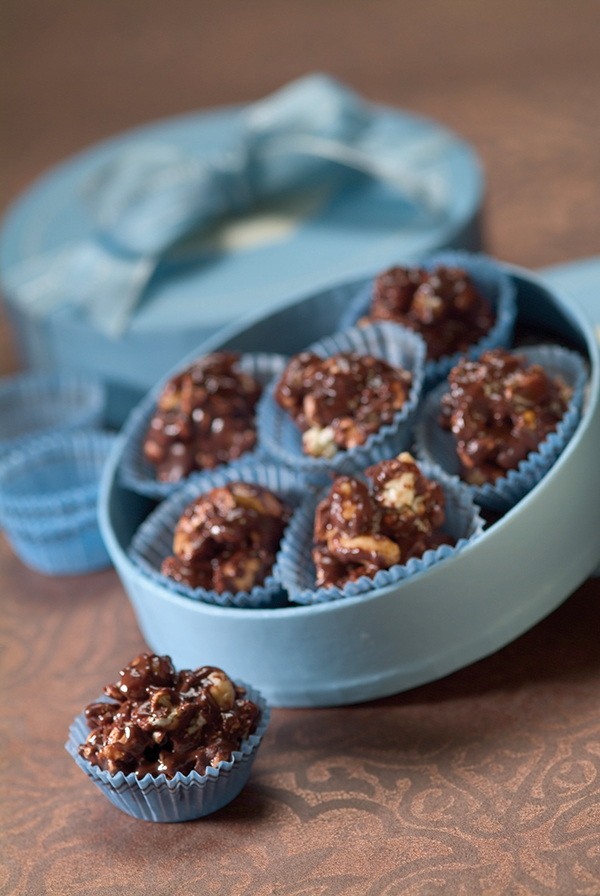
Popcorn and Peanut Truffles
- 6 cups popped popcorn
- 1 cup roasted and salted peanuts
- 1 package (12 ounces) semisweet chocolate chips
- 1/2 cup honey
- In large bowl, stir popcorn and peanuts together; set aside.
- In microwave-safe bowl, heat chocolate chips 10 seconds. Stir chips and repeat, stirring after each 10 seconds, until chips are melted. Warm honey in microwave 10 seconds and stir into chocolate until well blended.
- Pour chocolate mixture over popcorn mixture and stir until popcorn is evenly coated. With small ice cream scoop, push popcorn mixture into scoop and release onto wax paper to form truffles. Refrigerate until firm.
Serves
30 pieces
Notes, Tips & Suggestions
Truffles can be stored in an airtight container up to 5 days.
Toasted Coconut and Chocolate Popcorn
- 10 cups popped popcorn
- 2 tablespoons butter or margarine
- 2 tablespoons light brown sugar
- 1/2 teaspoon coconut extract (optional)
- 1 cup chocolate chips
- 1 teaspoon vegetable oil
- 1 bag (7 ounces) shredded coconut, toasted
- Place popcorn in large bowl; set aside.
- In small saucepan, combine butter, brown sugar and coconut extract; stir until melted and combined.
- Pour over popcorn, coating well. Spread popcorn onto large cookie sheet.
- In glass measuring cup, melt chocolate chips and vegetable oil in microwave on low heat until smooth. Drizzle over popcorn. Immediately sprinkle coconut over popcorn mixture; cool.
- Break into pieces and serve.
Serves
10 cups
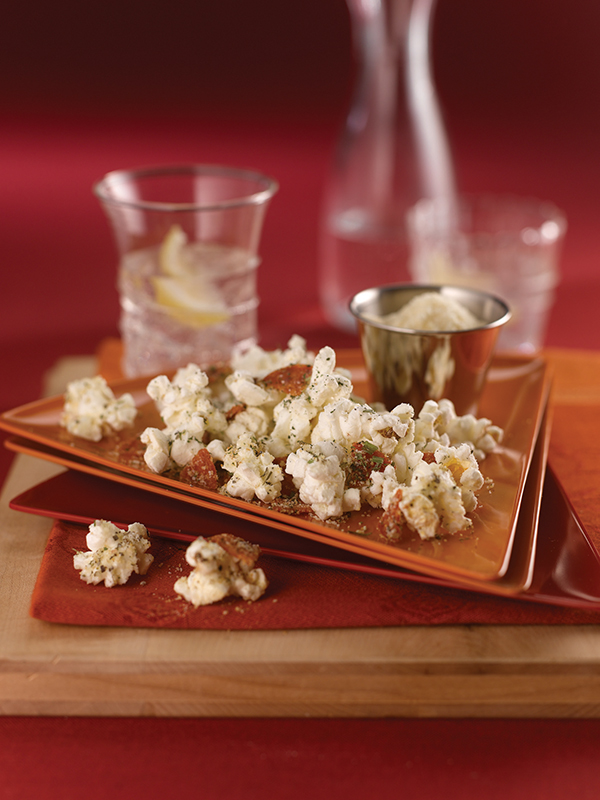
Cheesy Pepperoni Popcorn
- 1/4 cup nonfat Parmesan cheese
- 2 teaspoons garlic powder
- 1/4 teaspoon dried oregano
- 1/4 teaspoon dried marjoram leaves
- 1/4 teaspoon dried basil leaves
- 1/8 teaspoon dried sage
- black pepper, to taste
- 12 cups popped popcorn
- 3/4 cup turkey pepperoni, cut into bite-size bits
- olive oil cooking spray
- In small bowl, combine Parmesan cheese, garlic powder, oregano, marjoram, basil, sage and pepper; mix well.
- Place cooked popcorn and turkey pepperoni in large bowl; spray lightly with cooking spray.
- Sprinkle popcorn and pepperoni with cheese mixture and toss to coat evenly.
Serves
6-8 cups
Source: Popcorn Board