Family-Friendly Fun to Beat Winter Blahs
(Family Features) Cool winter days may have you tempted to burrow under a blanket and wait out the weather, but there are plenty of entertaining and affordable ways to enjoy quality family time together despite chilly temperatures.
Kids who are cooped up indoors during the winter often get restless, but you can make the most of that boredom by gathering everyone and discovering new ways to create memories together.
Get Your Game On
Forget about screen play and instead show the younger generation how much fun it can be to take on family rivals with classic board games or work in teams to complete age-appropriate puzzles. These activities allow everyone to participate and practice skills like problem solving while having fun.
Make a Meal Together
You likely know it’s a good idea to gather the family around the table for a meal, but there’s no need to wait until the food is done. Not only does cooking together give you something fun to do as a family, but it also helps kids develop important life skills and healthy habits, exposes them to new food options and allows them to practice reading and math when they follow recipes.
Get everyone in on the prep work with kid-friendly foods such as these flavorful frozen waffles that can be used as the base for simple and delicious recipes. A fun, easy way to enjoy a favorite cereal in waffle form, PEBBLES Waffles are available in beloved Fruity and Cocoa flavors. Start the day by making breakfast a family affair or mix things up and prepare a breakfast menu for dinner. Try one of these easy recipes for a sure way to put a smile on your loved ones’ faces.
Explore What Surrounds You
Resist the temptation to huddle indoors and instead explore how your community transforms with the seasons. Look for the best sledding hills or check out seasonal attractions like ice rinks and festivals. Even taking a family drive to see the holiday lights or marvel at the way snow transforms your surroundings gives you a way to break out of the house and enjoy some entertaining fun.
Encourage Artistic Expression
Once kids are bundled up properly, there’s little that tops good old-fashioned snow days. Snow angels, snow forts and snowmen are just the beginning. Inviting kids to create and design lets their imaginations run wild and, with a little luck, they’ll run off some of that pent-up energy, too. If you’re stuck inside, encourage creativity through arts and crafts, or make mealtimes a chance for children to explore their artistic sides by allowing them to customize toppings on favorites such as waffles.
Give Back to Others
It’s never too early to learn the intrinsic good of giving back, and cold winter months are an ideal time to instill a giving mindset. As a family, you could volunteer time at a local food bank or work together to assemble care kits with warm blankets and socks for the homeless. You could write letters to soldiers or make seasonal greeting cards for seniors at a local nursing home. Big or small, they’re gestures that make a lasting impression on young minds.
Find more family-friendly ideas for a winter to remember at postpebblescereal.com.
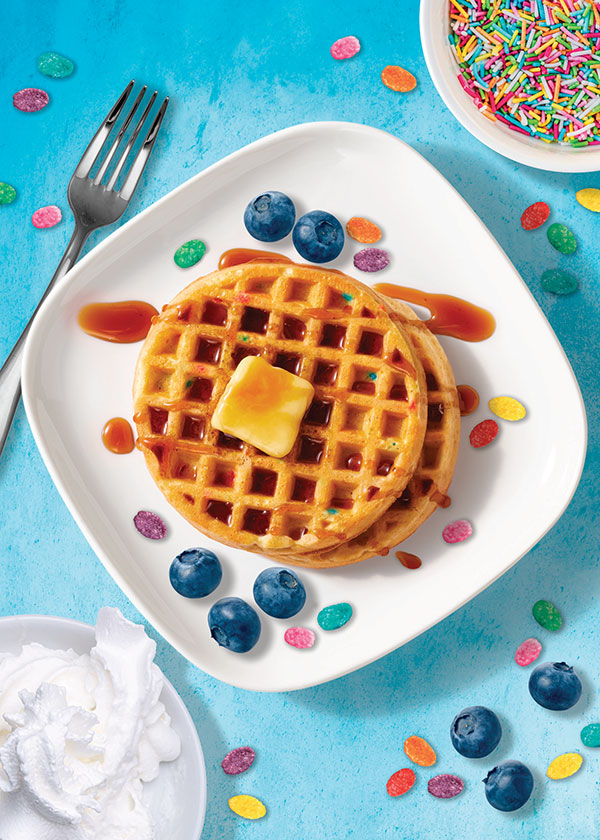
Fruity Smiley Face Waffle
- 2 Fruity PEBBLES Waffles
- 1 container whipped cream
- 1 cup Fruity PEBBLES cereal
- blueberries (optional)
- rainbow sprinkles (optional)
- maple syrup (optional)
- Heat waffles until golden brown and place on plate. Use whipped cream to make smiley face eyes, nose and mouth.
- Place cereal on top of whipped cream to make eyes, nose and mouth colorful. Add blueberries, rainbow sprinkles and syrup, if desired.
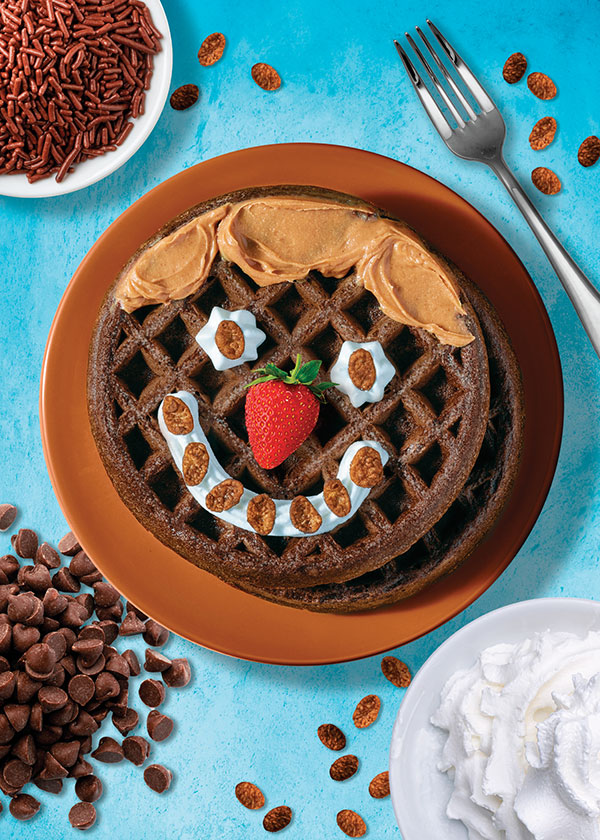
Cocoa Smiley Face Waffle
- 2 Cocoa PEBBLES waffles
- 1 cup Cocoa PEBBLES cereal
- 1 container whipped cream
- chocolate chips (optional)
- chocolate sprinkles (optional)
- strawberries (optional)
- chocolate syrup (optional)
- Heat waffles until golden brown and place on plate. Use whipped cream to make smiley face eyes, nose and mouth.
- Place cereal on top of whipped cream to make eyes, nose and mouth colorful. Add chocolate chips, chocolate sprinkles, strawberries and chocolate syrup, if desired.
Source: Post Cereals
Sweet and Savory Ways to Shake Up Holiday Celebrations
(Family Features) ’Tis the season for sweet and savory favorites – from the mouthwatering desserts you crave each year to starters and snacks that hold over hungry guests. Elevate your holiday entertaining with the right combination of appetizers, main courses, sides, sweets and beyond that start with the same seasonal staple: pecans.
As a versatile nut that can be used throughout the holidays, pecans have you covered so you can cook and enjoy a myriad of dishes, add festive flair to decor, or provide a nutritious snack in the midst of season-long indulgences. This year, pick up an extra bag of pecans to create nutritious, delicious dishes to enjoy on-the-go or serve to guests.
To help celebrate the holiday season, the American Pecan Promotion Board introduced a digital Pe-Calendar to highlight the many ways pecans can be enjoyed in and beyond a traditional pie. From Dec. 7-18, the interactive calendar will unveil tasty recipes for pecan fans to enjoy, along with fun games that can enter you in to win exciting prizes each day. From delicious Baked Brie with Pecans and Cranberry Orange Chutney to nutritious Pecan Snack Mix with Cranberries and Chocolate, along with prizes, the calendar provides an ultimate way to shell-ebrate with the must-have holiday nut.
To sign up for daily email reminders to open a new door for chances to win nutty prizes, or to find additional holiday recipes, visit EatPecans.com.
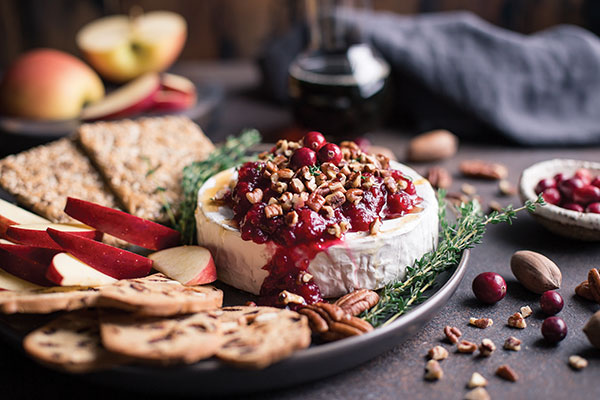
Baked Brie with Pecans and Cranberry Orange Chutney
Recipe courtesy of the American Pecan Promotion Board
Cook time: 24 minutes
Servings: 8
- 1 bag (12 ounces) fresh cranberries
- 1/2 cup maple syrup, plus 1 teaspoon for garnish, divided
- 1/2 cup water
- 1 orange, zest and juice only
- 1 teaspoon freshly chopped thyme, plus additional for garnish, divided
- 1 teaspoon freshly chopped rosemary
- 1 tablespoon bourbon (optional)
- 1 round brie (13.4 ounces)
- 1/2 cup roasted pecan pieces
- crackers
- toasted bread
- apple slices
- Preheat oven to 350 F. Line baking sheet with parchment paper or silicone baking mat.
- In medium saucepan over medium-high heat, bring cranberries (reserving some for garnish), 1/2 cup maple syrup and water to boil. Reduce heat to medium-low and cook, stirring occasionally, until cranberries pop and mixture thickens, 8-10 minutes.
- Remove cranberry mixture from heat and stir in orange zest, orange juice, 1 teaspoon thyme, rosemary and bourbon, if desired.
- Place brie on parchment-lined baking sheet. Bake 5-7 minutes, or until inside of cheese softens while outside remains intact.
- Transfer brie to serving platter and top with chutney and toasted pecans. Drizzle remaining maple syrup over brie and garnish with remaining fresh thyme and reserved cranberries. Serve with crackers, toasted bread and apple slices.
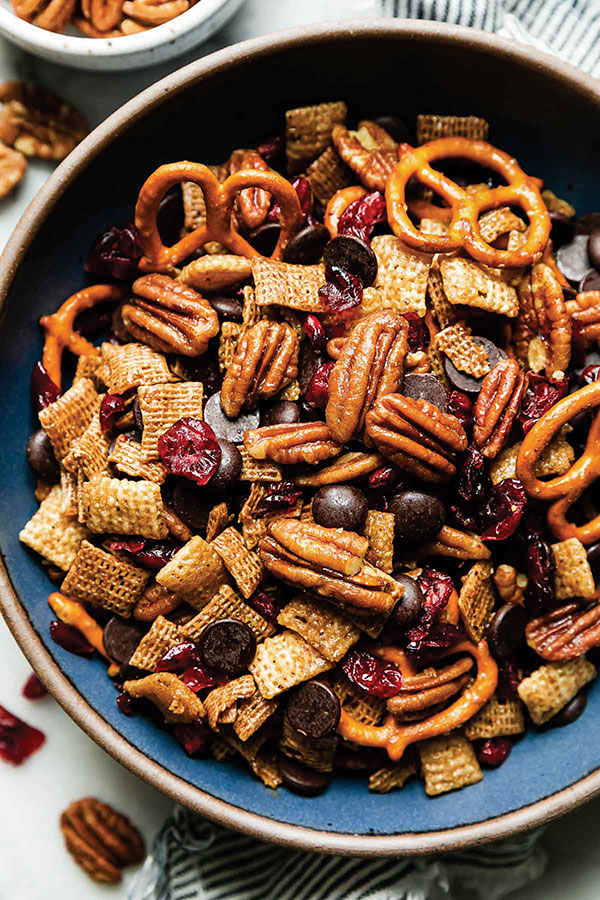
Pecan Snack Mix with Cranberries and Chocolate
Recipe courtesy of Jess Larson and the American Pecan Promotion Board
Prep time: 10 minutes
Cook time: 5 minutes, plus 10 minutes cooling time
- 1 cup pecan halves
- 1 cup rice squares cereal (wheat or cinnamon)
- 1/2 cup pretzels
- 2 tablespoons unsalted butter
- 1 tablespoon brown sugar
- 1 1/2 tablespoons pure maple syrup
- 1/2 teaspoon kosher salt
- 1/4 teaspoon ground nutmeg
- 1/2 cup dried cranberries
- 1/2 cup dark chocolate chips
- In large, microwave-safe bowl, add pecans, rice squares cereal and pretzels. In small, microwave-safe bowl, add butter, brown sugar, maple syrup, salt and nutmeg. Microwave butter mixture 1-2 minutes until melted then pour over dry mix. Toss well to combine.
- Microwave snack mix in 45-second intervals, about 4-5 intervals total, until mix is fragrant, golden and toasty.
- Cool mix completely then stir in cranberries and dark chocolate chips.
American Pecan Promotion Board
Peanut Butter Chocolate Energy Bites
(Culinary.net) When you need a quick pick-me-up during the workday to fight off the post-lunch slump, a protein-powered burst of energy may just do the trick. A perfect on-the-go snack solution with no baking required, these Peanut Butter Chocolate Energy Bites only take 15 minutes to prepare a batch that can last the whole week.
Packed with protein and easily made from ingredients you may already have on-hand, these quick and easy bites are perfect for storing in the fridge for when you need a delicious, healthy snack. You can also easily substitute ingredients based on what you have in the pantry or to fit your dietary preferences.
Find more healthy snack ideas at Culinary.net.
Watch video to see how to make this recipe!
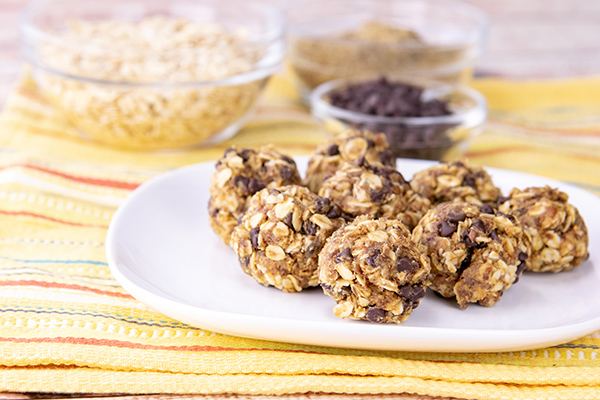
Peanut Butter Chocolate Energy Bites
Prep time: 5 minutes
Servings: 8 (3 bites each)
- 1 cup rolled oats
- 1/2 cup ground flaxseed
- 1/2 cup nut butter of choice
- 1/3 cup maple syrup
- 1/2 cup mini chocolate chips or raw cacao nibs
- In large mixing bowl, combine rolled oats, flaxseed, nut butter, syrup and chocolate chips; mix well using spoon or mixer.
- Using hands, roll mixture into balls, approximately 1-inch each. Place balls on cookie sheet and chill in refrigerator until firm.
Note: Balls can be stored in airtight container in refrigerator up to 1 week.
Source: Culinary.net
Save Time with Sweet, Savory, Salty Snacks
(Family Features) Work, social commitments, kids’ activities and the daily grind can take over schedules and wreak havoc on your opportunities to sit at the table for meals. As your calendar seems to fill up with meetings, family occasions and more, you might just find yourself skipping breakfast or lunch and opting for filling snacks instead.
In fact, according to the International Food Information Council’s 2022 Food and Health Survey, 75% of Americans snack at least once per day, which means 2023 could become the year of the snack. Whether it’s forgoing breakfast at home for a bite on the go or powering up with an afternoon morsel, one flavor favorite and nutritional powerhouse you can turn to is the pecan.
As pecans are used in an increasing number of snack innovations, they’re being hailed as the fastest growing nut in new snack applications, according to Information Resources Inc. They’re an ideal snack for punching up your routine with great taste, plant-based nutrition and an easy-to-pair profile.
For example, they’re poised to remix your snack mix mentality as they complement sweet, savory, spicy and buttery combinations. Ready in less than half an hour, you can add some sweetness to your workday with this Pecan Snack Mix with Cranberries and Chocolate for a fruity, nutty, chocolatey twist on traditional trail mix.
If a saltier treat is more your speed, consider this Salty Pecan Snack Mix for a grab-and-go breakfast as you head out the door or an easy way to keep hunger at bay in the afternoon. Because pecans pair with a variety of ingredients and flavors, they’re a perfect partner for this combination of rolled oats, coconut, honey, cinnamon and more.
Find more sweet and savory recipe inspiration at EatPecans.com.
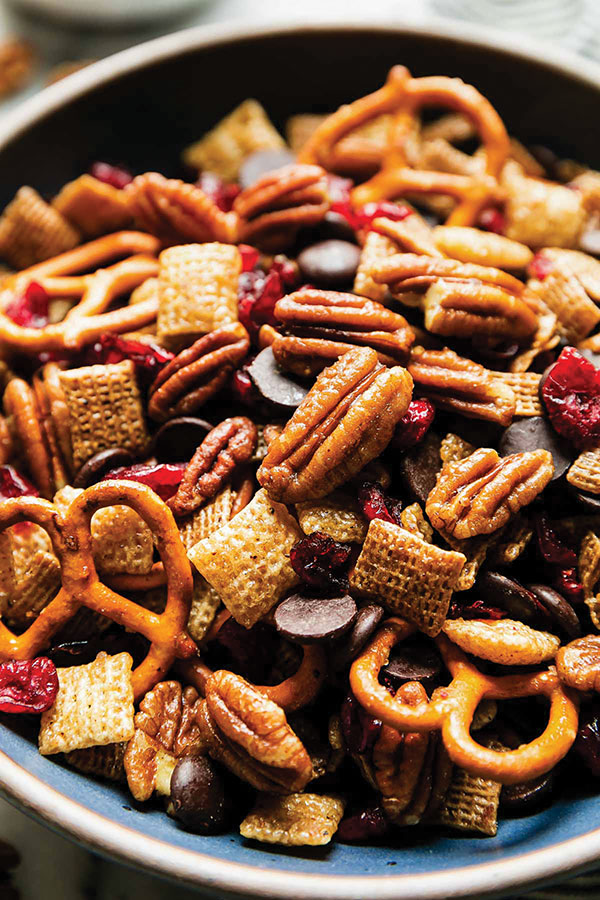
Pecan Snack Mix with Cranberries and Chocolate
Recipe courtesy of Jess Larson and the American Pecan Promotion Board
Prep time: 10 minutes
Cook time: 5 minutes, plus 10 minutes cooling time
- 1 cup pecan halves
- 1 cup rice squares cereal (wheat or cinnamon)
- 1/2 cup pretzels
- 2 tablespoons unsalted butter
- 1 tablespoon brown sugar
- 1 1/2 tablespoons pure maple syrup
- 1/2 teaspoon kosher salt
- 1/4 teaspoon ground nutmeg
- 1/2 cup dried cranberries
- 1/2 cup dark chocolate chips
- In large, microwave-safe bowl, add pecans, rice squares cereal and pretzels. In small, microwave-safe bowl, add butter, brown sugar, maple syrup, salt and nutmeg. Microwave butter mixture 1-2 minutes until melted then pour over dry mix. Toss well to combine.
- Microwave snack mix in 45-second intervals, about 4-5 intervals total, until mix is fragrant, golden and toasty.
- Cool mix completely then stir in cranberries and dark chocolate chips.
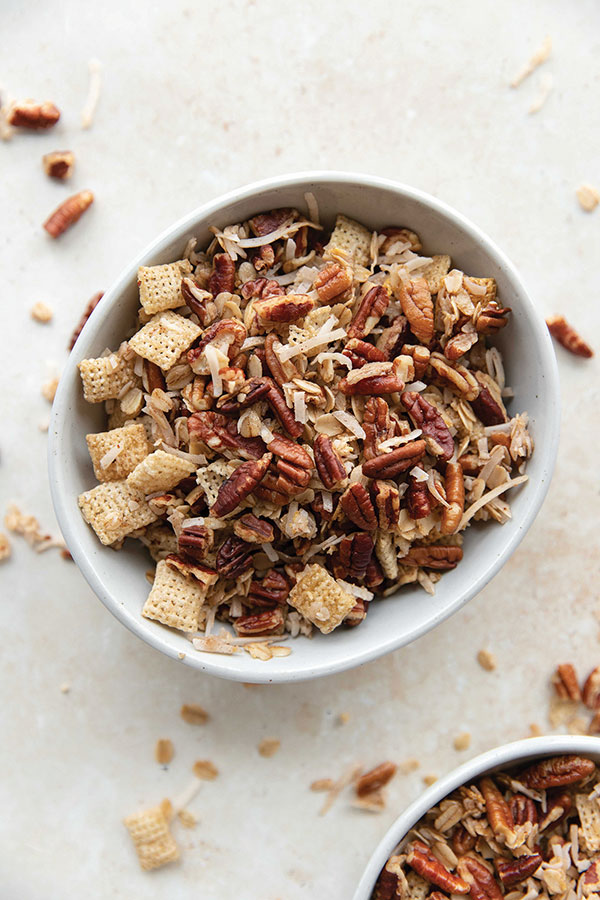
Salty Pecan Snack Mix
Recipe courtesy of Mallory Oniki and the American Pecan Promotion Board
Prep time: 10 minutes
Cook time: 20 minutes
Servings: 15
- 2 cups rice squares cereal
- 1 cup rolled oats
- 1 cup unsweetened coconut
- 1/3 cup honey
- 1/4 cup coconut oil
- 1/2 teaspoon cinnamon
- 1/2 teaspoon salt
- 1/4 cup butter
- 2 cups chopped pecans
- 1 cup oyster crackers
- Preheat oven to 350 F.
- In bowl, add rice squares cereal, oats and unsweetened coconut.
- In small saucepan over medium heat, add honey, coconut oil, cinnamon and salt. Stir until mixture starts to boil then pour over snack mix and stir until well combined.
- Transfer to baking sheet and bake 8-10 minutes.
- In saucepan over medium heat, add butter. Stir until butter browns then add chopped pecans and oyster crackers. Turn heat to low and stir while pecans roast.
- Remove snack mix from oven and add brown butter pecan and cracker mixture; stir to combine.
Inspire Creativity with Fun Snack Hacks
(Family Features) School days offer nearly endless opportunities for learning and exploration in the classroom, but education doesn’t have to end with the final bell. Parents can ensure their students feel energetic, creative and confident by inspiring snack choices that are as smart as they are fun to make together.
Whether you’re whipping up a snack to send to school or your little learners need an energy boost before starting afternoon homework, creative snacking can help encourage inspiration. As a trusted ally with better-for-you and convenient whole-fruit lunchbox snacks kids can enjoy, Sun-Maid offers these easy tips and ways to embrace the fun side of snack time.
- Keep It Simple: Look for recipes with five ingredients or less so your children can show their artful nature without becoming overwhelmed. Plus, this often leads to a more budget-friendly at-home treat.
- Shop Together: Gathering ingredients and equipment is an important part of any recipe, and bringing your future chefs along helps them feel like it’s their creation from start to finish. Additionally, some important life lessons can be learned along the way, like how to navigate the store and compare costs.
- Provide Kid-Friendly Instructions: There are many ways kids can lend a hand in making their own snacks, like mixing ingredients, washing produce or arranging a plate or platter. However, some steps are best left to the adults – make sure to do any cutting, slicing or dicing before letting children take the reins, for example, then just enjoy the creative fun.
With childhood favorites like crackers, marshmallows and vanilla yogurt covered raisins, Gimme S’mores Trail Mix offers a perfect way to get young minds thinking in the kitchen. A little guidance is all it takes to teach them each step of the recipe to make a crafty, delicious treat. Plus, with only a few simple ingredients that just need to be mixed together, it’s a low-stress, low-mess way to cook up creativity.
For a healthier version of a snack time superstar, Apple Nachos combine sweet apples like Honeycrisp, peanut butter and versatile, whole-fruit Sun-Maid Raisins. Naturally made with nothing but grapes and California sunshine, these sweet raisins have been trusted as a better-for-you snack for kids and grown-up kids alike since 1912.
With zero grams of added sugars, they give parents the confidence they need to choose snacks that provide both great taste and nutrition for a happy and healthy family. As a household staple, they can be enjoyed as part of tasty recipes or as a standalone treat kids crave and parents approve.
Find more sweet ideas to inspire confidence and creativity at sunmaid.com.
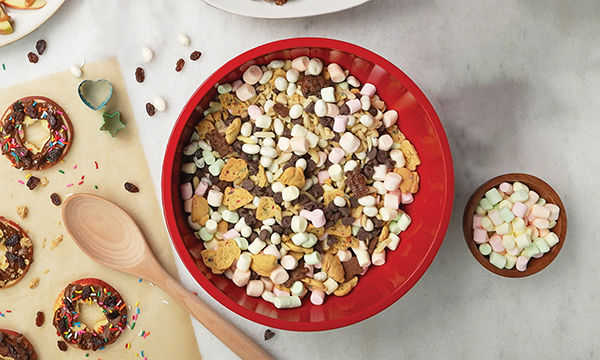
Gimme S’mores Trail Mix
Prep time: 5 minutes
Servings: 6
- 1/2 cup Sun-Maid Vanilla Yogurt Covered Raisins
- 3 cups graham crackers, assorted flavors
- 1 1/2 cups colored mini marshmallows
- 2 cups slivered almonds
- 1 cup chocolate chips
- In large bowl, mix raisins, graham crackers, marshmallows, almonds and chocolate chips.
- Serve immediately, or store in airtight container up to 1 week.
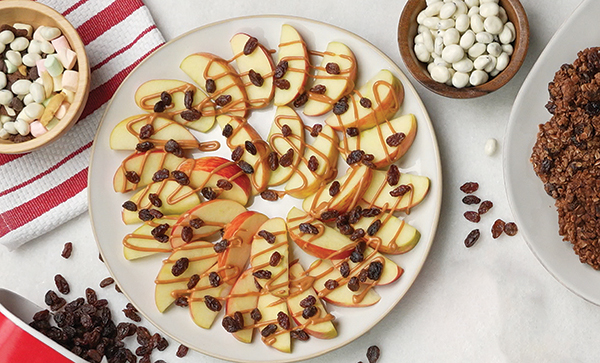
Apple Nachos
Prep time: 10 minutes
Cook time: 1 minute
Servings: 4
- 5 sweet apples, such as Honeycrisp
- lemon juice (optional)
- 2 tablespoons peanut butter
- 1/2 cup Sun-Maid California Sun-Dried Raisins
- Wash and slice apples.
- Arrange one layer of sliced apples on serving plate. To keep apples from browning quickly, squeeze lemon juice on top, if desired.
- In microwave, melt peanut butter about 30 seconds until smooth.
- Drizzle 1 tablespoon peanut butter over first layer of apples. Sprinkle with 1/4 cup raisins.
- Repeat with remaining apples, peanut butter and raisins.
Source: Sun-Maid Raisins
Holiday Fun with a Joyful Pop
(Family Features) With countless ways to enjoy the holiday season from decorating and hosting parties to wintertime activities, it’s a perfect time to bring family and friends together for some festive fun. One simple ingredient can be your go-to for just about any tradition: popcorn, which is an inexpensive, versatile, whole grain that makes holiday occasions better.
Consider these simple seasonal ways you can let popcorn fuel your holiday adventures.
Decorate
Strings of popcorn and cranberries add a nostalgic touch to the family tree while making popcorn trees adds whimsy to the table. Before stringing popcorn, let it sit out for a day or two as freshly popped popcorn may be too fragile to thread without breaking. Push a threaded needle through the center of each kernel then pull the kernel to the end of the knotted thread, adding an occasional cranberry, if desired. Festive trees can be made using popcorn mixed with melted marshmallows then shaped and finished with sprinkles.
Give It as a Gift
If it’s your turn to host this year’s holiday party, popcorn makes for a perfect party favor. Pop up a delicious treat like these Cranberry Popcorn Balls, place them in pretty jars or neatly wrap them then finish each with a bow. For an added touch, include the recipe instructions and popcorn kernels in a separate container so your guests can make it at home.
Enjoy It as a Snack
Freshly popped popcorn is a simple and delicious snack to share after a day of shopping, caroling, sledding or decorating. You can take the holiday season up a notch with creative recipes like Gingersnap Popcorn Snack Mix, White Chocolate Peppermint Popcorn Bark and Easy, Elegant Holiday Popcorn. These treats are perfect for popping up in the morning so the snacks are ready once guests arrive.
Visit Popcorn.org to find more sweet, salty and savory holiday recipe ideas.
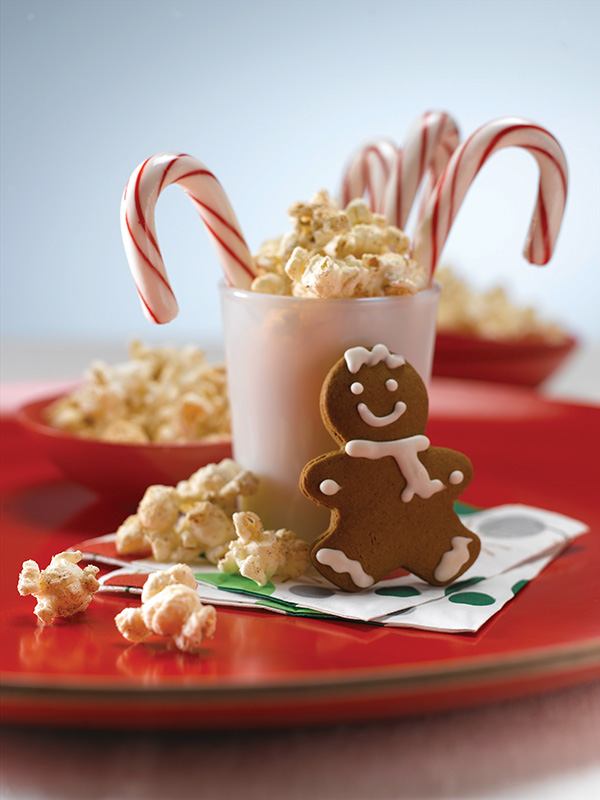
Gingersnap Popcorn Snack Mix
Yield: 2 quarts
- 2 quarts popped popcorn
- butter-flavored nonstick cooking spray
- 1/3 cup granulated sugar substitute
- 2 teaspoons ground ginger
- 1/2 teaspoon freshly ground nutmeg
- 1/4 teaspoon cinnamon
- 1/4 teaspoon ground cloves
- 1/8 teaspoon freshly ground black or white pepper
- Preheat oven to 325 F.
- Spread popcorn on baking sheet and spray lightly with nonstick cooking spray.
- In small bowl, combine sugar substitute, ginger, nutmeg, cinnamon, cloves and freshly ground pepper; sprinkle evenly over popcorn.
- Spray again with nonstick cooking spray and toss to coat evenly.
- Bake 7 minutes and serve warm.

Easy, Elegant Holiday Popcorn
Yield: 8 cups
- 8 cups popped popcorn
- 1/2 cup milk chocolate chips
- 1/2 cup white chocolate chips
- candy sprinkles
- On serving platter, spread popcorn in thin layer.
- Over double boiler or in microwave, melt milk chocolate chips. Drizzle over popcorn.
- Over double boiler or in microwave, melt white chocolate chips. Drizzle over popcorn.
- Sprinkle candy sprinkles over warm, chocolate-coated popcorn. Allow drizzles to set until firm.
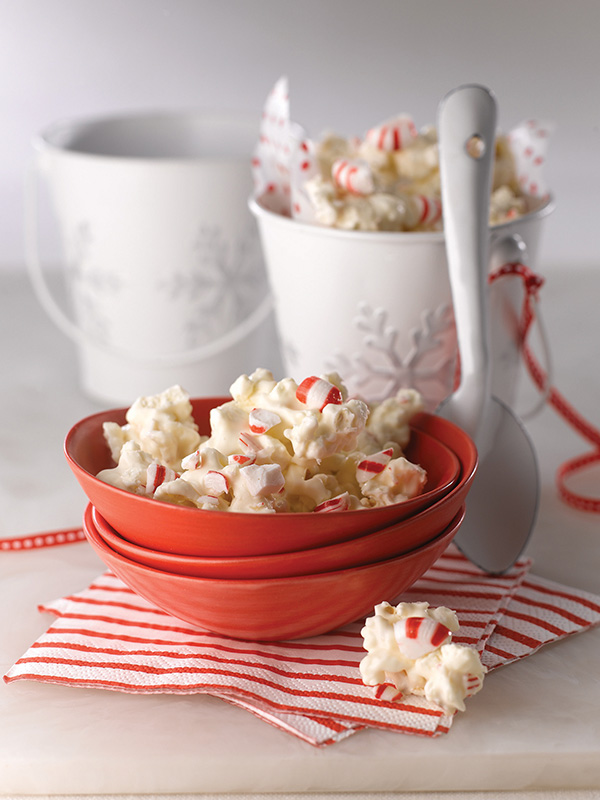
White Chocolate Peppermint Popcorn Bark
Yield: 1 pound
- 5 cups popped popcorn
- 12 ounces white chocolate baking chips, chopped white chocolate or white candy coating
- 1 cup crushed hard candy peppermints
- Cover baking pan with foil or wax paper; set aside.
- Place popcorn in large bowl; set aside.
- In double boiler over barely simmering water, melt chocolate, stirring until smooth, or melt according to package directions.
- Stir in crushed peppermints after chocolate is melted. Pour chocolate mixture over popcorn mixture and stir to coat. Spread onto prepared pan; cool completely.
- When chocolate is cooled and set, break into chunks for serving.
- Store in airtight container at room temperature.
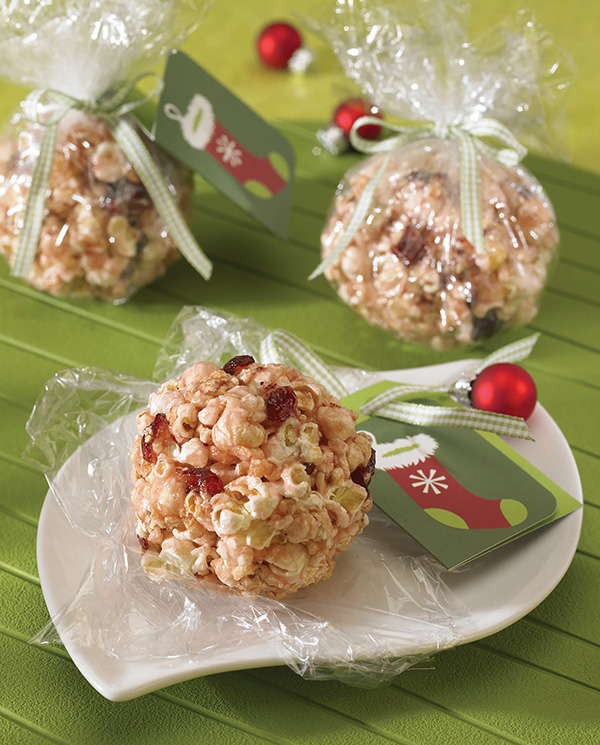
Cranberry Popcorn Balls
Yield: 18 balls
- 2 cups sugar
- 1 cup whole berry cranberry sauce, slightly mashed
- 1 tablespoon grated orange peel
- 1/2 cup cranberry juice
- 1/2 cup light corn syrup
- 1 teaspoon vinegar
- 1/2 teaspoon salt
- 5 quarts unsalted popped popcorn
- In heavy saucepan, combine sugar, cranberry sauce, orange peel, cranberry juice, corn syrup, vinegar and salt. Bring to boil; lower heat and cook to 250 F on candy thermometer.
- Mixture will bubble in pan; watch to keep from boiling over.
- Pour slowly onto hot popcorn and mix until well-coated.
- Let stand 5 minutes, or until mixture can easily be formed into balls.
- Butter hands and form into 3-inch balls.
Spooky Snacks that Make Halloween Pop
(Family Features) From watching scary movies to dressing up as ghouls and goblins, spooky season means it’s time to pop up your loved ones’ favorite snacks for a ghostly good time. Before heading out to trick-or-treat, gather your minions in the kitchen for some family-friendly fun crafting these haunting yet tasty treats.
Throughout October, you can honor National Popcorn Poppin’ Month with eerie, delicious eats like Spooky Popcorn Spider Web, Green Halloween Zombies, Witchy Popcorn Balls and Popcorn Caramel Apples that add festive fun to the Halloween excitement.
As a perfect ingredient in treats of all types, popcorn is beloved for its seed-to-snack simplicity as a non-GMO, vegan, gluten-free, sugar-free snack that’s naturally low in fat and calories. Add in its irresistible smell, taste and versatility, and it’s easy to see why it pairs so well with spooky celebrations.
Find more Halloween treats at popcorn.org.
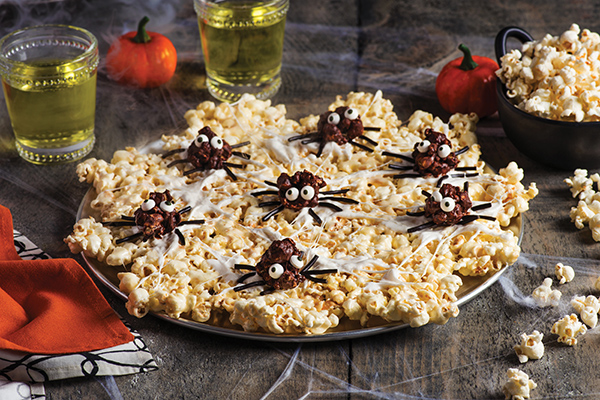
Spooky Popcorn Spider Web
Yield: 1 spider web
- 1/4 cup butter
- 8 cups mini marshmallows, divided
- 1 tablespoon vanilla extract
- 9 cups popped popcorn, divided
- 1 cup semisweet chocolate chips, divided
- black string licorice
- candy eyes
- Line round pizza pan with parchment paper; set aside. In large saucepan over low heat, melt butter; stir in 5 cups marshmallows, stirring constantly, 3-4 minutes, or until completely melted. Stir in vanilla. Remove from heat. Stir in 8 cups popcorn until coated. Spread onto prepared pizza pan in irregular round shape, about 1-inch thick, to resemble spider web. Refrigerate about 15 minutes, or until firm.
- In microwave, melt remaining marshmallows about 20 seconds, or until melted. Using spatula, string strands of melted marshmallow over popcorn spider web to create cobweb effect.
- In heatproof bowl set over saucepan of hot (not boiling) water, melt 3/4 cup chocolate chips; cool slightly. In large bowl of remaining popcorn, pour chocolate over popcorn, folding gently to coat. Spread mixture on waxed paper-lined baking sheet, separating into eight small clusters. Affix two candy eyes to each popcorn cluster. Refrigerate 10-15 minutes, or until set.
- Melt remaining chocolate chips. Cut licorice into 1-inch lengths. Using small spoon, dab circles of chocolate onto spider web. Affix chocolate-coated popcorn onto chocolate circles. Affix licorice lengths to chocolate popcorn clusters to resemble spider legs.
- Refrigerate 15 minutes, or until set. To serve, cut into smaller pieces.
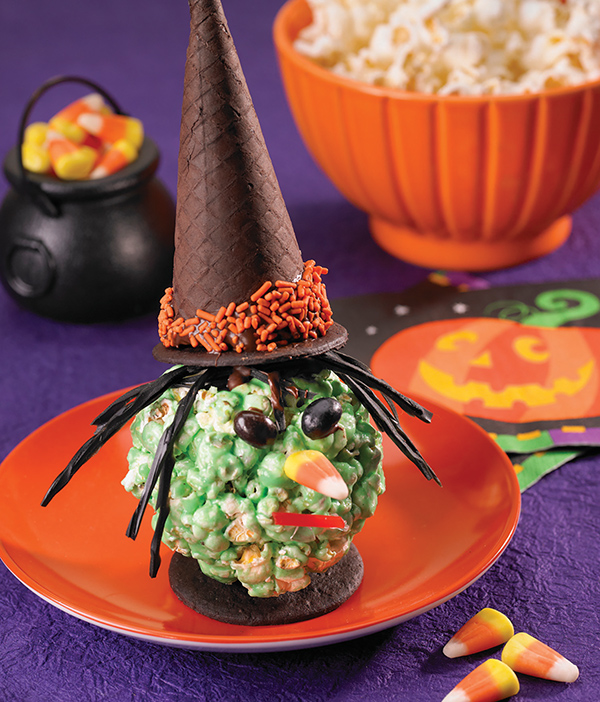
Witchy Popcorn Balls
Yield: 8 popcorn balls
- 16 chocolate wafer cookies
- nonstick cooking spray
- 3 quarts popped popcorn
- 4 tablespoons (1/2 stick) butter or margarine
- 3 cups miniature marshmallows
- 3 tablespoons (1/2 of 3-ounce box) lime gelatin dessert mix
- green food color (optional)
- 3/4 cup chocolate chips
- licorice strings
- 8 chocolate ice cream cones
- orange sugar sprinkles, placed in small dish
- jelly beans
- candy corns
- Spread sheet of waxed or parchment paper over work surface and place wafer cookies on it.
- Spray large mixing bowl with nonstick cooking spray and place popcorn inside.
- In medium saucepan over low heat, melt butter. Stir in marshmallows and gelatin powder until marshmallows are melted and mixture is smooth. Adjust color with 1-2 drops food color, if desired. Pour mixture over popcorn and mix until coated.
- Spray hands with nonstick cooking spray and press firmly to form into eight balls. Place balls on eight wafer cookies. Press candy decorations into popcorn balls to form "eyes," "nose" and "mouth."
- In small, microwave-safe bowl, heat chocolate chips, covered, 10 seconds. Stir to aid melting. Repeat as needed until chocolate is melted and smooth.
- Spoon about 1/2 teaspoon melted chocolate on top of each popcorn ball. Press licorice strings into chocolate to form "hair."
- Dip cone edges into melted chocolate then orange sugar sprinkles. Place on remaining wafer cookies to form "witches' hats." Place hats on popcorn balls. Allow chocolate to set about 45 minutes before serving.
- Serve or seal individually in plastic wrap.
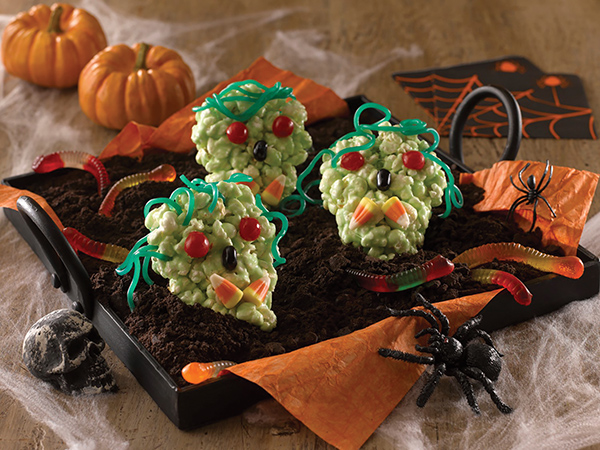
Green Halloween Zombies
Yield: about 7 pieces
- 2 1/2 quarts popped popcorn
- 6 tablespoons butter or margarine
- 3 cups mini marshmallows
- 4 tablespoons lime gelatin powder
- red gum balls
- candy corn
- flat green candy strips or fruit leather
- green sugar sprinkles
- Place popcorn in large bowl; set aside.
- In medium saucepan over medium heat, melt butter. Stir marshmallows into butter until melted. Stir in gelatin powder until evenly colored.
- Pour melted mixture over popcorn and stir until evenly coated. With buttered hands, shape popcorn into seven ovals.
- Flatten one oval slightly and squeeze one end to form "skull" shape. Place on parchment-lined baking sheet. Repeat with remaining ovals.
- To decorate: Press two gumballs into each skull to form "eyes." Press candy corn into skull to form "teeth." Use scissors to trim candy strips and press into top for "hair." Sprinkle with sugar sprinkles.
- Allow "zombies" to set about 20 minutes before wrapping individually in plastic wrap or serve immediately.
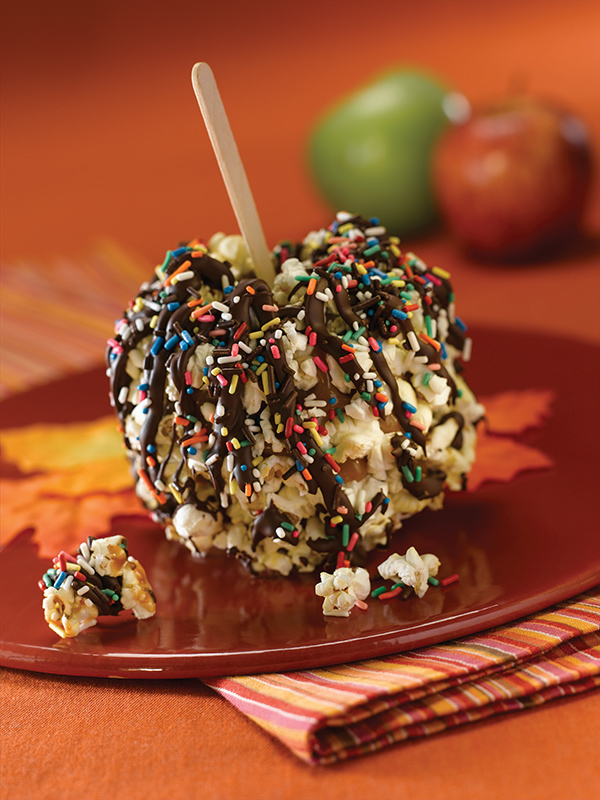
Popcorn Caramel Apples
Yield: 4 apples
- 1 quart freshly popped popcorn
- 1 package (9 1/2 ounces, 35 total) caramels, unwrapped
- 1/4 cup light cream or half-and-half
- 4 lollipop sticks or wooden candy apple sticks
- 4 apples
- 1/2 cup chocolate chips
- sugar sprinkles
- decorative ribbon (optional)
- Place popcorn in large bowl; set aside. Place sheet of waxed paper on work surface.
- In small saucepan over medium-low heat, heat caramels and cream. Stir frequently until caramels are melted and cream is blended into caramels.
- Push one stick into apple center and dip into caramel. Spoon caramel over apple to coat. Repeat with remaining apples
- Place caramel-coated apple in bowl of popcorn and press popcorn onto caramel to cover. Place apple on waxed paper to set; repeat with remaining apples.
- In small, resealable plastic bag, microwave chocolate chips 10 seconds and press chips to aid melting. Repeat, heating at 10-second intervals, until chips are completely melted. Cut small corner off bag and squeeze chocolate onto each apple, allowing chocolate to drip down sides. Sprinkle with sugar sprinkles.
- Tie bow to each apple stick, if desired. To serve, cut apples into slices.
Source: Popcorn Board
Poppy Chow
(Family Features) No matter the occasion, nearly every gathering of loved ones is better with snacks.
One opportunity to celebrate this winter, National Popcorn Day on Jan. 19, honors one of America’s oldest and most beloved snack foods. Perfect served by itself or as an ingredient in whole-grain creations like Poppy Chow, a twist on a classic kid’s favorite made with peanut butter, chocolate and popcorn.
With no artificial additives or preservatives, light and airy popcorn is naturally low in fat and calories, non-GMO and gluten free, making it a sensible option to satisfy cravings for something savory, sweet and just about every flavor in-between. Plus, whole-grain popcorn has energy-producing carbohydrates and fiber, which can help keep you satisfied longer.
Visit Popcorn.org for more tasty snack recipes worth celebrating.
Watch video to see how to make this recipe!
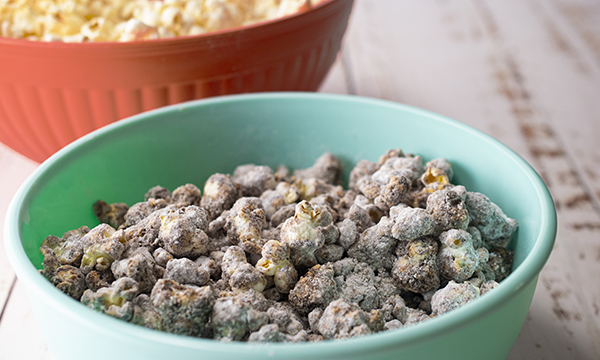
Poppy Chow
Yield: 2 quarts
- 2 quarts popped popcorn
- 1/4 cup (1/2 stick) butter or margarine
- 1/2 cup creamy peanut butter
- 1 cup milk or semi-sweet chocolate chips
- 1 cup confectioners’ sugar
- Place popcorn in large bowl; set aside.
- In microwave safe bowl, combine butter, peanut butter and chocolate chips.
- Microwave 2 minutes; stir until smooth.
- Pour chocolate mixture over popcorn and stir until well coated.
- Sprinkle confectioners’ sugar over popcorn and stir until coated.
- Cool to room temperature before serving.
- Store in airtight container, refrigerated, up to 24 hours.
Source: Popcorn.org
Pumpkin Bread with Chocolate Chips
This season, when you’re craving something sweet, try this Pumpkin Bread with Chocolate Chips. It’s rich with lots of semi-sweet chocolate chips but also has a prominent pumpkin flavor that is hard to resist.
This recipe is easy to make and provides an opportunity to get the little ones involved in the kitchen. For example, they can stir and pour those yummy chocolate chips into the batter.
Made start to finish in less than an hour, this dessert gives you more time to rake leaves, carve pumpkins and cuddle up by the fireplace.
It can be a perfect treat for get-togethers from parties and events to just a couple friends enjoying each other’s company.
It’s light and moist with a crisp exterior. The signature pumpkin taste blends with the sweet chocolate to create a unique taste perfect for fall.
Find more seasonal dessert recipes at Culinary.net.
If you made this recipe at home, use #MyCulinaryConnection on your favorite social network to share your work.
Watch video to see how to make this recipe!
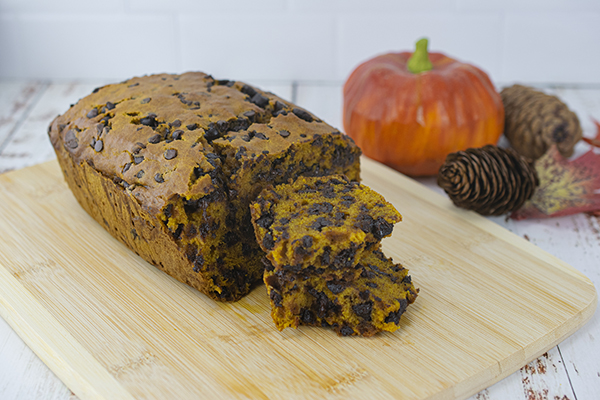
Pumpkin Bread with Chocolate Chips
Prep time: 10 minutes
Cook time: 45-50 minutes
Servings: 12
- Nonstick cooking spray
- 1 1/2 cups all-purpose flour
- 1/2 teaspoon salt
- 1/2 teaspoon baking powder
- 1/2 teaspoon baking soda
- 2 teaspoons pumpkin pie spice
- 1 cup canned pumpkin
- 1/3 cup brown sugar
- 1/3 cup granulated sugar
- 1/2 cup vegetable oil
- 3 eggs, at room temperature
- 1/2 tablespoon vanilla extract
- 1 cup semi-sweet chocolate chips
- 1 cup mini semi-sweet chocolate chips
- Preheat oven to 350 F. Spray 8-by-4-inch loaf pan with nonstick cooking spray and line with parchment paper. Set aside.
- In large bowl, whisk flour, salt, baking powder, baking soda and pumpkin spice. Set aside.
- In medium bowl, combine canned pumpkin, brown sugar, granulated sugar, oil, eggs and vanilla extract. Stir together.
- Stir wet ingredients into dry ingredients; mix until combined.
- Fold in chocolate chips.
- Pour batter into loaf pan. Bake 45-50 minutes until toothpick inserted in center comes out clean.
- Cool at least 10 minutes in pan before removing to wire rack to finish cooling.
Peanut Butter Candy Saltines
(Family Features) Among the decorations, gifts and gatherings of loved ones, there’s perhaps nothing quite like family favorite foods that call to mind the joy of the holidays. Whether your loved ones relish building gingerbread houses or dining on an all-in feast, looking forward to annual traditions is part of what makes the season so special.
This year, you can add to the fun with a new annual activity by creating a delightful dessert with the help of little ones and adults alike. With an easy recipe like Peanut Butter Saltine Candy that calls for just a handful of ingredients, you can get the whole family involved in the kitchen.
Ask your little helpers to measure out ingredients while a grownup prepares the pan and uses the stove. Once the base is finished baking, call the kids back to sprinkle chocolate chips and peanut butter chips over the top.
After your candy creation is cooled, just break it into pieces meant to be shared with the entire family. An added benefit: all can enjoy the nutrient-rich flavor of peanuts, which rise to superfood status by delivering 19 vitamins and minerals and 7 grams of protein per serving.
Find more holiday recipes at gapeanuts.com .
Watch video to see how to make this recipe!
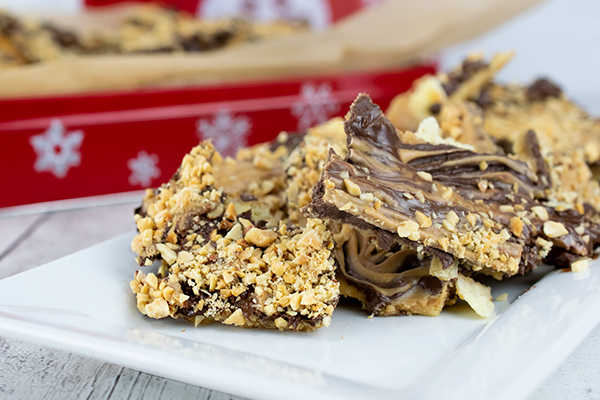
Peanut Butter Saltine Candy
Yield: 45 pieces
- Nonstick cooking spray (butter flavor)
- 1 sleeve (4 ounces) regular saltine crackers
- 1/2 cup butter
- 3/4 cup creamy peanut butter
- 1 cup granulated sugar
- 2 cups milk chocolate chips
- 1/2 cup peanut butter chips
- 1/2 cup rough chopped, dry roasted peanuts
- Preheat oven to 400 F. Line 10-by-15-by-1-inch pan with aluminum foil. Spray foil with nonstick cooking spray then lay saltines flat in single layer on prepared pan. Set aside.
- In heavy duty, 1-quart saucepan over medium heat, combine butter, peanut butter and sugar. Stir constantly until butter and sugar are melted, bringing mixture to boil. Boil 3 minutes, stirring frequently. Pour cooked mixture over saltines and bake 5 minutes.
- Remove from oven and sprinkle chocolate chips over saltines. Let cool 3 minutes then spread melted chocolate completely over saltines.
- Sprinkle peanut butter chips evenly over chocolate. Return pan to oven 1 minute to soften chips. Pull pointed tines of fork through softened peanut butter chips to partially cover chocolate. Sprinkle chopped peanuts on top, gently pressing into candy.
- Let cool on rack about 15 minutes then place in freezer 3 minutes. Remove from freezer and break into pieces. Store in airtight container.
Source: Georgia Peanut Commission


